Silhouette Studio, a powerful and versatile design software, offers users the capability to refine their digital creations by removing unwanted backgrounds from images. This process is essential for a variety of crafting and design applications, from creating precise cut files for a Silhouette CAMEO machine to preparing images for sublimation or crafting professional-looking mockups. While there isn't a single "magic button" for background removal, Silhouette Studio provides several intuitive tools that make this task achievable, even for those new to the software or without access to dedicated photo editing programs. This guide will delve into the methods and tools available within Silhouette Studio to effectively remove image backgrounds, ensuring clean, precise results for your projects.
Understanding the Need for Background Removal
The ability to remove backgrounds from images in Silhouette Studio serves numerous practical purposes. For crafters using a Silhouette CAMEO, a clean, isolated image is crucial for accurate cutting. Unwanted background elements can interfere with the cutting process, leading to jagged edges or incomplete cuts. Furthermore, removing backgrounds allows for the creation of transparent images, which can then be seamlessly placed onto different backgrounds, layered with other designs, or used in digital collages and mockups. This is particularly beneficial for those who may not have access to advanced photo editing software, as Silhouette Studio provides a robust, integrated solution for this common design need. The software's capabilities extend to anime and craft art, where extraneous backgrounds can detract from the main subject and hinder post-processing results. By mastering background removal, users can achieve a professional touch to their craftwork and unlock a wider range of creative possibilities.
Preparing Your Image in Silhouette Studio
Before embarking on the background removal process, it's important to properly prepare your image within the Silhouette Studio environment. The first step is to launch the Silhouette Studio application on your device. Once the software is open, you can import your image. This can be done by selecting a file from your PC and dragging it directly onto the Silhouette Studio canvas. It's also possible to change the canvas color, similar to other design software like Photoshop, to better visualize your image against different backgrounds. If the imported image does not fit the canvas size appropriately, you can easily resize it to ensure it is perfectly aligned with the working area. This initial setup ensures that you have a clear and well-positioned image to work with for the subsequent background removal steps.
Utilizing the Trace Panel for Background Removal
The Trace Panel within Silhouette Studio is a primary tool for identifying and separating elements within an image, making it indispensable for background removal. To access this feature, after opening your image, navigate to the right side of the tool panel and click on the "Open The Trace Panel" option.
Within the Trace Panel, you'll find several key functions. The "Select Trace Area" option allows you to define the specific portion of your image that you wish to trace. When you select an area, it will be visually indicated, typically by a yellow overlay. This yellow marking highlights the boundaries that Silhouette Studio will recognize for tracing.
A crucial setting within the Trace Panel is the "Threshold" option. Adjusting the threshold allows you to fine-tune how closely the software identifies the edges of your desired object. Increasing the threshold can help in effectively marking the object, especially in images with subtle color variations or soft edges. For complex backgrounds or images with multiple colors, you may need to experiment with this setting to achieve the best results. Silhouette Studio is capable of handling multi-colored images well, but careful adjustment of the threshold is key.
Once you have defined your trace area and adjusted the threshold, you will typically use one of two main tracing functions: "Trace" or "Trace Outer Edge."
- Trace: Clicking "Trace" will create trace lines around the entire detected object. This method is useful if you intend to print the entire photo and then cut out a specific element from it, or if you want to use the shape of the object to create a cut file for cutting on different materials.
- Trace Outer Edge: This option is specifically designed to create a trace line around the outermost boundary of your selected object. This is the most common method for effectively removing the background, as it isolates the subject by defining its external cut line.
The result of using "Trace Outer Edge" is the creation of lines that define the perimeter of your object, effectively separating it from its background. These lines are essential for the subsequent modification and cropping steps.
The Magnet Trace Tool: An Advanced Option
For users with the Designer Edition or higher of Silhouette Studio, the "Magnet Trace" tool offers a more dynamic and often more forgiving approach to background removal. This tool is particularly effective for removing busy or complex backgrounds from around an object.
To use the Magnet Trace tool, you initiate a tracing process by holding down your mouse button and drawing a path around your desired object. As you draw, the tool attempts to automatically snap to the edges of your subject, creating a "magnetic" selection. The default setting for the Magnet Trace tool is often around 50% size, but you may need to adjust this percentage to achieve the best trace for your specific image. Experimentation with the tool's size is key to getting a precise outline.
After you have drawn a complete outline around your object and closed the trace line by snapping it back to the starting point, the trace line will turn green, indicating a successful cut line has been generated.
One of the significant advantages of the Magnet Trace tool is its forgiving nature. Even after you have traced and detached your image, the software often retains the original photo image data from outside your traced line. This is incredibly useful because it allows for adjustments. If you notice that your traced line was too far inside the edge of your object, or too far outside, you can go back and move the edit points to correct the trace. This means you can refine the outline to ensure a perfect cut or isolation, even if your initial tracing wasn't flawless.
Refining Your Cut Lines with Point Editing
Once you have generated an initial trace or cut line, the "Edit Points" tool becomes invaluable for refining the outline. This tool allows for precise manipulation of the traced path, ensuring a clean and accurate separation of your subject from the background.
To access the Edit Points tool, select your traced object and then click on the "Edit Points" icon in the left-hand toolbar. Alternatively, you can often double-click directly on the cut line to open the Edit Points menu. This process is often referred to as "Point Editing."
With the Edit Points tool active, you will see individual nodes or points along your traced line. These points can be manipulated using their associated node handles. You can adjust the curve and position of the line by dragging these handles. Furthermore, you can add new nodes to create more detailed sections of the outline or delete unnecessary nodes to simplify the path. This granular control allows you to meticulously refine the cut line, ensuring it perfectly hugs the edges of your subject.
It's important to consider the cutting mechanics of the Silhouette CAMEO machine. The machine moves to each edit point as it cuts the design. Therefore, an overly complex or jagged cut line with numerous unnecessary edit points can lead to a longer cutting time and a less smooth cut. Point editing allows you to optimize the path, creating a balance between accuracy and efficiency. For intricate designs, you may need to add cut lines to areas between elements, such as the gaps between fingers, to ensure the background is fully removed. Each of these areas will be treated as a separate object in this stage.
🔥 Introduction to Point Editing in Silhouette Studio
Employing the Modify Panel for Background Cropping
The Modify Panel in Silhouette Studio is a powerful set of tools designed to combine, divide, and alter shapes. It is instrumental in the final stages of background removal, particularly when used in conjunction with your refined cut lines.
To open the Modify Panel, look for its icon on the right-hand side of the Silhouette Studio interface. Within this panel, you will find various options, including Weld, Subtract, Divide, and Crop. For the purpose of removing a background after creating a cut line, the "Crop" function is most commonly used.
The process typically involves selecting both your original image and the cut lines you have created around your subject. You can do this by clicking and dragging a selection box around both elements. Once both are selected, click on the "Crop" tool within the Modify Panel. This action will effectively crop the original image to the boundaries defined by your cut lines, thereby removing the background. The result is a clean cutout of your subject.
If your selection consists of multiple separate cut lines (e.g., if you added lines for gaps between fingers), you may first need to make these into a single compound path before using the Modify Panel. To do this, select all the individual cut lines, then go to the "Object" menu at the top of the screen and choose "Make compound path." This consolidates all your cut lines into one cohesive object, which the Modify Panel can then process more effectively. Selecting all lines can sometimes be tricky with complex photos; a quick method is to use "Edit" > "Select by color" and choose the color of your cut lines.
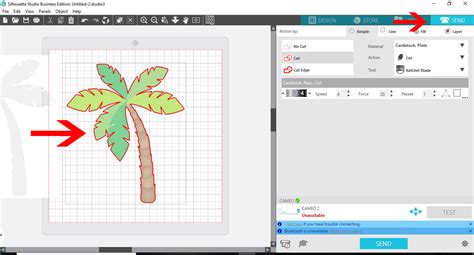
After using the Crop tool, you can verify the results in the "Send" menu, where the cut lines should now clearly outline your isolated subject. If you find that parts of the background were inadvertently left or too much of the subject was cropped, you can often adjust the edit points of the cut lines to reveal or further crop the image. This flexibility allows for fine-tuning the final output.
Alternative Approaches and Considerations
While the Trace Panel and Modify Panel, combined with Point Editing, are the primary methods for background removal in Silhouette Studio, the software offers flexibility for different scenarios.
Using Line Tools: In some cases, you can use the basic "Line Tools" to draw around your object and effectively separate it from the background. This method is similar to drawing a precise outline and can be achieved by selecting the "Draw a Curve Shape" tool from the left toolbar. You then manually click to place edit points directly on the edge of your subject, creating a custom cut line. This approach offers a high degree of control but can be more time-consuming for complex images.
The "Trace and Detach" Method: Some users might refer to a "trace and detach" method, which is essentially what happens when you use the Trace Panel and then potentially the Modify Panel. The key is that Silhouette Studio, even after creating a cut line, often retains the underlying image data. This allows for corrections and further manipulation, which is a significant advantage over some other software where the background is permanently deleted.
Image Quality and Complexity: The success of background removal in Silhouette Studio is significantly influenced by the quality and complexity of the original image. High-resolution images with clear contrast between the subject and the background will yield the best results. While Silhouette Studio can handle complex backgrounds and multi-colored images, more intricate details will naturally require more precise tracing and editing. For very complex backgrounds or images where the subject and background colors are very similar, the "Magnet Trace" tool can be particularly beneficial due to its edge-snapping capabilities.
Free vs. Paid Versions: It's important to note that the core functionality for background removal, including the Trace Panel and basic line drawing tools, is available even in the free version of Silhouette Studio. Features like the Magnet Trace tool are typically found in the Designer Edition or higher, offering more advanced capabilities for those who require them. However, for many common background removal tasks, the free version is more than sufficient.
Exporting Your Background-Removed Image
Once you have successfully removed the background from your image and are satisfied with the precision of your cut lines, you will want to export your creation. Silhouette Studio allows you to save your work in various formats suitable for different applications.
When you are ready to save, you can choose the desired file format from the export options. Common formats include SVG, DXF (which are vector formats ideal for cut files), PNG (which supports transparency, essential for preserving a transparent background), and JPG. If your goal is to use the image with a transparent background for layering or other design work, saving as a PNG is usually the preferred option.
This ability to export with a transparent background is a key benefit of Silhouette Studio, enabling users to seamlessly integrate their cutouts into various projects without the presence of an unwanted background. This is particularly useful for creating mockups, sublimation designs, or any project where the subject needs to stand out clearly.
By mastering these techniques within Silhouette Studio, you can transform ordinary images into versatile design elements, ready for cutting, printing, or digital manipulation, all within a single, powerful software application.
tags: #how #to #remove #background #in #silhouette