DaVinci Resolve, a powerhouse in post-production, offers an integrated solution for capturing professional-grade voiceovers directly within the software. This capability is invaluable for a wide range of users, from independent content creators to seasoned filmmakers, allowing for a streamlined workflow that keeps all aspects of a project within a single application. Whether you're adding narration to a corporate video, creating YouTube tutorials, or producing a film with off-screen dialogue, understanding how to record and process voiceovers effectively in DaVinci Resolve is a crucial skill. This guide will walk you through the process, from initial setup and recording to essential audio processing techniques.
Understanding DaVinci Resolve's Audio Capabilities
DaVinci Resolve is far more than just a video editor; it's a comprehensive post-production suite developed by Blackmagic Design. Its capabilities extend to color correction, motion graphics, visual effects, and robust audio post-production. This all-in-one approach means that instead of juggling multiple software applications, users can manage their entire project from start to finish within Resolve. This includes recording voiceovers, either directly within the app or by importing pre-recorded audio from external sources. This flexibility caters to diverse workflows, supporting solo creators and large production teams alike. The software boasts a user-friendly interface suitable for beginners, while simultaneously offering sophisticated tools that meet the demands of experienced professionals.
Setting Up Your Recording Environment and Hardware
Before diving into the recording process within DaVinci Resolve, establishing a conducive recording environment and ensuring your hardware is properly configured is paramount. The quality of your raw audio directly impacts the final output, making these initial steps critical.
Essential Hardware Recommendations
While DaVinci Resolve can work with various audio input devices, using dedicated hardware will yield superior results.
- Microphone: A good quality microphone is the cornerstone of clear audio. For voiceovers, broadcast condenser microphones are often favored for their sensitivity and clarity. Small diaphragm broadcast condensers, like the Earthworks Ethos, are excellent choices for desk setups. Alternatively, many USB microphones offer a simpler plug-and-play solution and are compatible with most systems.
- Audio Interface: If you're using an XLR microphone, an audio interface is necessary. This device connects your microphone to your computer, converting the analog signal into a digital format that DaVinci Resolve can process. It also often provides phantom power for condenser microphones and offers better preamps than built-in computer audio. The Universal Audio Volt 2 is an example of a popular USB interface that converts analog signals to 24-bit digital audio.
- Headphones: For accurate monitoring of your audio during recording and playback, a pair of closed-back headphones is essential. This prevents audio bleed from the headphones back into the microphone, which can create unwanted feedback loops.
Optimizing Your Recording Space
The acoustic environment in which you record has a significant impact on audio quality.
- Quiet Room: Choose the quietest room available. Minimize background noise from appliances, traffic, or other electronic devices. Even subtle hums can become noticeable in post-production.
- Acoustic Treatment: Ideally, the room should be treated to reduce reverberation and echo. Soft surfaces like carpets, curtains, upholstered furniture, and acoustic foam panels help absorb sound reflections. For a one-time project, strategically placing blankets or even recording in a closet filled with clothes can offer a surprisingly effective sound dampening solution.
- Mic Placement: Position your microphone correctly. For most voiceover work, speaking directly into the microphone from a few inches away is standard. Experiment with different distances and angles to find the sweet spot that minimizes plosives (harsh "p" and "b" sounds) and sibilance (harsh "s" sounds).
DaVinci Resolve 20: The New Voiceover Tool
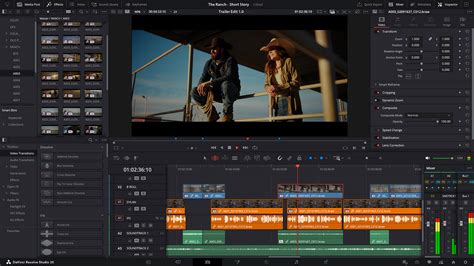
Previous versions of DaVinci Resolve required a more involved process for recording audio directly into the Fairlight page. This typically involved selecting the correct input track, arming it for recording, and then initiating the recording. DaVinci Resolve 20 introduces a significant improvement with a new voiceover tool, conveniently located on the timeline toolbar, accessible on both the Edit and Cut pages. This feature simplifies the recording process, making it extremely useful even for editors who need to lay down temporary narration or scratch tracks.
Media Storage Location in Resolve 20
A notable addition in DaVinci Resolve 20 is the introduction of a per-project prompted selection for a "Media Location." This designated folder is where all new media created within Resolve will be stored. It's important to note that this is not a mandatory location for your source footage; you can continue to organize your original media files in any way you prefer. Within the chosen location (which can be local, external, or network storage), DaVinci Resolve will automatically create a folder named after your project. Inside this project folder, a subfolder titled "Audio Files" will be created, and within that, a "Voiceover" folder will be established. This new organizational structure is beneficial for keeping all newly generated audio assets neatly organized.
Recording Your Voiceover in DaVinci Resolve
DaVinci Resolve offers multiple pathways to record voiceovers, with the new voiceover tool providing the most direct and user-friendly method.
Using the New Voiceover Tool (Edit and Cut Pages)
- Access the Tool: On the Edit or Cut page, locate the new microphone icon situated above the timeline track headers. Clicking this icon will reveal a floating voiceover recording panel.
- File Naming: You have the option to assign a custom name to your voiceover file. New recordings will be automatically assigned a sequential number (001, 002, 003) and a unique six-digit suffix. This suffix is crucial for facilitating relinking of media in the future.
- Microphone Selection: The voiceover tool includes a simple dropdown menu for selecting your connected microphone.
- Pro Tip: Using Your iPhone as a Microphone: You can utilize your iPhone as a microphone by connecting it via a USB-C cable and enabling Continuity Camera. Speak into the back of the phone, as the microphone is located near the camera lens.
- Track Assignment: You can choose a specific track to record to, or leave it on "Auto." When set to "Auto," DaVinci Resolve will create a brand-new audio track for your recording.
- Setting Input Levels: This is a critical step for achieving clean audio and avoiding clipping. The recommended peak level for your microphone input should be around -18 dBFS. It is strongly advised NOT to set levels to peak between -6 and -12 dBFS, as this was a common mistake for many years and offers insufficient headroom, increasing the risk of clipping. Clipping distorts the audio signal, making it sound horrible and difficult to recover. Because most audio recorders can capture 24-bit lossless audio, you have a substantial amount of gain (up to 144 decibels) available to increase the volume in post-production without compromising quality.
- Initiating Recording: Click the record button within the voiceover panel to begin. Unlike older methods, no track patching or arming is required on the Edit page when using this tool.
- Stopping Recording: To end the recording, you can either click the record button again or press the space bar on your keyboard.
- Additional Options: The three-dot menu within the voiceover panel offers further customization, including a three-second countdown, audio monitoring settings, the ability to mute the timeline during recording, and stereo recording options. For optimal direct monitoring, it's best to use your USB interface with headphones. Ensure your speakers are turned down to prevent audio bleed.
Recording via the Fairlight Page (Traditional Method)
For users who prefer or require the more detailed control offered by the Fairlight page, the traditional method remains available.
- Switch to Fairlight: Navigate to the Fairlight tab at the bottom of the DaVinci Resolve interface.
- Add a New Track: In the track header area (the left-hand panel displaying track information), right-click in an empty space. Select "Add Track" from the dropdown menu, and then choose "Mono" for a single microphone input. For stereo recording, select "Stereo." A mono track is typically sufficient for voiceovers.
- Rename the Track: Double-click on the default track name (e.g., "Audio 2") and rename it to something descriptive like "Voiceover," "Narration," or the speaker's name for better organization.
- Patching the Microphone:
- Method 1: Using the Mixer: Ensure your new track is selected. Open the Mixer panel (usually found in the top right corner). Under your voiceover track in the Mixer, it will likely say "No Input." Click on "No Input" and then select "Input" to open the Patch Input/Output window.
- Method 2: Via the Fairlight Menu: Go to the menu bar, click "Fairlight," and select "Patch Input/Output."
- Patching Process: In the Patch Input/Output window, the left side (Source) is where you select your microphone or audio interface input. The right side (Destination) is where you select the track you created for your voiceover. Ensure both are correctly highlighted and click "Patch."
- Arming the Track: Below the track name in the Fairlight track header, you'll see buttons labeled "R," "S," and "M." Click the "R" button (Arm for Record) to arm the track. It will turn red. When armed, you should see the level meters in the Mixer responding to your voice.
- Checking Levels: Speak into your microphone. Observe the level meters in the Mixer. The goal is to keep your signal in the green and yellow range, peaking around -18 dBFS, and avoiding the red, which indicates clipping. If your levels are too high, adjust the gain on your microphone or audio interface. If your hardware lacks a gain knob, you can adjust the "Record Level" within the "Path Settings" accessible from the Mixer's "Input" menu.
- Muting Timeline Playback: To prevent hearing the existing audio in your project while recording your voiceover, mute the timeline playback. Click the speaker icon located on the right side of the Timeline menu. This is especially important if you experience latency.
- Start Recording: Click the main record button (the red circle) on the transport controls. A waveform will appear on your audio track as you record.
- Stop Recording: Click the stop button (the square) to end the recording.
- Unarm and Unmute: Unarm the track by clicking the red "R" button again. Unmute the timeline playback by clicking the speaker icon. You can now play back your recorded voiceover.
How to Record Voiceover Directly in Davinci Resolve 20 (Full Tutorial)
Advanced Recording Techniques and Tips
DaVinci Resolve offers features to enhance the voiceover recording process and manage multiple takes.
Recording Multiple Takes
Mistakes are common during recording. DaVinci Resolve makes it easy to re-record sections without losing previous attempts.
- Identify the Mistake: Listen to your recording and locate the point where you need to re-record.
- Position the Playhead: Move the playhead in the Timeline to the beginning of the section you want to re-record.
- Re-record: Arm the track again, mute the timeline, and press the record button. Record the desired section.
- View Audio Track Layers: DaVinci Resolve will record the new take over the old one on the Timeline. To view all recorded takes, go to the "View" menu and select "Show Audio Track Layers." All recorded clips for that track will become visible underneath each other. The track at the very top is the one that will be played back. You can rearrange these layers by dragging them vertically. This allows you to select the best parts from each take and composite them into a single, perfect performance.
- Finalize View: Once you've arranged your layers, you can uncheck "Show Audio Track Layers" in the "View" menu to return to a single track view for further editing.
Using Your iPhone as a Microphone with Continuity Camera
As mentioned earlier, your iPhone can serve as a high-quality microphone.
- Connect: Connect your iPhone to your Mac using a USB-C cable.
- Enable Continuity Camera: On your iPhone, ensure Continuity Camera is enabled. This feature allows your iPhone to function as a webcam and microphone for your Mac.
- Select in Resolve: In DaVinci Resolve's voiceover recording panel or the Patch Input/Output window, select your iPhone as the audio input device. The microphone is located near the rear camera lens.
Processing Your Voiceover Audio
Once you have successfully recorded your voiceover, processing the audio is essential to achieve a polished, professional sound. The goal is to enhance clarity, control dynamics, and ensure consistent levels.
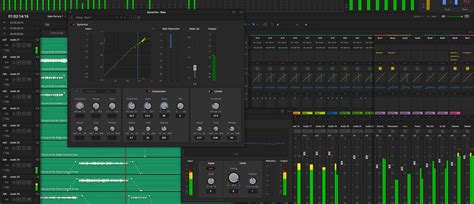
The 3-Track Level Effects Chain
A common and effective approach for processing dialogue involves a chain of three key audio effects: Equalizer (EQ), Compressor, and Limiter.
Equalizer (EQ):
- Purpose: To shape the tonal balance of the voice and remove unwanted frequencies.
- High-Pass Filter: The first step is often to apply a high-pass filter. This filter allows higher frequencies to pass through while attenuating (reducing) low frequencies. This is crucial for removing low-end rumble, microphone handling noise, and plosives that can muddy the sound.
- Frequency Control: An EQ essentially acts as a volume control for specific frequency ranges. You can use it to boost or cut frequencies to enhance intelligibility or address problematic resonances.
- Accessing EQ: In the Fairlight page, you can access the EQ by selecting the track, opening the Mixer, clicking the three dots, and ensuring "EQ" is enabled. Double-clicking the EQ section opens the Equalizer window.
Compressor:
- Purpose: To reduce the dynamic range of the audio, making the quiet parts louder and the loud parts quieter. This results in a more consistent and even vocal performance.
- Key Settings:
- Ratio: A ratio of 3:1 is a good starting point for voiceovers. This means that for every 3 decibels the signal exceeds the threshold, the output is only allowed to increase by 1 decibel.
- Threshold: This is the level at which the compressor begins to act. For audio peaking around -18 dBFS, setting the threshold at -21 dBFS would mean the compressor starts to engage as the signal approaches the peak.
- Attack and Release: These settings control how quickly the compressor reacts to the signal and how quickly it disengages. Fine-tuning these is crucial for natural-sounding compression.
- Accessing Compressor: The compressor is part of the built-in Dynamics panel in Fairlight.
Limiter:
- Purpose: To prevent the audio signal from exceeding a specific ceiling, thereby avoiding clipping and distortion. It allows you to increase the overall volume of the processed audio without the loudest peaks causing unwanted distortion.
- Fairlight Limiter: While there's a limiter in the Dynamics panel, it's often recommended to use the "Fairlight Limiter" plugin found in the FX section of the Dynamics panel for more precise control.
- Ceiling Setting: Set the high-end ceiling of the limiter to a safe level, such as -1.5 dBFS for a mono voiceover track. This ensures that even with significant volume boosts, the signal will not clip.
- Processing Order: It is crucial to set the processing order of these effects correctly. The default order might be EQ > DYNAMICS (Compressor) > FX. Ensure the limiter is the very last effect in the chain, so it acts as the final safeguard.
Limiter on the Master Bus
As an additional layer of protection against clipping, it's good practice to also place a limiter on the final stereo bus (master output) of your project. This safeguards your final render from any unexpected peaks that might occur during the mixing process.
Alternative Voiceover Solutions
While DaVinci Resolve offers robust built-in tools, other solutions can be considered, especially for generating voiceovers from text.
Text-to-Speech (TTS) Generators
For users who need to create voiceovers quickly from a script, or for those experiencing writer's block, AI-powered text-to-speech (TTS) generators can be a valuable tool.
- LOVO's Genny: This platform offers a TTS generator named Genny, capable of producing lifelike voiceovers from scripts in seconds. It also includes a scriptwriting assistant, Genny Write, which provides templates and inspiration for crafting compelling scripts. Genny boasts a vast library of over 500 AI voices with diverse accents and languages.
- Workflow: Generate your voiceover using a TTS tool, export the audio file, and then import it into DaVinci Resolve to sync with your video content.
Integrating Voiceovers into Your Project
Once your voiceover is recorded and processed, integrating it into your DaVinci Resolve project is straightforward.
- Import Audio: If you used an external TTS tool, import the generated audio file into DaVinci Resolve's Media Pool.
- Add to Timeline: Navigate to the Edit Page. Select the audio clip from the Media Pool and drag it onto your timeline, placing it on the appropriate audio track.
- Editing and Syncing: Trim the audio clip as needed to align it precisely with your video content. If you recorded multiple takes within Resolve and used the "Show Audio Track Layers" feature, you can now fine-tune the best segments from each take to create a seamless performance. You can also adjust the position and timing of audio clips by dragging them along the timeline.
Conclusion
DaVinci Resolve, particularly with the enhancements in version 20, provides a comprehensive and accessible platform for recording and processing voiceovers. By understanding the new voiceover tool, mastering the traditional Fairlight recording methods, optimizing your recording environment, and applying essential audio processing techniques like EQ, compression, and limiting, you can significantly elevate the quality of your audio productions. Whether you're adding a simple narration or crafting a complex soundscape, DaVinci Resolve empowers you to achieve professional results directly within your editing software.