In today's digital landscape, the quality of your audio can significantly impact the effectiveness of your video content. Whether you're creating vlogs, social media reels, explainer videos, or professional presentations, clear sound is paramount to keeping your audience engaged. Background noise, such as engine hums, traffic sounds, or ambient chatter, can detract from your message and give your content a unprofessional feel. Fortunately, platforms like Canva are increasingly offering sophisticated tools to combat these audio imperfections. This article delves into how to effectively remove background noise from your audio within Canva, ensuring your voice takes center stage and your videos achieve a polished, studio-quality sound.
Understanding the Challenge of Background Noise
Imagine you've captured a video of a crucial event, but the ambient sounds of the environment overshadow the intended audio. A common scenario involves footage of a traffic jam, where the persistent drone of engines can make dialogue or important sound cues difficult to discern. While the provided example describes a red light situation with stopping vehicles, the principle remains the same: the inherent noise of the environment can interfere with audio clarity. In such instances, merely having a video isn't enough; the audio component needs careful attention. This is where tools designed to isolate and enhance desired sounds become invaluable.
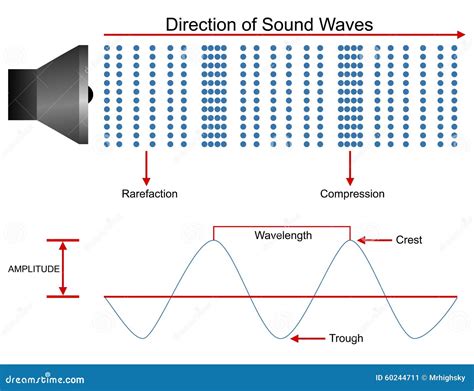
The goal is not just to eliminate noise but to bring the primary audio source, typically a voice, to the forefront. This process is often achieved through advanced algorithms that can differentiate between speech and ambient sounds, effectively filtering out the unwanted elements. The result is audio that is not only free from distractions but also possesses a richness and clarity that captivates the listener.
Canva's Solution: The "Enhance Voice" Feature
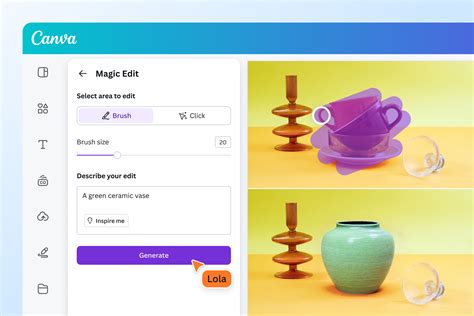
Canva offers a powerful, AI-driven tool called "Enhance Voice" specifically designed to tackle background noise and elevate audio quality. This feature is a game-changer for users looking to produce professional-sounding content without the need for complex, external audio editing software.
How "Enhance Voice" Works for Videos
For users working with video projects in Canva, the process of removing background noise is remarkably straightforward.
- Upload and Add Your Video: Begin by uploading your video file to Canva and adding it to your design canvas.
- Select the Video: Click on the video element on your canvas to select it.
- Access Audio Tools: In the floating toolbar that appears, locate and select "Audio Tools."
- Toggle "Enhance Voice": Within the Audio Tools menu, you will find the "Enhance Voice" option. Simply toggle this feature on. Canva's AI will then automatically analyze the audio, identify background noise, and reduce its presence, simultaneously amplifying the primary voice.
- Fine-tune Enhancement (Optional): For more granular control, a slider is often available, allowing you to adjust the strength of the enhancement. This is particularly useful if the initial result is too subtle or too aggressive, enabling you to fine-tune the effect to achieve the perfect balance.
It's important to note that the "Enhance Voice" feature is primarily designed for audio with a voice. While it can reduce general background noise, its effectiveness is maximized when there is a clear vocal track to isolate and enhance.
How "Enhance Voice" Works for Audio Files
The "Enhance Voice" feature is equally effective when working with standalone audio files.
- Upload and Add Your Audio File: Upload your audio file to Canva and add it to your design.
- Select the Audio Track: On your timeline, click on the audio track you wish to edit.
- Access Audio Tools: As with video, the floating toolbar will provide access to "Audio Tools."
- Toggle "Enhance Voice": Activate the "Enhance Voice" toggle. This will work to reduce background noise and improve the overall clarity of your audio recording.
The Power of AI Behind "Enhance Voice"
At its core, "Enhance Voice" leverages artificial intelligence to achieve its impressive results. The AI is trained on vast datasets of audio, enabling it to distinguish between human speech and a wide range of background noises. This sophisticated processing allows it to:
- Automatically Remove Background Noise: It identifies and subtracts unwanted ambient sounds.
- Highlight Your Voice: It selectively boosts the volume and clarity of the spoken words.
- Create High-Quality, Engaging Videos: The final output is a more professional and compelling listening experience.
Availability and Usage Limits
A crucial point of clarification regarding "Enhance Voice" is its accessibility. While initially it might seem like a premium-only feature, Canva's Help Center indicates that "Enhance Voice is available to all plans, both free and paid." However, there are nuances to consider regarding AI usage limits.
- AI Usage Limits: Each use of "Enhance Voice" deducts from your monthly AI allowance. These allowances can vary depending on your specific Canva plan. Users on free plans will have a different allowance compared to those on Canva Pro or enterprise solutions. It's advisable to check your plan details for specific information on AI usage caps.
- Focus on Voice: The feature is most effective and intended for audio and video content that contains speech.
This means that while you can use the tool across different plans, the frequency of your usage might be restricted based on your subscription level. Understanding these limits ensures you can effectively manage your creative workflow without unexpected interruptions.
FIX BAD AUDIO with Canva Enhance Voice
Beyond Noise Reduction: Comprehensive Audio Editing in Canva
While "Enhance Voice" is a powerful tool for noise reduction, Canva offers a suite of other editing features to further refine your audio. These tools empower you to achieve a truly polished sound for your projects.
Editing Audio Tracks on the Timeline
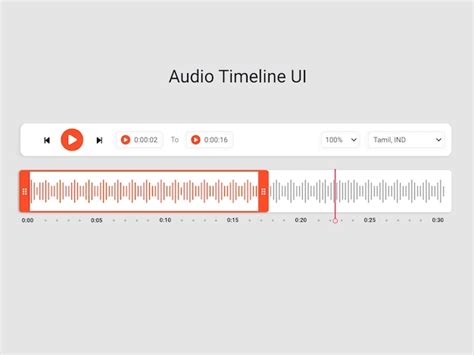
When working with video templates in Canva, you'll typically see an audio timeline at the bottom of the video editor. This timeline is where you can manipulate your audio tracks.
Adjusting Track Volume:
- Select the audio track or video whose volume you want to adjust.
- In the toolbar above the editor, click the volume icon.
- Use the slider or input a specific value in the textbox to set the desired volume level.
- For an automated solution, the "Balance all" button can help to automatically even out the volume of all audio and video elements in your design, ensuring a consistent listening experience.
Fading Audio Tracks:
- Select the audio track you wish to edit on the timeline.
- In the toolbar, click on "Fade."
- Use the slider or textbox to add fade-in or fade-out effects. This is excellent for smoothly transitioning audio in and out of scenes or at the beginning and end of your video.
Trimming and Clipping Audio:
- Trimming: Select the audio track. Trim handles will appear when you hover your mouse cursor over the track's edges. Drag these handles to shorten or lengthen the duration of your audio clip.
- Clipping: Select the audio track. Click the "more" icon (often represented by three dots) at the end of the audio track and choose "Adjust." You can then drag the audio waves within a colored section of the sound bar to define the precise portion of the track you want to play. This allows for very specific selection of audio segments.
Adjusting Audio/Video Duration to Page Length
The duration of your video page is influenced by the longest element on it, whether it's a video, GIF, or sticker. If a page contains a 10-second video and only text and images, it will play for 10 seconds. If it only has static elements, it defaults to five seconds. You can adjust this:
- Select the page you want to edit.
- On the toolbar above the editor, click the clock icon. This allows you to set the duration of the page, which will then dictate how long the audio plays for that specific section, or how long the video will loop if it's shorter than the page duration.
Achieving Professional Sound Without Expensive Gear
The promise of Canva's audio tools extends to democratizing high-quality audio production. The "Enhance Voice" feature, combined with other editing capabilities, allows users to:
- Eliminate Background Noise: As discussed, this is the primary function, leading to cleaner audio.
- Balance Sound Levels: Ensure that no part of your audio is too loud or too quiet, creating a smooth listening experience.
- Instantly Produce Studio-Sounding Videos: The AI-powered enhancements give your audio a professional polish that was once only achievable with dedicated audio engineers and expensive equipment.
Canva's "one-click vocal enhancer" is a testament to this accessibility. It simplifies complex audio processing into an easily manageable step, allowing creators to focus on their message rather than the technicalities of sound editing.
Muting and Removing Audio from Videos
In some cases, the best approach might be to remove the audio entirely, especially if it's of poor quality, contains unwanted dialogue, or is simply distracting. Canva provides a free and easy way to mute or completely remove audio from your videos.
- Muting a Video:
- Access the video editor via desktop or mobile.
- Locate the speaker icon on the menu bar.
- Use the toggle slider to adjust the volume down to zero, or click the mute icon to silence the clip instantly.
- Removing Audio: This process is effectively achieved through muting. Once muted, you can then choose to add new audio tracks, such as background music or voiceovers, to create an entirely new soundscape for your video.
This capability is available across all devices, including the Canva mobile app for iOS and Android, offering flexibility for creators on the go.
Enhancing Your Content Beyond Audio
Once your audio is perfected, Canva encourages further enhancement of your video content.
- Adding Sound Effects and Music: After removing or cleaning up existing audio, you can browse Canva's library of pre-licensed music and sound effects or upload your own. These can be dragged onto the timeline and placed precisely where needed to enhance the mood and impact of your video.
- Text Overlays and Captions: For accessibility and engagement, adding text overlays and captions is crucial. After muting a video, you can easily add text by selecting "Text" from the sidebar, choosing a text box, and customizing its font, color, and placement.
The seamless integration of these features within a single platform makes Canva a highly efficient tool for video creation. Users often describe the experience as "addictive and useful," highlighting the platform's intuitive design and comprehensive functionality.
Frequently Asked Questions About Audio Editing in Canva
Q1: Can I remove background noise from audio in Canva for free?Yes, the "Enhance Voice" feature is available to all plans, including free plans. However, usage may be subject to monthly AI allowances which differ by plan.
Q2: How do I mute a video in Canva?Select your video, find the speaker icon in the toolbar, and use the slider or click the mute icon to silence the audio.
Q3: Is "Enhance Voice" only for videos with speech?While "Enhance Voice" works best with speech to isolate and enhance it, it can still help reduce general background noise in audio without vocals, though the effect might be less pronounced compared to spoken content.
Q4: What is the difference between trimming and clipping audio in Canva?Trimming adjusts the start or end points of an audio clip by dragging handles. Clipping allows you to select a specific segment within the audio track to be played, offering more precise control over which part of the sound is used.
Q5: Can I add background music after removing audio?Absolutely. Once you've muted or removed the original audio, you can easily add new music tracks from Canva's library or upload your own to create the desired atmosphere.
By mastering these audio editing capabilities within Canva, creators can significantly elevate the quality and professionalism of their video content, ensuring their message is heard loud and clear.