Clip Studio Paint (CSP) offers a powerful suite of ruler tools designed to streamline the illustration and design process, and among these, the Symmetry Ruler stands out as a particularly versatile and time-saving feature. Whether you're aiming to create intricate logos, symmetrical character designs, or perfectly balanced patterns, the Symmetry Ruler allows for effortless mirroring and radial repetition of your strokes. This tool, accessible within the broader Ruler tool group, transforms the way artists approach designs that require exact replication across an axis or around a central point.
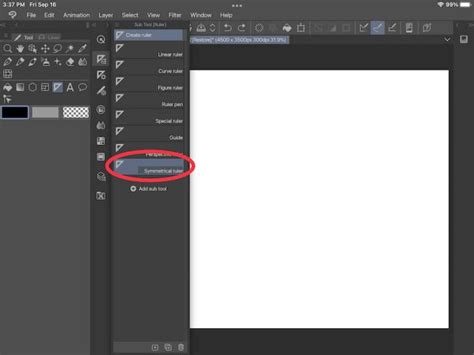
The journey into understanding the Symmetry Ruler begins with its integration into the CSP interface. To access it, one navigates to the Ruler tool group, visually identifiable by a specific icon, and then selects the Symmetry Ruler from the displayed options. This action opens up a world of customization, primarily managed through the Sub Tool Detail window, which can be accessed by clicking the wrench icon associated with the tool. For users who prefer immediate access to certain settings, CSP offers a convenient way to display chosen options directly in the Tool Property window. This is achieved by simply checking the box to the left of a setting's name; a blue-filled box with a small eye icon indicates that the option will be visible and active in the Tool Property window, while a gray, empty box means it remains hidden within the Sub Tool Detail window.
Understanding the Core Mechanics: Number of Lines and Line Symmetry
At the heart of the Symmetry Ruler's functionality lie two key settings: "Number of Lines" and "Line Symmetry." The "Number of Lines" parameter dictates how many times your drawn lines will be mirrored or repeated across the canvas, centered around the ruler's axis. The minimum setting is 2, resulting in a single mirror image across the ruler. As this number increases, so does the complexity of the radial repetition. The maximum value of 16 creates 16 "wedges" or segments around the ruler, each a reflection or rotation of the original stroke.

The "Line Symmetry" checkbox introduces a crucial distinction in how the mirroring occurs. When enabled, it creates a mirrored effect, essentially flipping the drawing across the ruler's axis. However, when "Line Symmetry" is disabled, the tool transitions into what is known as "rotational symmetry." In this mode, the drawn design is not merely flipped but is rotated into each designated segment around the central axis. For instance, with a "Number of Lines" set to 4 and "Line Symmetry" enabled, a design drawn on one side will be mirrored twice, resulting in four identical segments that are reflections of each other. If "Line Symmetry" is turned off with the same "Number of Lines" setting, the design will be rotated into each of the four segments, creating a radial pattern where each segment is a rotated version of the original. It is important to note that the "Line Symmetry" option is only available when the "Number of Lines" is set to an even number.
Creating Your First Symmetrical Design
The practical application of the Symmetry Ruler can be demonstrated through various scenarios, from simple mirroring for character design to complex radial patterns. The "Create at Editing Layer" checkbox provides control over where the ruler itself is generated. If this option is active, the ruler will be created on the currently selected layer.
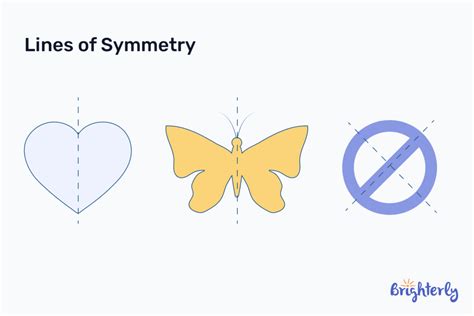
Symmetry, in its essence, is the quality of having precisely similar parts that either face each other or are arranged around an axis. The symmetrical ruler is an invaluable asset for crafting logos, intricate designs, or for effortlessly ensuring that character designs are identical on both sides. While not always the primary tool for character drawing, it excels in precisely this area. For example, if one were to sketch out only the left side of a character's face, the Symmetry Ruler can then be employed to ink the entire drawing, automatically mirroring the inked lines to the right side.
To initiate the creation of a Symmetrical Ruler, one first sets the desired "Number of Lines" and any other preferred settings. When the "Number of Lines" is set to 2, the ruler will simply mirror across its axis. For instance, to mirror the left side of a face to the right during the inking process, the artist would first locate the center point of the face. Then, using the Symmetry Ruler tool, they would click and drag to draw the ruler line precisely along the intended axis of mirroring. Once the ruler is established, any drawing or inking performed on one side will be automatically reflected and mirrored onto the other side in real-time.
As a left-handed artist, for example, one might find it more comfortable to work on the left side of the canvas. The beauty of the Symmetry Ruler is its compatibility with almost any drawing tool, including the Direct Drawing tools such as the straight line, ellipse, and rectangle tools. In a practical example, after completing all the inking on the left side of a character's face, the right side would have been automatically inked due to the ruler's presence. Even a simple detail like an "anime nose" represented by a small triangle, when mirrored, can create an interesting, almost skeletal effect on the opposite side. This is easily rectified by temporarily disabling the ruler to add asymmetrical details for a more natural appearance, allowing the artist to continue drawing or inking on the same layer without the mirroring effect.
The visual representation of the ruler on the canvas can be customized through the Preferences settings. By default, CSP displays an "on" ruler in purple and an "off" ruler in green. This color-coding provides a clear visual cue to the ruler's active status.
How to Use the Symmetry Tool in Clip Studio Paint!
Beyond Simple Mirroring: Rotational Symmetry and Complex Designs
Moving beyond basic mirroring, the Symmetry Ruler unlocks possibilities for more intricate and complex designs. Consider a scenario where the "Number of Lines" is set to an even number, such as 16. In this case, keeping "Line Symmetry" enabled allows each "wedge" of the ruler to be mirrored into the next one. This creates a continuous, repeating pattern rather than simply mirroring segments in opposite directions.
The utility of the Symmetry Ruler extends to a wide array of creative endeavors. It is an efficient tool for generating symmetrical elements in illustrations, such as leaves, flowers, or intricate patterns. For example, drawing a simple flower can be achieved by setting up a ruler with a sufficient number of lines and a radial symmetry configuration. The Operation Tool, specifically the Object Sub Tool, can be used to precisely center the ruler on the canvas, ensuring perfect radial balance.
A particularly interesting, albeit less intuitive, feature is the ability to make the eraser tool also obey symmetry. This is achieved by navigating to the eraser tool's Tool Property window, clicking the small wrench icon, and locating the "Correction" section. Within this section, there is a checkbox labeled "Enable Snapping." When this box is unchecked by default, the eraser functions normally, affecting only the area directly beneath it. However, by enabling this snapping feature for the eraser, any erasing action will be mirrored or rotated according to the active Symmetry Ruler, ensuring that erasures are as symmetrical as the drawing itself. This functionality, reportedly discovered through a YouTube video shared by Melinda from Mintoon Comis, highlights the depth of customization available within CSP.

It is worth noting that while a canvas can accommodate multiple Symmetry Rulers, only one can be active at any given time. Users can easily disable and enable a ruler by selecting it and then unchecking the "Snap" option in its properties. A small icon adjacent to the ruler also serves as a toggle for this snapping functionality.
The Symmetry Ruler is a testament to Clip Studio Paint's commitment to providing artists with powerful, intuitive tools. It transforms potentially tedious tasks into enjoyable and efficient creative processes. Whether you are designing a logo, illustrating a mythical creature, or crafting a decorative pattern, the ability to draw with perfect symmetry, mirroring, or radial repetition significantly enhances the final output and speeds up the workflow. The tool's flexibility, from simple horizontal mirroring to complex radial arrangements, makes it an indispensable asset for any digital artist using Clip Studio Paint. The potential applications are vast, encouraging experimentation and the creation of visually stunning and perfectly balanced artwork.
The tool's default settings, with "Number of Lines" set to 2 and "Line Symmetry" enabled, provide a straightforward starting point for users. However, exploring the various combinations of "Number of Lines" and the "Line Symmetry" toggle opens up a spectrum of possibilities. For instance, creating a cute Halloween pumpkin bat coloring page can be an engaging project using this ruler, demonstrating its versatility across different artistic styles and themes. The ability to snap almost any sub tool to symmetry rulers further amplifies its integration into the overall drawing and editing workflow. The Symmetry Ruler truly embodies the principle of drawing with symmetry, not just horizontally and vertically, but also diagonally and across multiple axes, offering an unparalleled level of control and creative freedom.