The ubiquitous checkered pattern often signifies transparency in digital images. However, when this pattern is part of the image itself, it represents a "fake" transparency, a common challenge for designers, e-commerce sellers, and casual users alike. This article delves into understanding why this occurs and provides a comprehensive guide on how to remove these intrusive checkered backgrounds, restoring true transparency or even replacing them with desired visuals.
Understanding the Checkered Pattern: Transparency's Visual Cue
In many graphics editing programs, such as GIMP or Photoshop, a checkered or gray-and-white grid is the standard visual representation of a transparent area. When you load a PNG file with a truly transparent background into these programs, you will see this checkerboard pattern. It's a deliberate design choice to clearly indicate that no pixels exist in that space, allowing whatever is beneath it to show through. This is crucial for layering images, creating logos that can be placed on various backgrounds, or designing web graphics.
However, the issue arises when this checkered pattern is not a representation of transparency but is, in fact, baked into the image data itself. This can happen for several reasons. Sometimes, an image might be saved incorrectly, or it could be a screenshot taken from a program that uses the checkerboard to denote transparency. These "fake" PNGs can be frustrating, as they prevent the image from being seamlessly integrated into other designs.

The Challenge of "Fake" Transparency
When you encounter a PNG file where the checkered pattern is a literal part of the image, it means the pixels forming that pattern are opaque. They are not indicating a lack of pixels but are actual colored pixels that need to be removed. This is where the task of "removing the checkered background" comes into play. The goal is to isolate the desired subject from these background pixels and either make them truly transparent or replace them with a new background.
The complexity of this task can vary. For images with simple, straight edges, like a bolt with straight lines, the process might involve tracing with a path tool, converting that path to a selection, inverting it, and then cutting away the background. However, more intricate images, or those with subtle drop shadows that have bits of the checkerboard showing through, require more sophisticated techniques.
Method 1: Leveraging AI-Powered Online Tools for Effortless Removal
For users who may not possess advanced design skills or access to complex software like Photoshop, online tools offer a remarkably accessible and efficient solution. These platforms often utilize Artificial Intelligence (AI) to automate the background removal process, making it possible to achieve professional results with just a few clicks.
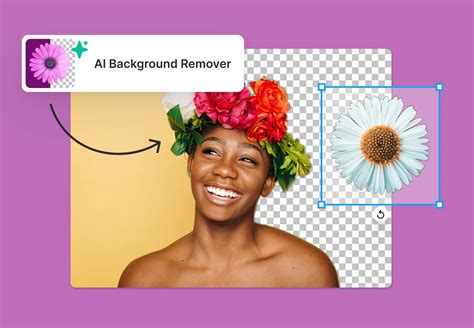
FlexClip: AI-Driven Background Removal and Replacement
FlexClip is a prime example of a powerful online toolkit that simplifies the process of removing checkered backgrounds. It comes equipped with a robust background remover and an advanced AI photo editor, enabling users to easily remove and replace checkered backgrounds.
How FlexClip Works:
- Upload Your Image: Begin by uploading the PNG file with the checkered background to FlexClip.
- AI Background Removal: FlexClip's AI technology automatically identifies the subject of your image and removes the checkered background. This process effectively transforms a "fake" PNG into a genuinely transparent one. You'll typically encounter two removal options:
- Auto Remover: This option is ideal for images where the checkered pattern is simply pixels and not true transparency. The AI treats the entire checkerboard as the background and removes it automatically.
- Custom Remover: For more nuanced control, a custom remover might allow you to fine-tune the selection.
- Download as Transparent PNG: Once the checkered background is removed, you can keep the image transparent and download it as a high-quality PNG file.
Beyond simply creating a transparent background, FlexClip also offers an AI Text-based photo editor. This allows you to replace the checkered background with entirely new scenes or solid colors, generated simply by typing a text prompt. This flexibility is invaluable for creating visually appealing product images or social media graphics.
Pokecut: Smart AI for Seamless Background Elimination
Pokecut is another intelligent, AI-powered online tool designed for quick and easy background removal. It is particularly beneficial for e-commerce and clothing design, where clear product imagery is crucial.
Pokecut's Step-by-Step Process:
- Upload Your Photo: Click the "Upload Photo" button and select your image with the checkered background, or drag and drop the file. Pokecut supports various formats including JPEG, JPG, PNG, WebP, and BMP.
- Image Loading and Processing: Pokecut begins its AI-powered removal process. A loading indicator will show the progress.
- Background Removal Complete: The tool successfully removes the checkered background, resulting in an image with smooth, natural edges around the subject.
- Download Your HD Photo: Once satisfied, download your high-quality, background-free image.
Pokecut's smart AI precisely detects the edges of objects and people, ensuring that fine details are preserved during the removal process, avoiding jagged or blurry outlines. This makes it an excellent alternative for those who find Photoshop's methods too complex.

Key Advantages of Online AI Tools:
- Ease of Use: No advanced design skills are required.
- Speed: Background removal is typically completed in seconds or minutes.
- Accessibility: Available online, requiring no software downloads or installations.
- Cost-Effective: Many offer free basic functions, eliminating the need for expensive software subscriptions.
- Versatility: Support for multiple image formats and often offer options for background replacement.
Method 2: Utilizing Desktop Software for Greater Control
For users who prefer or require the advanced features of desktop software, programs like GIMP and Photoshop offer robust tools for background removal. While these methods may involve a steeper learning curve, they provide a higher degree of control over the editing process.
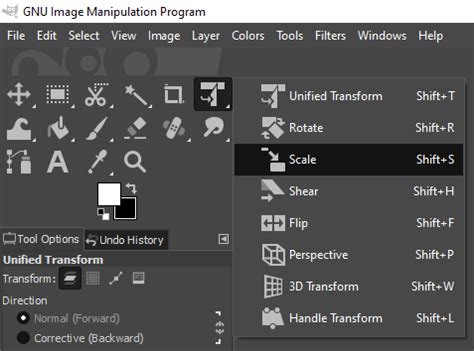
GIMP: A Free and Powerful Open-Source Option
GIMP (GNU Image Manipulation Program) is a free, open-source image editor that is a capable alternative to paid software. As mentioned, GIMP visually represents transparency with a checkerboard pattern. If you import an image into GIMP and see this pattern, it signifies genuine transparency. However, if the checkerboard is part of the image, you'll need to use GIMP's selection tools.
Workflow in GIMP (General Approach):
- Open the Image: Load your PNG file into GIMP.
- Select the Subject: Use selection tools like the "Fuzzy Select Tool" (Magic Wand) for areas of similar color, or the "Paths Tool" for more precise selections around complex shapes. For images with straight lines, tracing with the Paths Tool and converting to a selection is a common and effective method.
- Invert Selection (if necessary): If you've selected the subject, you'll need to invert the selection to target the background.
- Delete Background: Press the Delete key to remove the selected background pixels.
- Export as PNG: Ensure you export the image as a PNG to preserve transparency.
The user's experience of needing to scale an image down significantly (e.g., from a 720x686 canvas to 840x840, and then potentially to 98x98 pixels) highlights a common workflow challenge. This often involves a conversion to a vector format (like SVG) in software like Inkscape, and then importing the scaled vector into GIMP. While functional, the back-and-forth between applications can be time-consuming.
Photoshop: The Industry Standard
Photoshop, while a paid subscription service, offers a comprehensive suite of tools for image manipulation, including sophisticated background removal capabilities.
Photoshop Techniques:
- Quick Selection Tool: Similar to GIMP's Fuzzy Select, this tool allows you to quickly "paint" over the area you want to select. Photoshop's AI helps to intelligently identify edges.
- Select and Mask Workspace: This dedicated workspace provides advanced tools for refining selections, particularly useful for complex edges like hair or fur.
- Layer Masks: A non-destructive way to hide parts of a layer. You can create a selection of your subject, then add a layer mask, which effectively hides everything outside of your selection.
- Duplicate Layer Method for Shadows: For creating drop shadows, a common technique involves duplicating the subject layer. The bottom layer is then colored to create the shadow, and its position is adjusted to achieve the desired effect. This method requires careful alignment and often needs to be confined within specific shapes, like a circle, using selection tools.
The user's mention of a "drop shadow has bits of checker showing through" indicates a need to carefully refine the mask or selection around the shadow area, ensuring the shadow pixels are either truly transparent or properly integrated with the new background.
21 PHOTOSHOP TIPS – Easy Through Advanced!
Method 3: The Old-Fashioned Method for Specific Scenarios
Sometimes, the simplest approach is the most effective, especially when dealing with specific elements like straight lines or predictable shapes. The "old-fashioned method" often refers to manual tracing and selection.
For an object like a bolt with straight lines, manually tracing its outline with the Pen Tool (in Photoshop) or the Paths Tool (in GIMP) is a highly accurate approach. Once the path is created, it can be converted into a selection. This selection can then be used to cut out the subject or to create a mask.
If the goal is to create a drop shadow, duplicating the layer and coloring the bottom layer to form the shadow is a classic technique. This shadow then needs to be positioned accurately to create a realistic effect. When this needs to fit within a specific shape, like a circle, guides and elliptical selection tools become essential for defining the boundaries.
Considerations for Image Usage and Licensing
When sourcing images from the web, especially those with transparent backgrounds, it's crucial to be mindful of copyright and licensing.
- Google Images and Copyright: Images found through general search engines like Google Images are often protected by copyright. Using them without permission can lead to legal issues. It's a "big no-no" to assume free usage.
- Finding the Source and License: The best practice is to always find the original source of an image and check its license rules. Resources like Moose offer stock photos for personal and commercial use, sometimes with simple attribution requirements or even allowing use without attribution.
- Reverse Image Search: Tools like Google Images' reverse image search can help you locate the origin of an image and potentially find copyright information or alternative sources.
- "Transparent Background" Search Filters: Many image search engines allow you to filter results specifically for images with transparent backgrounds, increasing the chances of finding usable assets.
- Checking for Real Transparency: Before downloading, click on an image in search results. If its background changes from white to a checkered pattern, it likely has a genuine transparent background.
Conclusion: Mastering the Art of Transparency
Removing a checkered background from a PNG file, whether it's a true transparency indicator or a "fake" embedded pattern, is a common but important task in digital imaging. From sophisticated AI-powered online tools like FlexClip and Pokecut that offer speed and simplicity, to the granular control provided by desktop software like GIMP and Photoshop, a range of solutions exists to suit different needs and skill levels.
Understanding the nature of the checkered pattern is the first step. Whether you're aiming for a clean, transparent background for seamless integration or seeking to replace it with a new visual to enhance your image, the methods discussed provide a clear path forward. By mastering these techniques and being mindful of image licensing, you can effectively manage and utilize images with transparency, enhancing your creative projects and professional output.