The allure of transforming ordinary photographs into something extraordinary, whether for artistic expression or to create striking visual narratives, is a cornerstone of digital image manipulation. Among the myriad of effects achievable in Adobe Photoshop, the cracked skin or distressed texture effect stands out for its dramatic and often unsettling visual impact. This tutorial delves into the intricate process of creating a convincing cracked skin effect, moving from the foundational adjustments of your base image to the subtle nuances that imbue the final result with a sense of three-dimensionality and decay. We will explore techniques that leverage texture overlays, blending modes, adjustment layers, and filters to achieve a sophisticated and believable outcome, suitable for applications ranging from spooky gifts to avant-garde artistic projects.
Preparing the Foundation: Adjusting the Background Image
Before embarking on the textural transformations, it's crucial to establish a solid base. This involves isolating your subject and setting up a complementary background that will enhance the desired effect.
Isolating the Subject and Establishing a New Background
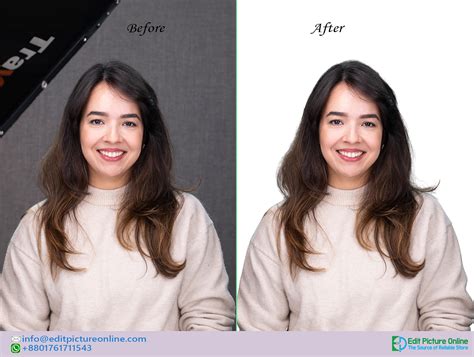
The initial step in creating a compelling cracked skin effect is to ensure your subject is clearly defined against a suitable backdrop. If your chosen image features a plain background, such as white, the process begins with its isolation.
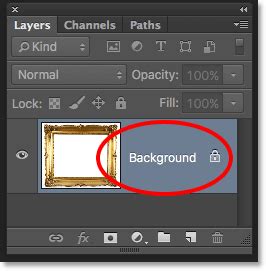
Duplicate the Background LayerTo safeguard your original image, always start by creating a duplicate of the background layer. This can be achieved by pressing Command/Control + J. This practice ensures that a pristine copy of your original file remains accessible should any adjustments lead to undesirable outcomes. The original background layer can be temporarily hidden by clicking the eye icon next to its thumbnail in the Layers panel.
Select and Mask the SubjectPrecisely isolating your subject is paramount for a clean integration of textures. For detailed guidance on achieving sharp and refined mask edges, refer to specialized tutorials on masking techniques within Photoshop. This meticulous selection ensures that subsequent textural applications adhere only to the desired areas of your subject.
Add a Gradient Fill Layer to Replace the BackgroundWith the subject isolated, the next step is to introduce a new background that complements the mood. Create a new Gradient Fill Adjustment layer by clicking the black and white circle icon at the bottom of the Layers panel. This layer should be positioned beneath your masked subject layer. For this tutorial, we will utilize the following gradient settings:
- Preset: Foreground to Background (#00020a to #0a262f)
- Style: Radial
- Angle: -20.67º
- Scale: 122%
- Reverse: Checked
- Dither: Unchecked
- Align with layer: Checked
It is important to note that these values may require adjustment depending on the specific characteristics of your source image. The goal is to create a dark, atmospheric background that will make the cracked effect pop.
Group Your Background and Subject Layers TogetherTo maintain organization and facilitate further manipulation, group the gradient fill and masked subject layers. Select both layers using the Shift key and click the folder icon at the bottom of the Layers panel to group them. This consolidated group can then be named appropriately, such as "Background and Subject."
Embracing Non-Destructive Editing: Smart Objects
The power of Photoshop lies in its ability to allow for flexible and non-destructive editing. Converting your consolidated layer group into a Smart Object is a critical step that unlocks this potential, enabling you to apply filters and adjustments that can be revisited and modified at any time without permanent alteration to the underlying pixels.
Converting to a Smart Object
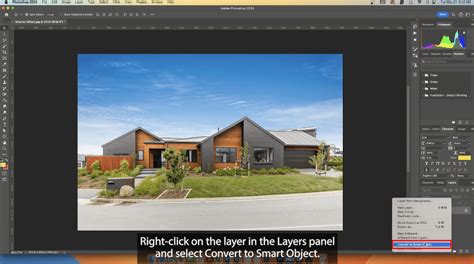
Right-click on the group containing your background and subject layers and select "Convert to Smart Object." You can then rename this new Smart Object layer to something descriptive, such as "Background." This action encapsulates all the elements within the group into a single, editable entity.
Introducing the Cracks: Dry Dirt Texture Application
The core of the cracked skin effect lies in the application of textures that mimic naturalistic fissures and imperfections. A dry dirt texture provides an excellent starting point for this transformation.
Overlaying and Blending the Dry Dirt Texture
Import the Dry Dirt TextureOpen your chosen dry ground texture file and drag it directly onto your Photoshop document. Utilize the Free Transform tool (Command/Control + T) to scale, rotate, and position the texture. Aim to align prominent crack details with areas where you envision the most pronounced cracking on your subject. Commit these transformations by pressing Enter or clicking the checkmark in the top toolbar. You may find it helpful to temporarily reduce the texture's opacity to better gauge its placement relative to your subject.
Change the Dirt Texture Blending Mode and OpacityTo integrate the texture seamlessly with your subject, experiment with different blending modes. For this tutorial, the "Pin Light" blending mode is recommended. Adjust the layer's opacity to approximately 50%. These settings are a starting point; feel free to explore other blending modes and opacity levels to achieve the most visually appealing result. Name this layer "Dirt Texture."
Erase Unwanted Portions of the Dry Dirt Texture Using a MaskSince we want the cracked texture to appear only on the skin, a layer mask is essential. Select the "Dirt Texture" layer and add a Layer Mask by clicking the mask icon at the bottom of the Layers panel. Equip the Brush tool (B), setting it to a large, soft brush (e.g., 100 px, 0% Hardness, 49% Flow). Ensure you are working on the mask thumbnail. Using black as your foreground color, carefully paint over areas where you do not want the texture to appear, such as the eyes, mouth, and any other facial features that should remain uncracked. Remember to also erase the texture from any parts of the clothing or background that should not be affected.
Enhancing Contrast and Detail
To give the cracked effect more depth and definition, we will employ adjustment layers and refine the texture's appearance.
Create a Curves Adjustment LayerTo boost the contrast of the cracked skin effect, add a Curves Adjustment layer. Position it above all other layers and clip it to the "Dirt Texture" layer by clicking the clipping mask icon (a small square with a bent arrow) at the bottom of the Properties panel. Select the "Medium Contrast (RGB)" preset from the dropdown menu. This will intensify the tonal range of the cracks.
Fine-Tune Details on the Dirt Texture LayerUpon reviewing the progress, you might decide to increase the opacity of the "Dirt Texture" layer to around 55% for more pronounced cracks. Subsequently, select the Brush tool (B) again, this time using a smaller brush size (e.g., 25 px). Zoom in closely to meticulously refine the edges of the cracks. For delicate areas like the edges of the nose or fingers, lower the brush opacity to approximately 45% to achieve a more subtle integration. If any parts of the texture need to be brought back, press X to swap your foreground and background colors to white, and paint with white to reveal them.
Adjust the Levels of the Dirt Texture LayerTo further refine the contrast and definition of the cracks, select the "Dirt Texture" layer thumbnail in the Layers panel. Navigate to Image > Adjustments > Levels (Command/Control + L). Adjust the sliders to achieve values similar to these: Blacks 20, Greys 1.26, and Whites 235. This adjustment will enhance the contrast, but it may also reveal some unwanted areas. To rectify this, select the mask thumbnail again, set the layer's opacity back to 100%, and use the Brush tool (B) with black to mask out these newly revealed imperfections. Once finished, remember to reset the layer's opacity to your desired percentage (55%).
Adding a Unique Sheen: Color Lookup Adjustment
To imbue the image with a specific mood and visual character, a Color Lookup adjustment layer can be employed. This technique allows for sophisticated color grading and can significantly alter the overall aesthetic of the cracked skin effect.
Applying a Color Grading Preset
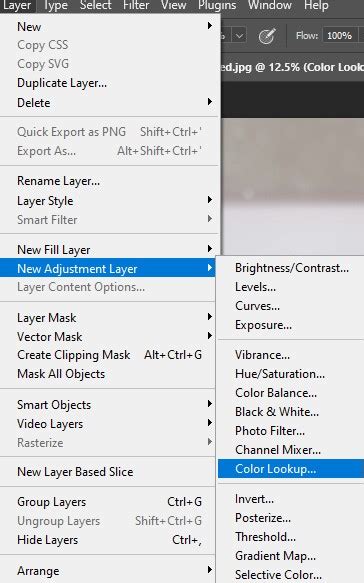
Create a Color Lookup Adjustment LayerNavigate to the Adjustments panel and create a new Color Lookup adjustment layer at the top of your layer stack. Within the Properties panel, select "TealOrangePlusContrast.3dl" as your 3DLUT File. As with blending modes, the choice of 3DLUT file is subjective and may require experimentation to find the one that best complements your specific image and desired artistic vision.
Enhancing the Distressed Aesthetic: Grunge Texture Overlay
To complement the cracked skin effect and add another layer of visual complexity, a grunge texture can be introduced. This will further enhance the distressed and aged appearance of the subject.
Integrating the Grunge Texture
Import the Grunge TextureOpen your selected grunge texture file and drag it onto your Photoshop document. Position this layer between the "Dirt Texture" and the "Background" layers. Name this new layer "Grunge Texture." Use Free Transform (Command/Control + T) to scale and rotate the texture as needed, then commit the changes.
Change the Grunge Texture Blending Mode and OpacityTo effectively blend the grunge texture with the underlying layers, set its Blending Mode to "Color Burn." Reduce the Opacity to approximately 25%. This combination will subtly integrate the grunge elements without overpowering the cracked skin effect.
Erase Unwanted Portions of the Grunge Texture Using a MaskSimilar to the dirt texture, the grunge texture may require masking to ensure it is applied strategically. Add a Layer Mask to the "Grunge Texture" layer. Using a soft brush, paint with black to selectively erase or soften areas of the grunge texture where it detracts from the overall composition or appears unnatural.
Adding Depth and Realism: Diffuse Glow Filter
The final step in refining the cracked skin effect involves applying a subtle filter that unifies the image and adds a touch of realism. The Diffuse Glow filter can help to soften harsh edges and enhance the perceived depth of the textures.
Applying the Diffuse Glow Filter
Select the Smart Object LayerEnsure that your "Background" Smart Object layer is selected. This is crucial because filters applied to Smart Objects can be re-edited later.
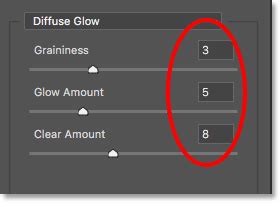
Apply the Diffuse Glow FilterNavigate to Filter > Filter Gallery > Distort > Diffuse Glow. Use the following settings:
- Graininess: 1
- Glow Amount: 1
- Clear Amount: 15
Since this filter is applied to a Smart Object, you can revisit and adjust these settings at any time by double-clicking on the filter name under the Smart Object's layer in the Layers panel. This filter will subtly smooth out the image, adding a gentle glow that enhances the three-dimensional feel of the cracked skin.
Advanced Techniques for Enhanced Realism
Beyond the foundational steps, several advanced techniques can elevate the cracked skin effect from merely textured to truly convincing. These methods focus on adding dimensionality, subtle imperfections, and mimicking naturalistic phenomena like peeling skin or depth of field.
Creating Three-Dimensionality with Highlights and Shadows
To make the cracks appear more three-dimensional, we can introduce subtle highlights and shadows along their edges.
Duplicate and Invert the Crack LayerDuplicate the "Dirt Texture" layer. Invert this duplicated layer (Command/Control + I) and then desaturate it (Command/Control + Shift + U). Change the Blending Mode of this new layer to "Screen." This will render the cracks as white on a transparent background.
Utilize Blend If for Targeted ApplicationEmploy the "Blend If" sliders within the Layer Styles options (double-click the layer) to make this white crack layer invisible where the underlying layer is darker. This effectively removes the white highlights from the darker areas of the original crack texture, leaving them only on the lighter edges, thus simulating a raised effect.
Simulating Peeling SkinTo mimic the appearance of skin peeling away, create a new layer set to "Soft Light" blending mode. Using a soft-edged brush, paint with white around the edges of the cracks and in areas where peeling would naturally occur. The Lasso Tool can then be used to remove highlights from unwanted areas, enhancing the illusion of peeling.
Adding Shadows for DepthSimilarly, create another layer set to "Soft Light" and paint with black around the deeper parts of the cracks and in recessed areas. This will cast subtle shadows, further enhancing the three-dimensional quality of the effect.
Replicating Depth of Field Blur
If the original image was shot with a shallow depth of field, you can replicate this effect to enhance realism.
Duplicate and Blur the ImageDuplicate the entire layer group (or the Smart Object if you've consolidated everything) onto a new layer. Apply the Blur Tool to this new layer, ensuring the "Sample All Layers" option is checked. Set the strength of the blur tool to approximately 50%. Carefully brush over areas that should appear out of focus, mirroring the natural fall-off of sharpness in the original photograph.
Photoshop tutorial : How to Create Realistic Cracked Skin
Exploring Variations: Crack Brushsets and Stone Cracks
The concept of "crack brush" in Photoshop opens up a vast array of creative possibilities, extending beyond skin textures to encompass various materials and scenarios.
Utilizing Pre-made Crack Brushes
For those seeking a quicker or alternative approach, Photoshop offers a plethora of crack brush sets. These brushes can be downloaded and installed, providing ready-made crack designs that can be painted directly onto an image.
Creating a Mysterious, Dark Horror SceneOne application of crack brushes is in crafting atmospheric horror scenes. By creating a new document, filling the background with black, and then rendering cloud effects around a subject, crack brushes can be strategically placed to create a sense of decay and unease. Adding elements like red blood particles can further amplify the horror aesthetic.

Crafting Cracks in Stone Textures
The techniques learned for cracked skin can be adapted to create realistic cracks in other materials, such as stone.
Creating a Stone Crack with Variable ThicknessTo simulate a crack in stone, a new layer can be created. Using the Brush tool with varying diameters (achieved by using the [ and ] keys), draw a random, irregular line. This allows for control over the thickness of the crack along its length, mimicking natural fracturing. Painting with black over the edges of the crack can then be used to create a subtle fading effect, making it appear more integrated into the stone surface. This method avoids the use of layer styles, relying instead on manual painting and adjustment for a more organic result.
The use of layers and layer groups is particularly advantageous in managing complex crack effects, allowing for non-destructive editing and easy modification of individual components. By understanding how to manipulate brush dynamics, blending modes, and layer masks, one can achieve highly convincing textural transformations, whether it's for creating a compelling cracked skin effect, a dramatic stone fissure, or an entirely new visual narrative. The foundational principles of texture overlay, blending, and masking are universally applicable across a wide range of Photoshop manipulation tasks.