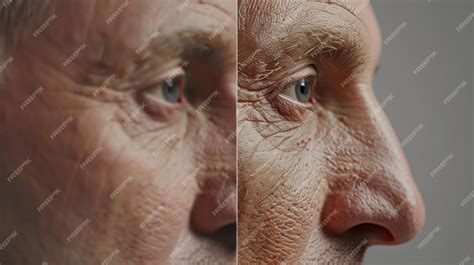
Retouching wrinkles on someone’s face can be a very touchy matter. The goal isn’t always complete removal, as that can leave subjects looking unnatural, akin to characters from a cartoon. When wrinkles are removed completely, something crucial is lost; the photoshopping becomes obvious. In this tutorial, we delve into the art of reducing the appearance of wrinkles in Photoshop, aiming for natural-looking portraits that retain the subject's character and life story. Wrinkles are a natural sign of aging, life experience, and the wisdom that comes with it, not something to be shunned and removed through heavy-handed use of Photoshop. However, wrinkles that appear too dark and noticeable, whether from bad lighting or lack of sleep, can detract from an otherwise great portrait. We will explore techniques to reduce their impact through a combination of Photoshop's powerful tools, layer adjustments, and blend modes.
Understanding the Nuances of Wrinkle Retouching
It's crucial to understand that "healing" an image in Photoshop, particularly when dealing with skin, involves a clever combination of processes. Tools like the Healing Brush are designed to take unwanted texture from a problem area and replace it with good texture sampled from a different, suitable area. Subsequently, Photoshop blends this new texture with the original tone and color of the problem area to achieve a seamless result.
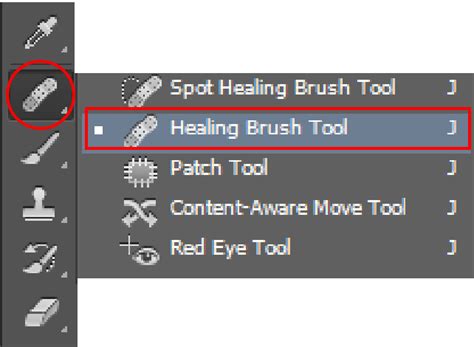
The Healing Brush Tool is a primary asset for removing wrinkles. The key is to use a brush size that is slightly larger than the wrinkle itself. To achieve the best results, it's recommended to sample a color directly below the wrinkle by holding down the Alt/Option key and clicking. This action sets your sample point. For more natural-looking portraits, the Clone Stamp tool is also a valuable alternative.
The Importance of Non-Destructive Editing
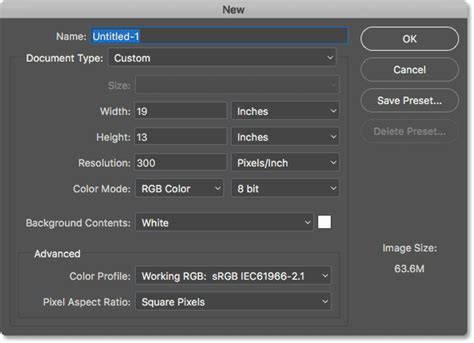
Before embarking on any retouching, it is paramount to ensure your editing process is non-destructive. This means working on copies of your original image data so that you can always revert to the original if needed. The simplest and most effective way to achieve this in Photoshop is to duplicate your photograph layer. In Photoshop, this is done by pressing Ctrl + J (or CMD + J on a Mac). This duplication creates a separate layer with a copy of your image pixels, allowing you to work on this new layer without altering the original. If you attempt to use certain techniques, like the Clone Stamp tool, directly on the background layer without duplicating it, or on a blank new layer without proper sampling settings, the technique might not work as intended. For instance, if you are on a new blank layer rather than a duplicated one, the duplication method will not work.
Essential Tools for Wrinkle Reduction
Photoshop offers a suite of tools that can be employed to effectively reduce the appearance of wrinkles. Each tool has its strengths, and often, a combination of them yields the most natural results.
The Healing Brush Tool: Your Best Friend for Subtle Corrections
The Healing Brush Tool is exceptionally effective for retouching skin and reducing the appearance of dark and distracting wrinkles. As mentioned, the goal is typically to reduce rather than completely remove wrinkles. This tool's "healing" capability is a clever combination of texture replacement and color blending.
How to Use the Healing Brush Tool for Wrinkles:
- Create a New Layer: Add a new blank layer above your Background layer. For better organization, you can name this layer, for example, "Reduce Wrinkles." You can do this by holding down the Alt/Option key while clicking the New Layer icon in the Layers panel, which opens the New Layer dialog box.
- Configure the Healing Brush: Select the Healing Brush Tool from Photoshop's Tools panel. Ensure that the "Sample" option in the Options Bar at the top of the screen is set to "All Layers" or "Current & Below." This is crucial because your new layer is blank, and you need Photoshop to sample texture from the layer below (your image). By default, it's often set to "Current Layer," which would not work here.
- Disable Alignment (Usually): Make sure the "Aligned" option, located to the left of the "Sample" option, is unchecked. With "Aligned" turned off, each brush stroke will grab texture from the same initial sample point. If "Aligned" is turned on, the sample point moves with your brush, which can lead to undesirable texture copying.
- Sample Good Texture: Press and hold your Alt (Win) / Option (Mac) key. Your cursor will change into a small target symbol. Position this target over an area of smooth, clear skin with a texture similar to what you want to replicate, then click to sample it.
- Paint Over Wrinkles: Release the Alt/Option key. Your cursor will revert to the brush icon. Position the brush over the wrinkle you want to correct. For best results, use a brush size that is slightly wider than the wrinkle. You can adjust the brush size using the left bracket key
[to make it smaller and the right bracket key]to make it larger. Paint over the wrinkle. As you paint, a small plus sign (+) will appear over your sample point and move with your brush, indicating the source of the texture. - Observe and Adjust: As you paint, you will see the texture and color blending. Photoshop performs the final blend after you release the mouse button, so don't be alarmed if the area looks imperfect while you are painting. Keep an eye on the plus sign to ensure it stays over good texture.
- Sample Frequently: Skin texture varies across the face. For optimal results, sample good texture from different areas as you move from one wrinkle to the next to avoid repeating patterns.
- Work in Sections: For longer wrinkles, it’s often better to use a series of shorter strokes, starting from the youngest-looking end of the wrinkle and working towards its origin. This helps maintain a natural flow.
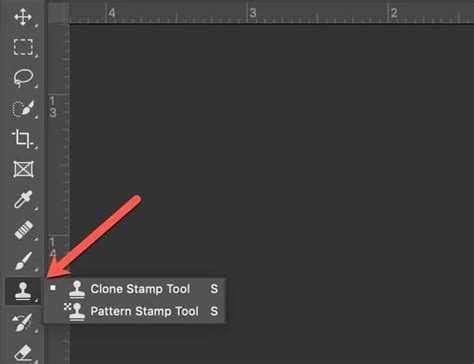
The Clone Stamp Tool: For More Controlled Texture Replacement
The Clone Stamp Tool offers a more direct way to copy pixels from one area of an image to another. While it can be powerful, it requires careful application to avoid unnatural results.
Using the Clone Stamp Tool for Wrinkles:
- Duplicate Layer: As always, duplicate your Background layer (Ctrl/Cmd + J) to work non-destructively.
- Set Brush Properties: Select the Clone Stamp Tool. For wrinkle reduction, it's often recommended to use a large, soft brush with a lowered opacity (around 20-30%).
- Sample and Paint: Alt/Option-click on an area of good skin texture near the wrinkle you want to address. Then, gently paint over the wrinkle. The lowered opacity allows you to build up the effect gradually, blending the cloned texture in subtle layers.
- Nace's Recommendation: For a more natural approach, Nace suggests using the Clone Stamp tool with the brush set to "Lighten" blend mode. When sampling and painting over wrinkles with this setting, you effectively remove the shadow in the wrinkle while preserving much of the skin's texture. This method doesn't copy texture in the same way a normal clone stamp brush does; it primarily uses the color. This way, you retain some of the wrinkle's definition, contributing to a more natural look.
The Patch Tool: For Seamless Blending of Larger Areas
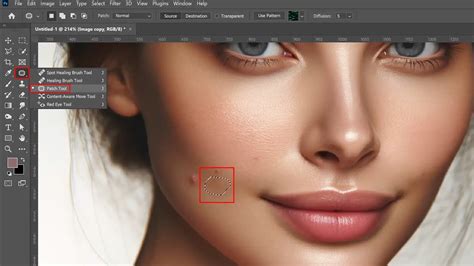
The Patch Tool is a powerful, yet often underused, tool excellent for cutting out blemishes and automatically blending new texture into the selected area.
Applying the Patch Tool:
- Select the Tool: Choose the Patch Tool from the Photoshop toolbar.
- Draw Around the Wrinkle: Click and drag to draw a selection around the wrinkle you wish to correct.
- Drag to Good Texture: With the selection active, click inside the selection and drag it to an area of smooth, undamaged skin that has a similar texture and tone. Release the mouse button, and Photoshop will blend the sampled texture into the selected area.
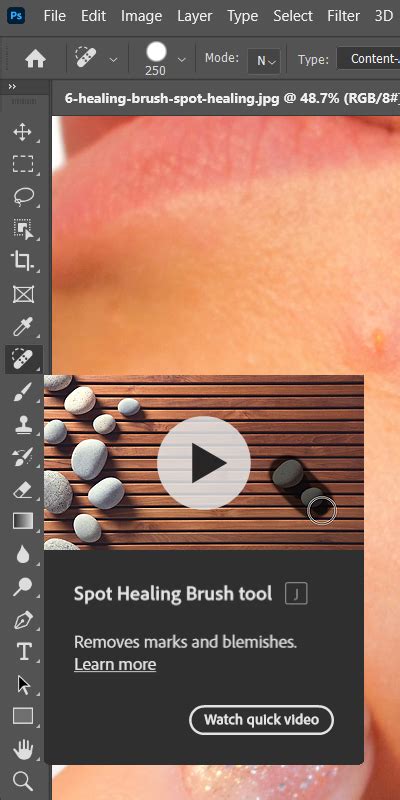
The Spot Healing Brush Tool: For Quick Blemish Removal
The Spot Healing Brush Tool is fantastic for removing temporary blemishes and minor wrinkles without extensive manual work. It automatically detects and samples surrounding pixels to heal the selected area.
Using the Spot Healing Brush:
- Select the Tool: Choose the Spot Healing Brush Tool.
- Adjust Brush Size: Set a brush size that is appropriate for the wrinkle you want to address.
- Brush Over the Wrinkle: Simply click or brush over the wrinkle. Photoshop will automatically sample and blend nearby pixels to remove it. While useful for small imperfections, it might be less precise for larger or more defined wrinkles compared to the regular Healing Brush.
The Liquify Filter: For Subtle Reshaping and Persuasion
In specific cases, such as natural wrinkles that form under the chin when smiling, the Liquify filter can be used to subtly persuade these creases to join together, thereby reducing their impact. This tool should be used with extreme caution to avoid an obviously altered appearance.
Applying Liquify for Wrinkle Reduction:
- Open Liquify: Go to Filter > Liquify.
- Use the Freeze Mask Tool: Mask off any areas you don't want to be affected by the filter.
- Use a Large, Soft Brush: With a big, soft brush, slowly and gently push the area of the wrinkle inwards towards the face. A larger brush helps to move the entire area simultaneously, retaining its structure. The key is to use minimal pressure and make subtle adjustments.
Achieving Natural-Looking Results: Beyond Complete Removal
A common pitfall in skin retouching is the tendency to completely remove all wrinkles. This can result in a plastic-like appearance, making subjects look unnaturally young and devoid of character. The goal should be to reduce the prominence of distracting wrinkles, not to erase them entirely.
Layer Opacity and Blend Modes: The Key to Subtlety
Once you have used tools like the Healing Brush or Clone Stamp to address wrinkles, you can further refine the result using layer opacity and blend modes to bring back a natural sense of depth and texture.
Using Blend Modes for Naturalness:
- Change Blend Mode: Select the layer on which you performed your retouching (e.g., "Reduce Wrinkles"). In the Layers panel, change the blend mode from "Normal" to "Lighten." With the "Lighten" blend mode, only pixels on the retouching layer that are lighter than the pixels in the original image below will remain visible. Since wrinkles are often darker due to shadows, they will remain visible while the smoothed-over areas blend in.
- Adjust Layer Opacity: To further control the visibility of the original wrinkles and skin texture, lower the opacity of the retouching layer. The Opacity slider is located next to the Blend Mode option in the Layers panel. A value between 40% and 60% often works well, allowing the wrinkles to become visible again while still benefiting from the smoothing effect.
This combination of blend modes and opacity allows you to "bring back" the natural texture and definition of the skin, ensuring that the retouching appears subtle and believable.
The Skin Retouching Technique That Makes You a Photoshop Pro
The "High Pass" Filter Technique for Softening Skin
Another advanced yet effective method for softening rough skin and wrinkles without blurring them out completely involves using the High Pass filter. This technique can also be applied to skies in landscape photos to reduce noise and texture.
Steps for the High Pass Softening Technique:
- Duplicate Layer: Press Ctrl + J (Cmd + J on Mac) to duplicate your background layer.
- Invert Layer: Press Ctrl + I (Cmd + I on Mac) to invert the duplicated layer.
- Change Blend Mode: Change the blend mode of this inverted layer to "Vivid Light."
- Apply Gaussian Blur: Go to Filter > Blur > Gaussian Blur. Set the Radius to a value that gives a slightly over-smoothed look. For example, a Radius of 24 might be a starting point, but this will vary based on image resolution. The goal is to create a subtle smoothing effect that can be dialed back later. Press OK.
- Select Brush Tool: Press 'B' for the Brush tool and select a Soft Round brush.
- Set Foreground Color: Make the foreground color white. You can do this by pressing 'D' (to reset to default black and white) and then 'X' (to swap them if needed).
- Adjust Flow: Set the brush flow to around 15 percent. This low flow allows for gradual application of the effect.
- Brush on Affected Areas: Brush the effect onto the areas of the face that need softening, such as wrinkles and rough skin. Be careful to avoid brushing over the eyes, as this can make them appear unnatural.
- Adjust Layer Opacity: Once you have applied the effect, you can lower the opacity of this layer to reduce the overall intensity of the softening effect to taste. An opacity of 67% is often a good starting point.
This method effectively softens harsh lines and textures while preserving the underlying detail, resulting in a natural-looking enhancement.
Considerations for Different Subjects
It's important to note that retouching techniques might need slight adjustments based on the subject's age and gender. For men, there can be a tendency to over-sharpen features, so softening might be more appropriate. For women, the goal is to avoid the plastic-like effect that can result from over-retouching.
Advanced Techniques and Alternatives
Using a Pen Tablet
If you do a lot of portrait retouching, using a pen tablet instead of a mouse can drastically speed up the workflow. A pen tablet allows for dynamic control of brush size and opacity with pen pressure, making detailed work much more intuitive and efficient.
AI Wrinkle Removers
For those who prefer not to delve into manual retouching or lack the time, AI-powered tools offer an alternative. Services like ImageEdit can automatically enhance images and tailor them to perfection, including wrinkle removal. These tools leverage artificial intelligence to analyze and modify images, providing a quick solution for wrinkle reduction.
Clothing Wrinkles
Interestingly, some of the same tools used for facial wrinkle reduction can also be applied to removing wrinkles from clothing in photographs. The Spot Healing Brush Tool, for instance, can be effective for "ironing" out garments. Experimenting with different blend modes (such as Replace, Multiply, Screen, Darken, Lighten, Color, and Luminosity) and Healing Types can yield varied results.
The Philosophy of Wrinkle Retouching
Ultimately, the approach to retouching wrinkles should be guided by a respect for the subject's natural appearance. Wrinkles are not merely flaws; they are testaments to a life lived, conveying stories and experiences. While technology allows us to alter these features, the most compelling portraits are those that enhance rather than erase the subject's individuality and history. Leaving skin pores and subtle facial hair is essential for maintaining a natural and believable portrait. The aim is to refine and enhance, not to create an artificial representation.