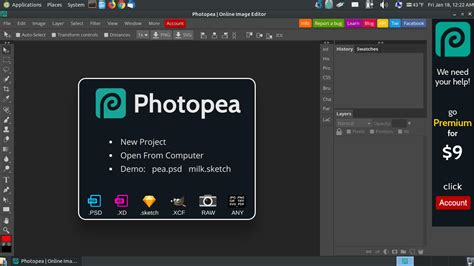
Photopea, a powerful and versatile online photo editor, offers a robust suite of tools for image manipulation. While working within Photopea, you'll often find yourself interacting with various file formats. Understanding how to save your work in the desired format, particularly as a JPEG, is crucial for both preserving your edits and ensuring compatibility across different platforms. This guide will delve into the intricacies of saving as JPEG in Photopea, exploring the underlying technologies, best practices, and the advantages of this ubiquitous image format.
Understanding Image Formats: The Foundation of Saving
Before we dive into the specifics of saving as JPEG, it's essential to grasp the fundamental differences between various image file formats. Photopea, like most advanced image editors, converts all opened files (unless they are already in PSD format) into its native PSD (Photoshop Document) format. This PSD format is a proprietary format developed by Adobe, and it serves as the primary working file within Photopea. The biggest advantage of creating a .psd extension file as compared to other image formats is that this format has the ability to store lots of information including text, layers, color profiles, masks, transparencies and alpha channels. The PSD format is divided into 5 parts which include the file header, color mode data, resources to edit the image, image related data and lastly the layer and mask information. The file header includes the version, image width, pixel width and height, number of channels and bits per channel. Color mode data provides information related to the length and image resources gives the resource ID to indicate the type of data stored in each block. The maximum height and width of a .psd extension file cannot exceed 30,000 pixels and its size cannot exceed 2 GB, which is the maximum limit for these files, however, this may change in future.
However, the PSD format is not always the most practical for sharing or displaying images on the web. This is where export options come into play, allowing you to convert your layered PSD into a more universally compatible format like JPEG.
Beyond PSD: A Glimpse at Common Image Formats
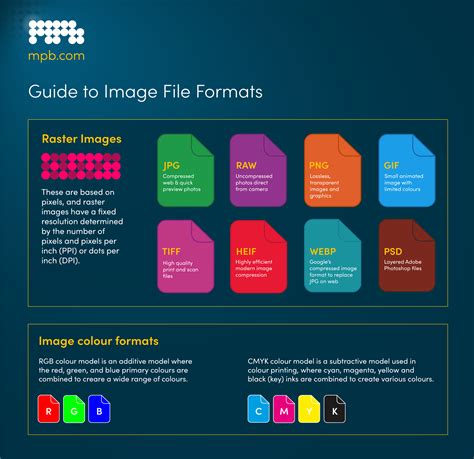
Photopea supports a wide array of export formats, each with its own strengths and ideal use cases:
- PNG (Portable Network Graphics): PNG is a transparent, lossless image format. This means it can preserve sharp edges and is excellent for graphics with transparency, such as logos or icons, and for web graphics, screenshots, and images with text or sharp edges.
- GIF (Graphics Interchange Format): The GIF format is known for its ability to support animation and transparency, though it has a limited color palette of only 256 colors. It's often used for simple graphics, logos, icons, and short animated images.
- TIFF (Tagged Image File Format): TIFF is a highly flexible format that can store multiple layers, transparency, and high-quality images. It supports lossless compression, making it a good choice for archival purposes or when maximum image quality is paramount.
- BMP (Bitmap): BMP is a basic, uncompressed image format. It supports various color depths and is frequently used for simple images and icons in Windows applications.
- SVG (Scalable Vector Graphics): SVG is a vector-based image format that uses XML markup. It's resolution-independent, meaning it can be scaled to any size without loss of quality, making it ideal for logos and illustrations that need to be displayed at various dimensions.
The Ubiquitous JPEG: Strengths and Limitations
JPEG (Joint Photographic Experts Group) is arguably the most widely used image format for photographic images. Its primary strength lies in its efficient compression, which significantly reduces file sizes without a drastic, perceptible loss of quality for most photographic content.
JPEG files store meta information of the images. Meta information includes the technical details of the images such as color spaces, color profiles and the height and width of images. Adobe RGB and sRGB are examples of JPEG color profiles. JPEG file compression is mostly used in the compression of photographs and life-like paintings which involve a nice range of tone and ample variations in color. This makes it an excellent choice for sharing photos online, embedding them in websites, and for general storage where file size is a concern.
However, the JPEG file extension is not suitable for multiple edits and isn't reliable for compressing highly technical data other than visual content. Each time an image undergoes JPEG compression, a drop in the resolution quality occurs. Applications where JPEG formats cannot be used include scientific data, technical processes, and medical imaging functions. Therefore, if your workflow involves extensive editing or if you need to preserve every single pixel of detail for scientific or technical purposes, JPEG might not be the ideal format for intermediate saving.
Lossless vs. Lossy Compression: A Critical Distinction
It's vital to understand the difference between lossless and lossy compression. Lossless formats, like PNG and TIFF (when using lossless compression), preserve all original image data. When you re-open a losslessly compressed image, it's identical to the original. Lossy compression, used by JPEG, discards some image data to achieve smaller file sizes. The best way to avoid this is to save the image in a lossless format and carry out its distribution by exporting it as a JPEG file. Lossless formats allow users not to lose out on image quality and restores all the pixel information when returned to its original size.
Saving as JPEG in Photopea: A Step-by-Step Process
Exporting files in various formats inside Photopea is a simple task. Once you have finished editing your photo, you will want to save your work in a format suitable for your needs. The most common need is to save it as a JPEG.
There are several ways of opening files. The standard way is through the Open dialog (File - Open). You can also paste images (from the system clipboard) simply by pressing Ctrl + V. There is an experimental feature, which allows you take pictures using the camera of your device right inside Photopea.
To save your image as a JPEG, follow these straightforward steps:
- Access the File Menu: Navigate to the "File" menu located at the interface's top-left corner.
- Select "Export As": From the dropdown menu, choose the "Export As" option. This action will open a dialog box dedicated to export settings.
- Choose JPEG Format: Within the "Export As" dialog box, you will see a section for format selection. Click on the format dropdown and select "JPG."
- Adjust Export Settings: After selecting "JPG," a new set of options will appear, allowing you to fine-tune your JPEG export. These settings typically include:
- Quality: This slider controls the level of compression. A higher quality setting means less compression and a larger file size, while a lower quality setting results in more compression and a smaller file size, but potentially more noticeable quality degradation. For most web use, a quality setting between 70% and 90% offers a good balance.
- Resize: You can also choose to resize your image during the export process. This is useful if you need to create a smaller version of your image for specific purposes.
- Metadata: You can choose whether to include or exclude image metadata.
- Save Your File: Once you are satisfied with the settings, click the "Save" button. Photopea will then process your image and save it as a JPEG file to your computer or designated download location.
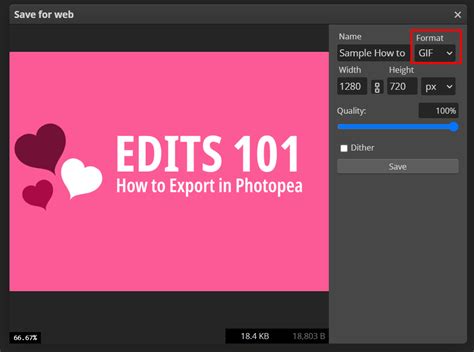
A file is saved when its most recent version is kept on your computer or another storage device. The "Save for Web" window, which is a feature in some image editing software, lets you choose the output format and often provides a preview of how the image will look with different compression settings. Photopea's "Export As" function serves a similar purpose, offering control over the final output.
Understanding the "Save for Web" Concept
While Photopea's primary export function is "Export As," the concept of "Save for Web" is important to understand in the broader context of image optimization. This feature, found in other editors, is specifically designed to produce the smallest possible file sizes for web use while maintaining acceptable visual quality. It often includes advanced options for optimizing JPEGs, GIFs, and PNGs for faster loading times on websites. Photopea's "Export As" dialog provides similar controls, allowing you to make informed decisions about your image's final presentation online.
When to Choose JPEG Over Other Formats
The decision of when to save as JPEG hinges on your intended use of the image.
- Photographs and Realistic Images: For digital photos, paintings with smooth gradients, and images with a wide range of colors and tones, JPEG is the ideal choice due to its effective compression that minimizes file size without significant visual compromise.
- Web Display: When uploading images to websites or social media, JPEGs are preferred because their smaller file sizes lead to faster page load times and reduced bandwidth consumption.
- Sharing and Archiving (with caveats): For general sharing of photos with friends and family, JPEG is convenient. However, for long-term archival where absolute fidelity is critical, consider saving a master copy in a lossless format like TIFF or PSD.
How to Prepare Graphics for Best Printing in Photopea (Best Settings to Use)
Advanced Considerations for JPEG Export
While the basic export process is straightforward, several advanced considerations can help you get the most out of your JPEG files:
- Color Profiles: JPEG files can store color profile information (like sRGB or Adobe RGB). sRGB is the standard for web content, ensuring that colors appear consistently across different devices. If your image was created or intended for print, you might consider working with Adobe RGB and ensuring your export settings preserve this profile if necessary, though for most web use, sRGB is sufficient.
- Progressive vs. Baseline JPEG: Photopea's "Export As" dialog may offer options for Baseline or Progressive JPEGs. Baseline JPEGs load from top to bottom. Progressive JPEGs load in a series of passes, appearing as a blurry image that gradually sharpens. For web use, progressive JPEGs can sometimes improve perceived load times, as users see a rough version of the image faster.
- Re-saving and Quality Degradation: Remember that each time you open a JPEG, make edits, and save it again as a JPEG, you are re-applying lossy compression. This can lead to cumulative quality degradation. The best practice is to always work with your original layered file (e.g., PSD) and only export to JPEG as the final step for distribution or display. This allows you to replace the old version of a file with a fresh export from the original, uncompressed (or losslessly compressed) source.
By understanding the nuances of image formats and the specific capabilities of Photopea's export functions, you can ensure your images are saved in the optimal format, whether it's for web sharing, print, or future editing. The ability to save as JPEG in Photopea is a fundamental skill that empowers you to share your creative work effectively.