Clip Studio Paint (CSP) is a powerful tool for digital artists, offering a wide array of features to bring creative visions to life. However, even experienced users can encounter frustrating issues, such as an overlay layer refusing to draw. This problem can manifest in various ways, from a seemingly unresponsive canvas to unexpected visual artifacts like red vertical lines. Understanding the underlying causes and potential solutions is crucial for a smooth and productive workflow.
The Enigma of the Semi-Transparent Eye Icon and Unresponsive Layers
One of the most common symptoms of this issue is the appearance of a semi-transparent "eye" icon next to a newly created layer. This visual cue often signals that the layer is not behaving as expected. When this occurs, users find themselves unable to draw on these new layers, with their artistic input only registering on the original, existing layer. This limitation can be particularly baffling when working within an animation project, where the expectation is to have independent control over multiple frames or elements represented by different layers.
The problem can be exacerbated by how Clip Studio Paint handles layers within animation folders. In animation, each layer within an animation folder is intended to function as an individual "cel," representing a single frame or element. When the desire is to have multiple layers within a single cel for more complex rendering or effects, a specific approach is needed. Simply creating new raster layers within an existing animation folder might not yield the desired result, as the software might interpret these as separate cels rather than distinct drawing surfaces for the same frame.
Decoding Layer Behavior: Cels, Folders, and the Power of Organization
To effectively manage layers within Clip Studio Paint, especially for animation, it's essential to understand the distinction between "cels" and "folders."
- Cels: In the context of animation, a cel is essentially a single frame or a distinct element that moves independently. In CSP, these are often represented by raster layers.
- Folders: Folders are organizational tools that can contain multiple cels or other folders, allowing for a hierarchical structure of your project.
When encountering the issue of being unable to draw on new layers within an animation context, the underlying problem often lies in how these layers are structured relative to the animation cels.
Option 1: Multiple Layers within One Cel
If the goal is to have several layers that all contribute to a single frame or element (i.e., multiple layers within one cel), the recommended approach is to convert your cels into "BASIC folders." These BASIC folders then act as containers, allowing you to place multiple raster layers inside them. Each of these internal raster layers can then be used for drawing, effects, or other artistic manipulations, all contributing to that single, unified cel. This method provides greater flexibility for complex layering within a single frame.
Option 2: Multiple Cels within One Folder
Conversely, if the objective is to have a sequence of distinct frames or elements (multiple cels) organized together, the proper method is to create a separate "ANIMATION folder." This top-level folder then serves as the container for individual cels. Each cel within this folder can be a standard raster layer or a group of layers that together form a single frame. This structure is fundamental for creating traditional frame-by-frame animation sequences.
Clip Studio Paint Animation 101 | Zedrin
Troubleshooting Specific Scenarios: From PNG Import to Overlay Layers
Beyond animation-specific issues, users may encounter problems with drawing on new layers even in standard projects. One user reported loading a PNG image into CSP, adding a new raster layer, and then being unable to draw on it with any tool - pen, pencil, or fill. While the thumbnail in the layer palette would change to reflect a fill, the actual canvas remained unaffected. This suggests a deeper issue with layer recognition or activation.
A similar problem arises when attempting to use "Clip to Layer Below" for shading. In this scenario, instead of the shadows being confined to the area of the layer beneath, the user experiences the creation of red vertical lines, and the brush strokes extend beyond the intended boundaries. This can be particularly perplexing as the transparent preview of the layers might show a distinct difference, indicating that the layers themselves are present and recognized, yet their interaction is flawed.
The solution, as discovered by one user, often lies in a process of elimination and re-creation. By creating a new layer with the same transparent preview settings as the problematic layer, and then attempting to draw on this fresh layer, the functionality can be restored. This suggests that the original layer might have become corrupted or entered an unforeseen state, and a clean slate resolves the anomaly. Restarting Clip Studio Paint is a common first step in troubleshooting, but in these cases, it appears to be insufficient.
Understanding Layer Modes and Their Impact
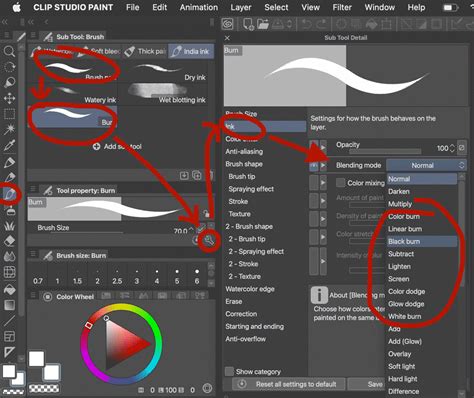
Clip Studio Paint offers a variety of layer modes that significantly alter how colors and values interact between layers. While not directly causing the "won't draw" issue, understanding these modes is crucial for achieving desired visual effects and can sometimes indirectly influence how a layer behaves or appears.
For instance, the "Add" or "Dodge" layer modes are frequently used for creating glowing effects. When working with these modes, it's vital to maintain a balance of values. Painting with overly bright colors on an "Add" layer can lead to overexposure, a common mistake where the image becomes too bright and details are lost. This is analogous to holding your hand up to the sun and seeing a red hue; the intense light washes out detail.
The principle behind the "Add" layer mode is that it adds the values of the current layer to the layers beneath. If the underlying layers have values up to 0.5, and the "Add" layer also has values of 0.5, the result can reach a maximum value of 1, which is the brightest possible. Exceeding this threshold results in overexposure. Therefore, when using these additive modes, it's often best to use colors in the lower half of the color wheel's value range to avoid blowing out the image. The "hard part" of a glow comes from these bright, concentrated light sources, while the "soft part" is the diffusion of this light into the surrounding areas. This careful management of light and shadow, often on separate layers, is key to creating believable and impactful visual effects.
Advanced Techniques and Troubleshooting Tips
When the standard layer creation and drawing functionalities fail, it's worth considering less obvious factors:
- Layer Properties: While less common, delve into the layer properties to ensure no unusual settings are enabled that might restrict drawing.
- Masks and Selections: Accidental masking or active selections can prevent drawing on a layer. Ensure no active selections are present and that any masks applied are not obscuring the entire layer.
- Brush Settings: While unlikely to cause a complete inability to draw, ensure that brush opacity and flow are set to appropriate levels.
- Software Updates: Always ensure you are running the latest version of Clip Studio Paint. Software bugs are occasionally introduced and then patched in subsequent updates. The user's report of using version 1.13.2 on Windows 11 indicates they are on a relatively recent version, but checking for even newer patches is always prudent.
- Corrupted Preferences: In rare cases, corrupted user preferences can cause unpredictable behavior. Resetting Clip Studio Paint's preferences to their default settings can sometimes resolve deeply ingrained issues. This is a more drastic step and should be done after backing up any custom settings.
The ability to draw on new layers is fundamental to digital art. When this capability is hindered, it disrupts the creative flow. By understanding the intricacies of Clip Studio Paint's layer system, particularly within animation contexts, and by employing systematic troubleshooting methods, artists can overcome these obstacles and return to the essential task of creation. The key often lies in recognizing how different layer types and modes interact and, when necessary, recreating problematic layers to ensure a clean and functional workspace.