Procreate, a powerful digital art application, offers a robust layer system that is fundamental to creating complex and editable artwork. Understanding how to effectively select and manage these layers is crucial for any artist, from beginners to seasoned professionals. This guide will delve into the various methods for selecting layers in Procreate, enabling you to perform bulk actions like moving, grouping, duplicating, and deleting with efficiency and precision.

The Fundamentals of Layer Management in Procreate
Procreate's layer system allows artists to build their artwork by stacking image elements on top of each other. This approach provides immense flexibility, enabling the modification of individual components without affecting other parts of the design. Each action taken within the Procreate canvas, such as painting, smudging, or erasing, is applied to the currently selected layer. The application clearly indicates the active layer by highlighting it within the Layers Panel.
When working with Procreate, you'll encounter the concept of a "Primary layer" and "Secondary layers." The Primary layer, which is the first one you select or the one you are currently actively working on, will appear in the Layers Panel as bright blue. Subsequent layers you select become Secondary layers and are indicated by a dark blue highlight. This distinction is key to understanding how multiple layer selections function.
Selecting Individual Layers
The most basic form of layer selection involves simply tapping on a layer within the Layers Panel. This action designates that layer as the Primary layer, making it the active target for any subsequent editing. This straightforward method is suitable for making minor adjustments to a single element.
Selecting Multiple Layers: The Core Functionality
The ability to control and edit multiple layers at once is a cornerstone of efficient workflow in Procreate. This allows for bulk moving, grouping, deletion, or transformation of several elements simultaneously, saving significant time and effort.
The primary method for selecting multiple layers in Procreate is through a simple swipe gesture. To select additional layers after you've already chosen a Primary layer, you need to swipe to the right on each desired Secondary layer. As you swipe, the layer will appear to slightly "bounce" to the right and then be highlighted in a slightly darker shade of blue, confirming its selection. You can continue this process, swiping right on as many layers as you wish to include in your selection.
If you find you've accidentally selected a layer, deselecting it is just as easy: simply swipe to the right on the already selected layer again. This toggles its selection status.
Understanding Layer Select and Gesture Controls
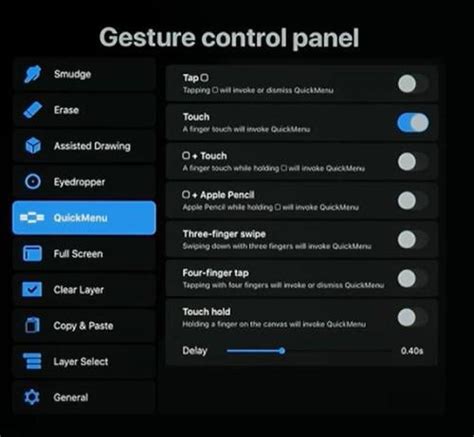
Procreate offers an advanced feature called "Layer Select" that allows for more intuitive layer management, particularly when dealing with complex canvases. Layer Select uses touch gestures to display all the layers associated with a specific area of the canvas.
To enable Layer Select, navigate to Actions (wrench icon) > Prefs > Gesture Controls > Layer Select. Once activated, layer-specific content will be highlighted as you move your finger or Apple Pencil around the canvas. Lifting your finger or stylus will then select the highlighted layer. This is exceptionally useful for isolating layers within a dense composition without needing to directly interact with the Layers Panel.
If multiple layers overlap in the area you're touching, a pop-up panel will appear, presenting all the available layers for you to choose from. This ensures you can precisely select the intended layer even in crowded sections of your artwork.
For users of the Apple Pencil Pro, Layer Select can be assigned to the squeeze function within Gesture Controls. This provides a hands-free method for selecting layers, further streamlining the creative process. It's important to note that the squeeze function can only be assigned to one gesture at a time.
When Layer Select is active, if you are painting, smudging, or erasing, and a group of layers is selected in the Layers Panel, Layer Select will also appear. This context-aware functionality enhances the selection capabilities based on your current actions.
Performing Bulk Actions with Selected Layers
Once you have selected multiple layers, a suite of powerful actions becomes available, significantly enhancing your ability to organize and manipulate your artwork.
Moving and Reordering Layers
To move or reorder selected layers, you can tap and hold on any of the selected layers or Layer Groups. This action allows you to "pick up" the entire selection. While holding, you can then drag the layers up or down within the layer order of the Layers Panel. This is invaluable for rearranging elements to achieve the desired visual hierarchy.
If you are in the Procreate Gallery and wish to move selected layers to a different canvas, you can tap and hold to pick up your layers, and then tap your destination canvas with another finger. This enables seamless transfer of layer groups between projects.
Grouping Layers
Grouping selected layers is a fundamental organizational technique. With your layers selected, you will find a "Group" option appear on the top right of the Layers Panel. Tapping this will bundle your selected layers into a single grouped layer. This not only tidies up your Layers Panel but also allows you to treat the entire group as a single unit for moving, transforming, or applying effects.
To view the contents of a group, tap the arrow on the right-hand side of the group name. This will expand or contract the group, revealing its individual layers.
To ungroup layers, open the Layers Panel, tap on the group name, and then select "Ungroup" from the pop-up menu.
Swipe left on a group to reveal options such as duplicating or deleting the entire group. The layer options context menu, accessible through various gestures, also provides options like renaming, clearing, and applying masks to layer groups.
Deleting Layers
The "Delete" option, appearing at the top right of the Layers Panel when multiple layers are selected, is a straightforward way to remove unwanted elements. However, it's crucial to remember that deletion in Procreate should generally be considered a permanent action. While an "Undo" function is available to reverse immediate actions, it's always wise to be certain before deleting layers, especially if they are complex or time-consuming to recreate.
How to Merge Layers in Procreate | Grouping vs Merging Layers
Duplicating Layers
Reproducing an existing layer or a group of layers is easily achieved with the "Duplicate" function. This is incredibly useful for creating backups, experimenting with variations of an element, or building up repeating patterns. When you duplicate a layer, an exact copy is created, placed directly above the original in the Layers Panel.
Locking Layers
To protect a completed layer or group of layers from accidental edits, Procreate offers a "Lock" feature. When you lock a layer, a small padlock symbol appears next to its name in the Layers Panel. This prevents any further modifications to that layer, ensuring that your carefully crafted elements remain untouched while you work on other parts of your artwork. This is particularly helpful when working with many layers or when collaborating on a project.
Advanced Layer Concepts and Functionality
Beyond basic selection and manipulation, Procreate offers more advanced features that leverage the power of layers.
Layer Masks
Layer Masks provide a non-destructive way to hide or reveal parts of a parent layer. You can add a layer mask to the layer underneath an active layer. Masks are edited using grayscale values: painting in black hides parts of the parent layer, while painting in white reveals them. Varying shades of gray allow for controlling opacity, creating subtle transitions and effects. Layer masks can also be inverted to quickly achieve the opposite hiding or revealing effect.
Clipping Masks
A clipping mask "clips" an active layer to the layer underneath it. This means that any content painted on the clipped layer will only appear where there is existing content on the layer below it. This is a powerful tool for applying textures, patterns, or specific effects to a particular shape or object without affecting the underlying layer directly.
Blend Modes
By default, content on a layer is set to "Normal" and is opaque, obscuring the contents of layers beneath it. However, Procreate offers a wide array of blend modes that alter how a layer's pixels interact with the pixels of the layers below. These blend modes are indicated by letters on the right-hand side of each layer in the Layers Panel. Scrolling through the blend mode menu allows you to choose different modes, such as Multiply, Screen, Overlay, and many more, each offering unique visual effects and ways to combine layers.
Procreate Pocket and Document Limitations
It's important to be aware of the limitations regarding the number of layers available in Procreate. Procreate Pocket documents and standard Procreate artworks have a maximum number of layers that varies depending on the document's size and resolution. Larger canvas sizes will typically support fewer layers compared to smaller ones. Understanding these constraints can help you plan your artwork and manage your layers effectively to avoid hitting limits.
Conclusion: Unleashing Your Creative Potential with Layer Mastery
Mastering layer selection and management in Procreate is not just about efficiency; it's about unlocking the full creative potential of the application. By understanding how to select, group, move, duplicate, delete, and protect your layers, you gain the power to build complex compositions with confidence, experiment freely, and refine your artwork with precision. Whether you're adding simple PNG images to create a sticker design or building an intricate digital painting, the techniques discussed here will serve as a solid foundation for your Procreate journey. Remember to explore the various gesture controls and advanced features to truly integrate layer management into your unique artistic workflow.