Procreate offers a powerful suite of tools to manipulate images, and its blur functions are essential for achieving a wide range of artistic effects, from subtle softening to dynamic motion. Understanding how to effectively use Gaussian Blur, Motion Blur, and Perspective Blur can significantly enhance your digital artwork, adding depth, focus, and visual storytelling. This tutorial will guide you through the intricacies of each blur type, explaining their applications and how to control them within Procreate.
Preparing Your Canvas for Blurring
Before diving into the blur effects, it's crucial to prepare your artwork correctly. The effectiveness of any blur application hinges on how your layers are organized.
Importing and Setting Up Your Background
For this tutorial, we'll be using a digital paper texture as a background, but any image can be used. To import your chosen file, navigate to the Actions panel, identified by the wrench icon. Within the Actions panel, tap on "Add" and then select "Insert a file." This will open your device's file browser, allowing you to locate and select the digital paper you wish to use. Once imported, populate your canvas with this digital paper to create a seamless background.
The Importance of Layer Organization
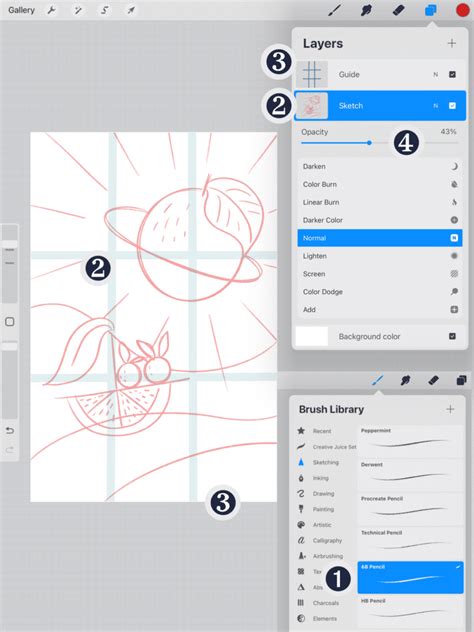
The most critical step in preparing your artwork for blurring is ensuring that each distinct element resides on its own layer. This separation of elements is fundamental to applying blurs selectively and effectively. Access your Layers panel by tapping the stacked squares icon. Here, you can view all the layers present in your artwork. To apply a blur to a specific part of your image, you must first select the corresponding layer. For instance, if you intend to blur only the background, select the layer labeled "Background." This meticulous layer management ensures that your blur effects are contained and precisely targeted.
Understanding Blur Application: Layer vs. Pencil
When you select a blur effect in Procreate, you'll encounter two primary application methods: "Layer" and "Pencil." Understanding the distinction between these two options is key to achieving the desired results.
Layer Blur: Global Application
The "Layer" blur option applies the chosen blur effect to the entire selected layer. This is a straightforward and comprehensive approach, ideal for when you want to uniformly soften or stylize an entire element or background. Once you've selected your desired blur type and chosen "Layer" as the application method, the blur will be applied across the entirety of the active layer.
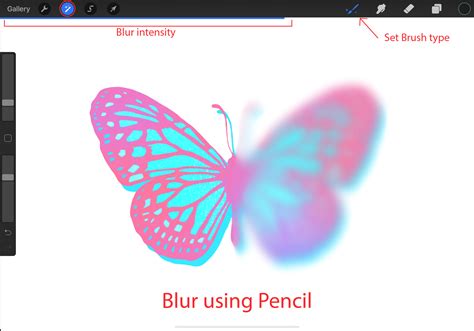
Pencil Blur: Targeted Precision
In contrast, "Pencil" blur allows for highly precise, localized blurring. When you select this option, the blur effect is applied only to the specific areas of your artwork that your digital pencil touches. This method offers granular control, enabling you to create selective focus or subtle diffusion on particular parts of your image. You can further refine this effect by adjusting the type of brush used, its size, and its intensity, allowing for intricate blur points on your artwork. For example, using "Pencil" blur, you could selectively soften a portion of a butterfly within your composition, creating a nuanced depth of field.
Exploring Procreate's Three Blur Types
Procreate offers three distinct blur filters, each designed to achieve a different visual outcome. Mastering these will elevate your artwork's aesthetic and narrative capabilities.
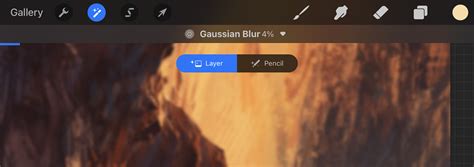
Gaussian Blur: The Softening Effect
Gaussian Blur is a fundamental and widely used blurring technique. It creates a soft, out-of-focus appearance by averaging the pixel values within a specified radius, weighted by a Gaussian function. This results in a smooth, natural-looking blur that is excellent for softening edges, reducing detail, or creating a sense of depth.
How to Apply Gaussian Blur:
- Navigate to the Adjustments panel (the wand icon).
- Select "Gaussian Blur" from the available blur options.
- At the top of the screen, you will see a blue bar labeled "Slide to adjust." Initially, it will be set at 0%-no blur.
- Press and drag your finger left or right on this slider to control the intensity of the blur. Dragging to the right increases the blur, while dragging to the left decreases it.
- Once you are satisfied with the intensity, tap on the Actions icon again to apply the blur.
Gaussian Blur is invaluable for creating atmospheric effects, simulating shallow depth of field, or gently unifying disparate elements within a composition. It's the go-to for achieving a classic, diffused look.
Motion Blur: Capturing Movement
Motion Blur is designed to simulate the effect of fast movement. It streaks pixels in a specific direction, creating a sense of speed and dynamism. This is particularly effective for portraying vehicles in motion, energetic actions, or any element that suggests rapid displacement.
How to Apply Motion Blur:
- Access the Adjustments panel (wand icon).
- Choose "Motion Blur."
- You will see the "Slide to adjust" bar. Initially, it's at 0%-no blur.
- Create the illusion of speed and motion by applying a streaky blur to your active layer. Drag your finger left or right to increase the amount of blur in the direction of your finger movement. The direction you drag your finger dictates the direction of the blur.
- To finalize, tap the Actions icon.
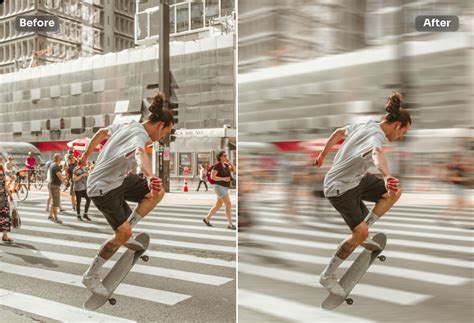
The key to effective Motion Blur lies in understanding the directionality. By swiping in the intended direction of motion, you create a more convincing and immersive effect.
Perspective Blur: Simulating Depth and Focus
Perspective Blur offers a more sophisticated way to manipulate focus and depth, mimicking how the human eye perceives objects at different distances. It allows for the creation of zooming and blasting effects by simulating a blur that emanates from or recedes into a specific point.
How to Apply Perspective Blur:
- Open the Adjustments panel (wand icon).
- Select "Perspective Blur."
- A disc will appear in the middle of the screen. This disc represents the point of origin for the blur. You can drag this disc around the canvas to change where the blur would "originate" from.
- At the top of the screen, the "Slide to adjust" bar displays how much blur is applied. Drag your finger to the right, anywhere outside the disc, to increase the amount of blur. Slide your finger left again to reduce the blur.
- You can also keep moving the disc around after applying the blur to reposition the focal point.
- For directional control, switch to "Directional mode." In this mode, the disc is larger and includes an arrow that displays which way your blur is pointing, allowing for more controlled radial effects.
- Tap the Actions icon to confirm the effect.
Perspective Blur is incredibly useful for drawing attention to a specific subject by blurring the surroundings, or for creating dramatic visual effects like a warp or a vortex.
How To Blur In Procreate
Advanced Techniques and Creative Applications
Beyond the fundamental application of each blur type, there are numerous ways to integrate them creatively into your workflow.
Combining Blurs for Complex Effects
Don't be limited to using just one blur type. You can achieve highly sophisticated results by layering and combining different blurs. For instance, you might use Gaussian Blur to soften a background and then apply a subtle Motion Blur to a foreground element to create a dynamic contrast. Experiment with applying blurs to duplicate layers, adjusting opacity and blend modes to fine-tune the final appearance.
Using Blurs with Layer Masks
For even greater control, utilize layer masks in conjunction with blur effects. Apply a blur to a layer, and then use a layer mask to selectively reveal or conceal the blurred areas. This allows you to precisely control where the blur is visible, offering a non-destructive way to refine your effects.
Blurs for 3D Lettering and Graphic Design
Blur effects are not just for photographic manipulation; they are also powerful tools in graphic design and typography. Gaussian Blur can be used to create soft, glowing effects or to add depth to 3D text. Motion Blur can imbue text with a sense of speed, making it ideal for sports graphics or dynamic logos. Perspective Blur can create unique, eye-catching typography that appears to recede or expand.
Enhancing Realism and Atmosphere
In digital painting, blurs can significantly enhance realism. Subtle Gaussian Blur can mimic the natural softening of focus in the human eye, making your scenes more believable. Applying a slight blur to distant objects can create a convincing sense of atmospheric perspective. Motion Blur can add energy to dynamic scenes, making them feel more alive.
Best Practices for Using Blurs in Procreate
To ensure your blur effects look professional and intentional, consider these best practices:
- Work Non-Destructively: Whenever possible, duplicate your layer before applying a blur. This allows you to revert to the original state or experiment with different blur intensities without permanently altering your artwork. Layer masks are also excellent for non-destructive editing.
- Consider the Purpose: Always ask yourself why you are applying a blur. Is it to soften a harsh edge, create depth of field, simulate motion, or guide the viewer's eye? Having a clear intention will lead to more effective results.
- Subtlety is Key: Often, less is more. Over-blurring can lead to a muddy or unappealing image. Start with subtle applications and gradually increase the intensity until you achieve the desired effect.
- Understand Your Subject: Think about how blur naturally occurs in the real world. For example, fast-moving objects are blurred in the direction of their movement, while objects far from the focal plane are softened uniformly. Mimicking these natural phenomena will make your blurs more believable.
- Test on Different Devices: If your artwork is intended for display on various screens, test how your blurs appear on different devices. Color and brightness can vary, affecting the perception of blur.
By mastering the Gaussian, Motion, and Perspective blur tools in Procreate, you gain the ability to refine your artwork with sophisticated depth, focus, and dynamic effects. Experimentation is encouraged - the more you practice, the more intuitive these powerful tools will become, allowing you to elevate your creative expression to new heights.