Removing the background from an image in Photoshop is a fundamental skill for digital artists, photographers, and designers. Whether you aim to isolate a subject for a composite, create a clean product shot, or simply declutter an image, Photoshop offers a robust suite of tools to achieve precise and flexible results. This guide delves into various methods, from quick automated solutions to intricate manual techniques, empowering you to master background removal for any scenario.
The Power of Selection: Tools for Background Isolation
Photoshop provides an array of tools designed to help you precisely select subjects and eliminate backgrounds. The effectiveness of each tool often depends on the complexity of the image, the contrast between the subject and background, and the desired level of detail.
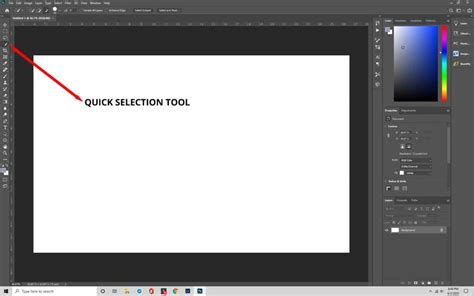
Quick Selection Tool: Speed and Simplicity
The Quick Selection tool is a go-to for many users due to its speed and intuitive nature. It leverages Adobe's Sensei AI technology to detect edges as you paint a selection. This makes it easier to separate your subject from the background, especially in images with clear distinctions.
- Best for: Quick selections, images with more complex details, and when there's a high contrast between your subject and background.
- How to use:
- Sign in to Photoshop and upload your image.
- In the toolbar, select the Quick Selection tool.
- Toggle the "Detect objects" switch on and choose your image subject. Photoshop will highlight it with a pink overlay.
- Press
Ctrl + C(Windows) orCmd + C(macOS) to copy the selected area. - Create a new layer via the Layers menu and paste the selection (
Ctrl + VorCmd + V). - Hide the original layer by clicking the eye icon next to it, leaving only your subject on a transparent background.
Remove Background Tool: One-Click Automation
For a truly effortless experience, Photoshop's Remove Background tool offers a one-click solution. This feature is ideal for images with a single subject against a simple background where smooth, perfect edges are not the absolute priority, or when time is of the essence.
- Best for: Images with a single subject against a simple background, and when you need to quickly erase backgrounds without worrying about intricate edge refinement.
- How to use:
- Open your image in Photoshop.
- Click the "Remove background" option, typically found in the Quick Actions panel or properties panel.
- Photoshop will automatically scan the image, identify the subject, and erase the background.
This tool is particularly useful as a starting point, after which you can refine the selection using other methods.
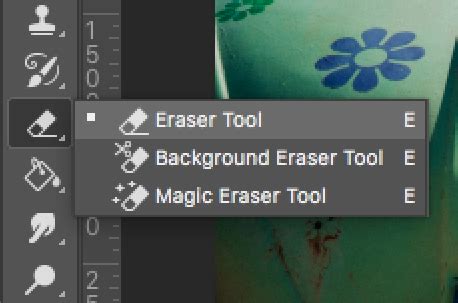
The Eraser Tool: Manual Precision
The Eraser tool provides the most granular control over your edits. It allows you to manually paint away the background around your subject. This method requires patience and a steady hand to avoid accidentally erasing parts of your intended subject.
- Best for: Erasing specific parts of a background, or working on images with irregular shapes where precise manual control is needed.
- How to use:
- Open your image in Photoshop.
- Select the Eraser tool from the left-hand menu.
- Adjust the brush size and hardness to your preference.
- Carefully glide the eraser over the areas you wish to remove. Zooming in is crucial for detailed work.
Advanced Techniques for Precise Selections
While automated tools offer convenience, achieving professional-grade results often requires more advanced techniques that offer greater control and flexibility.
The Select and Mask Workspace: Refining Edges
The Select and Mask workspace is a dedicated environment within Photoshop designed to help you create precise selections and masks. It minimizes distractions from the main interface, allowing you to focus solely on refining your edges.
- Key Features:
- Subject Button: A quick AI-powered selection that can be a great starting point, though it often requires further refinement. Note that this feature requires an internet connection.
- Global Adjustments: Tools like Feather and Smooth can be applied to the entire selection. However, for complex areas like hair, it's often better to address them separately.
- Refine Edge Brush Tool: This is invaluable for detailed areas like hair or fur. Painting over these areas with the Refine Edge Brush tells Photoshop to analyze and better separate the fine details from the background.
- View Modes: Different view modes (e.g., Overlay, On Black, On White) help you assess the accuracy of your mask.
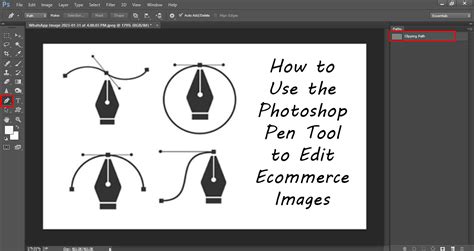
The Pen Tool: The Ultimate in Precision
The Pen Tool is a powerful, albeit time-consuming, method for creating highly accurate selections. It works by creating vector paths, which are essentially mathematical outlines that can be converted into selections. This is the preferred method for complex shapes and when absolute precision is paramount.
- Best for: Subjects with well-defined edges, intricate details, and when the highest level of accuracy is required.
- How to use:
- Open your image and duplicate the background layer.
- Select the Pen tool and ensure it's set to "Path" in the options bar.
- Zoom in closely to your subject.
- Click to place anchor points along the edge of your subject. For curves, click and drag to create Bezier handles.
- Continue around your subject until you close the path by clicking on the first anchor point.
- Once the path is complete, open the Paths panel (
Window > Paths). - Right-click on your saved path and select "Make Selection."
- To remove the background, invert the selection (
Select > Inverse) and press Delete.
Magnetic Lasso Tool: Edge-Adhering Selection
The Magnetic Lasso Tool is designed to "snap" to the edges of your subject as you move your cursor. It works by analyzing the color and contrast differences between adjacent pixels, making it a good option for objects with distinct edges.
- Best for: Objects with clear, contrasting edges where manual tracing is tedious.
- How to use:
- Select the Magnetic Lasso Tool.
- Click on a starting point along the edge of your subject.
- Move your cursor along the edge; the tool will automatically add anchor points where it detects a strong edge.
- Complete the selection by clicking back on your starting point or letting the tool automatically close the loop.
- Once the selection is made, you can invert it and delete the background.
Object Selection Tool: AI-Assisted Precision
A more recent addition to Photoshop, the Object Selection tool utilizes AI to automatically detect and select objects within your image. You can either draw a rectangle or lasso around the object, or simply hover over it, and Photoshop will attempt to identify and select it.
- Best for: Quickly selecting prominent objects in an image, especially when combined with other selection refinement tools.
- How to use:
- Select the Object Selection tool.
- Choose either the "Rectangle" or "Lasso" mode from the options bar.
- Draw a bounding box or lasso around the object you want to select.
- Photoshop will automatically create a selection around the detected object.
- Refine the selection as needed using other tools or the Select and Mask workspace.
Refining Your Mask: Achieving Flawless Edges
Often, even the most advanced selection tools leave behind slight imperfections, especially around fine details like hair or fur. The process of refining your mask is crucial for a professional finish.
Dealing with Remnants and Inclusions
After an initial background removal, you might encounter two common issues:
- Remnants of the original background: These are small specks or areas of the background color that were not entirely removed, appearing around the edges of your subject.
- Parts of the subject removed: Conversely, the mask might have inadvertently removed parts of your subject.
Both these issues can be corrected using the Brush Tool. Paint with black to hide any remaining background elements, and paint with white to restore any parts of your subject that were accidentally masked away.
Handling Color Casts
When removing a colored background, some of that color can reflect onto the edges of your subject, creating an undesirable color cast. To address this:
- Use the Brush Tool.
- Hold
Alt(Windows) orOption(macOS) to temporarily activate the Eyedropper Tool. - Sample a color from the subject's edge that is free of the color cast.
- Paint over the affected areas with this sampled color to neutralize the unwanted hue.
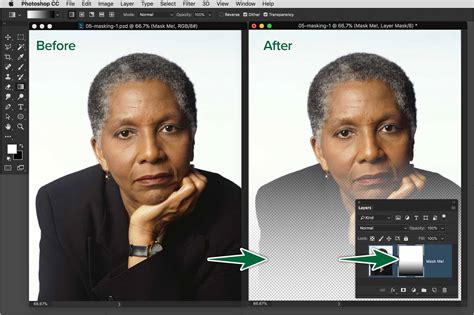
Utilizing Layer Masks for Flexibility
Instead of directly deleting the background, it's often more beneficial to use layer masks. A layer mask allows you to non-destructively hide parts of a layer.
- How to create a mask: After making your selection, click the "Add layer mask" icon at the bottom of the Layers panel.
- Benefits: You can always go back and refine the mask using the Brush Tool (painting with black to hide, white to reveal) without permanently altering your image data. This provides immense editing flexibility.
Beyond Photoshop: External Tools and Workflows
While Photoshop offers comprehensive background removal capabilities, there are external tools and workflows that can further streamline the process or provide alternative solutions.
Photoroom: AI-Powered Simplicity
For users with limited editing experience or those needing to process many images quickly, AI-powered tools like Photoroom offer an excellent alternative. Photoroom uses sophisticated image recognition and segmentation algorithms to automatically remove backgrounds, delivering high-quality results with minimal user input.
- Key Features:
- Automatic Removal: Upload an image, and Photoroom handles the background removal.
- Batch Mode: Process hundreds of images simultaneously, ideal for businesses.
- Additional Editing: Offers tools to resize, adjust lighting, and even create new AI-generated backgrounds.
Icons8 Background Remover: Fast and Precise Online Solution
Icons8 provides an online background remover that is known for its speed and precision. It can deliver professional-looking results in a matter of seconds, making it a great option for quick edits or when you don't have Photoshop readily available.
Professional Tips and Tricks
Mastering background removal involves more than just knowing the tools; it's about understanding how to apply them effectively.
The "Ignore and Mask Away" Philosophy
One of the biggest secrets professionals employ is that if an area is too challenging to select precisely, they don't waste time struggling with it. Instead, they use masking techniques to "ignore" those difficult areas and mask them away, focusing their efforts on the more critical parts of the image.
Utilizing Custom Brushes
For intricate details, especially in hair or fur, custom Photoshop brushes can be a game-changer. Downloading and installing specialized ABR files (Photoshop brush files) can provide brushes designed to mimic the texture and behavior of fine strands, making it easier to refine masks in these challenging areas.
- Installation: Download the ABR file and double-click it to automatically install the brushes into Photoshop.
Easy Complex Hair Masking in Photoshop - Quick Tutorial
The Three-Step Formula for Seamless Background Removal
A professional approach often involves a structured workflow:
- Initial Selection: Use an automated tool (like Quick Selection or Remove Background) or a precise tool (like Pen Tool) to get a base selection.
- Refinement: Employ the Select and Mask workspace, Refine Edge Brush, or manual masking with the Brush Tool to perfect the edges, paying close attention to fine details and color casts.
- Integration: Apply the mask to a layer and adjust as needed to blend seamlessly with any new background.
By combining these techniques and tools, you can confidently tackle any background removal task in Photoshop, achieving professional and polished results.
tags: #in #photoshop #remove #background