Coloring in Procreate offers a wonderfully accessible and relaxing entry point into the world of digital art, even for those completely new to the application. This comprehensive guide, drawing on various expert insights and techniques, will walk you through several effective methods for coloring digital coloring pages, alongside essential tips and tricks to enhance your workflow and elevate your creative output. Whether you're a seasoned Procreate user looking to refine your process or a complete beginner embarking on your first digital coloring adventure, this tutorial provides a step-by-step approach, complemented by visual aids and video resources.
Why Embrace Digital Coloring Pages in Procreate?
The appeal of coloring digital pages within Procreate is multifaceted, offering distinct advantages over traditional methods. Firstly, it serves as an incredibly beginner-friendly creative practice. The digital medium removes many of the barriers associated with physical art supplies. You can experiment freely without the concern of making permanent mistakes, thanks to the no mess, unlimited undo functionality. This freedom extends to your palette, offering endless color options that go far beyond the limitations of a physical crayon box or paint set.
Furthermore, working with digital coloring pages is an excellent way for newcomers to learn layers and selection tools, fundamental components of Procreate's powerful functionality. Understanding how to manipulate layers and define specific areas with selection tools is crucial for more complex digital art creation. Beyond the technical learning, digital coloring provides a relaxing way to build confidence with Procreate. The repetitive and often meditative nature of coloring, combined with the immediate visual feedback, can significantly boost a user's comfort level and creative self-assurance within the app. This makes it an ideal starting point for anyone feeling intimidated by the vast capabilities of digital art software.
Essential Tools for Your Digital Coloring Journey
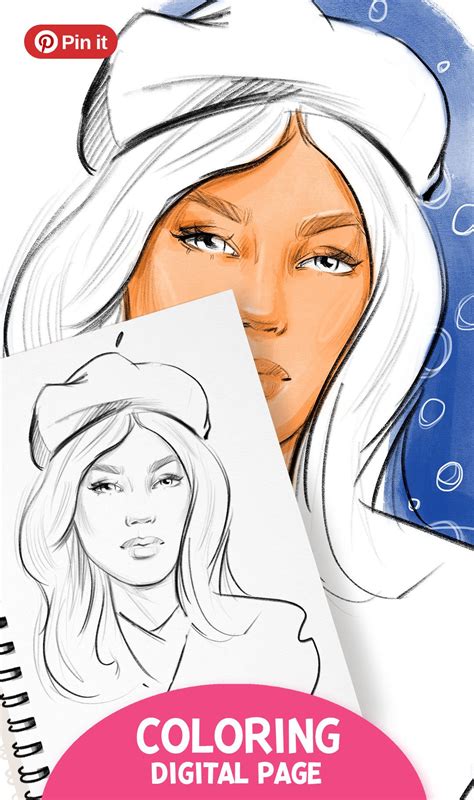
Before you dive into the coloring process, ensure you have the necessary tools at your disposal. At its core, you only need three key components: Procreate, an iPad, and a stylus. The specific model of iPad and stylus will influence the precision and responsiveness, but most modern setups will work effectively. Beyond the hardware and software, you will also need a digital coloring page file. Fortunately, Procreate is highly versatile, and most PNG, JPG, and layered files will work great for coloring projects. For this tutorial, examples are drawn from coloring pages like those found in the "Secret Garden Coloring Book," which are specifically designed to be compatible with digital coloring workflows.
How to Draw an Entire Coloring Book — Even If You’re a Beginner (No AI)
Importing Your Digital Coloring Page into Procreate
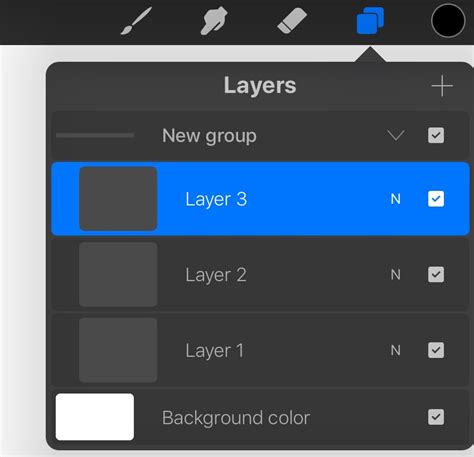
The first crucial step is to get your chosen coloring page into Procreate. To maintain the integrity and crispness of your line art, it's recommended to start by opening or importing your coloring page into a new canvas. This ensures that the resolution and dimensions are optimized for your work. Before you begin coloring, take a moment to check your layer setup. Understanding how your coloring page is structured within the layers panel is vital to avoid extra cleanup later. For instance, if your coloring page is a single image file, it will likely be on its own layer. If you've downloaded a layered file, you might have separate layers for line art and shading elements, which can offer more flexibility.
Diverse Coloring Methods in Procreate
Procreate offers a variety of techniques to color digital pages, each with its own strengths. Exploring these methods will help you discover what best suits your artistic style and the specific coloring page you're working with.
1. Drag and Drop Color Fill (ColorDrop)
One of the quickest and most intuitive methods is using Procreate's ColorDrop feature. This tool allows you to quickly fill closed shapes by dragging color from the palette into an area. To utilize this, select your desired color, then tap and hold the color swatch in the upper right corner of your screen. Drag this color down into the section of the coloring page you wish to fill.
A critical aspect of ColorDrop is the threshold slider. After you release your stylus, a small slider will appear, allowing you to adjust the threshold to control how tightly the fill hugs your line art. If the color spills out of the lines or doesn't fill completely, adjusting this slider is key. Dragging it to the right increases the sensitivity, making the fill hug the lines more closely, while dragging it left decreases sensitivity, allowing the color to spread further. For this method to be most effective, the areas you are filling should ideally be completely enclosed by lines, with no gaps.
2. Coloring with the Selection Tool
For more intricate designs or areas with small gaps in the line art, the Selection tool offers a more precise approach. Located in the upper left-hand menu (often represented by an 'S' or a ribbon icon), the Selection tool allows you to define an area first, then fill it cleanly without spillover.
Once you activate the Selection tool, you can choose different modes, such as "Freehand." With the Freehand mode, you can carefully trace the boundaries of the area you want to color. It's important to close the selection by tapping back on the starting point of your trace, which will be indicated by a circle. Once the selection is made, indicated by moving diagonal lines, you can then select your desired brush and color. Any marks you make will be confined strictly within the selected area, preventing any color from bleeding outside the intended boundaries. This method is especially helpful for detailed sections or spots with tiny gaps that ColorDrop might struggle with.
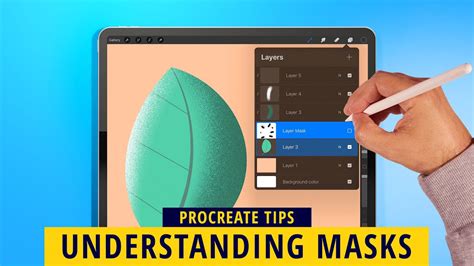
3. Using Reference Layers: Coloring on Layers Underneath Line Art
A highly recommended and professional technique involves utilizing Procreate's robust layer system, particularly by placing your color layers beneath your reference (line art) layer. This workflow ensures that your outlines stay sharp and separate from your coloring, providing a clean and polished look.
To implement this, first import your coloring page onto its own layer. Then, designate this layer as a "Reference" layer by tapping on its name in the Layers panel and selecting "Reference." This tells Procreate that this layer's content should be used as a guide for other layers. Next, create a new layer directly above your reference layer. This new layer is where you will apply your colors. When you use tools like ColorDrop on this new layer, Procreate will reference the lines on the layer below, ensuring your colors stay perfectly within the lines. This method gives you much more flexibility to edit, shade, and experiment without affecting the original lines. You can even lock your reference layer to prevent accidental edits.
Understanding Reference Layers in Procreate
When you select a layer as a reference, you're essentially telling Procreate to use the visual information on that layer as a guide for actions on other layers. This means that even though your colors are on a separate layer, Procreate "knows" where the lines are on the reference layer and will confine your coloring to those boundaries. It's a powerful feature that allows for non-destructive editing and greater creative control.
Pro Tips and Tricks for Cleaner and More Efficient Coloring
Beyond the basic coloring methods, Procreate offers several features that can dramatically speed up your workflow and lead to cleaner, more professional-looking results. Understanding and utilizing these tools can transform your coloring experience.
1. Clipping Masks and Alpha Lock
Clipping masks and alpha lock are indispensable tools for adding depth and detail without compromising the edges of your base colors.
- Alpha Lock: Once you've filled an area with color on a layer, you can "Alpha Lock" that layer. To do this, select the layer in the Layers panel, swipe left, and tap "Lock." When a layer is alpha-locked, you can only color within the existing pixels on that layer. This is perfect for adding shading or texture directly onto your base color without accidentally coloring outside the lines of that specific color block.
- Clipping Masks: A clipping mask works similarly but allows you to attach a new layer above your base color layer. By clipping this new layer to the layer below, any marks you make on the clipped layer will only appear where there are pixels on the layer beneath it. This is incredibly useful for adding highlights, shadows, textures, or even complex patterns without affecting the original color layer. You can have multiple clipping masks attached to a single base color layer, allowing for sophisticated detailing.
2. Blend Modes for Depth and Variation
Blend modes are a powerful way to alter how colors on one layer interact with the colors on the layers beneath them. While not strictly necessary for basic coloring, they are invaluable for adding depth, texture, and atmospheric effects.
One common and useful blend mode for coloring pages is "Multiply." If you place your line art layer on top of your colored layers and set the line art layer's blend mode to "Multiply," the black lines will darken the colors beneath them while remaining transparent where they are not. This can create a subtle, integrated look. Conversely, if you set your colored layer's blend mode to "Multiply" and place it underneath a white or transparent line art layer, it can help to subtly tint the white areas of the line art.
Another effective use of blend modes is when you want to color on a layer underneath your line art. By setting the line art layer's blend mode to "Multiply," the black lines will appear over your colors, and the white areas of the line art layer will become transparent, allowing your colors to show through. This is a fantastic way to achieve a traditional coloring feel where the lines are distinct.
3. Layer Management: One Color Per Layer
While it might seem like more work initially, I recommend doing each color on its own layer. This practice offers immense benefits for editing and refining your artwork later. If you decide you want to change the shade of a specific object, or even an entirely different color, you can simply select that object's layer and adjust it without affecting any other part of your illustration.
This approach makes it super simple to change your colors if you want to adjust them. For instance, if you decide that the blue you used for a flower isn't quite right, you can select the layer dedicated to that flower's color and use Procreate's recolor tools, alpha lock, or even the fill layer option to quickly update it. Watching video tutorials that demonstrate these color-changing techniques, such as using "Recolor" or "Alpha Lock/Fill Layer," can provide visual guidance on how to efficiently manage and modify your colors.
4. Brush Selection for Desired Texture
The choice of brush significantly impacts the final look of your colored page. Procreate boasts an extensive brush library, allowing you to mimic various traditional media.
- For a crayon look: Explore custom brush packs designed to replicate the texture and stroke of crayons.
- For colored pencil effects: Look for brushes that offer a grainy texture and a slightly drier appearance.
- For marker styles: Brushes that provide smooth, even coverage and sharp edges are ideal.
- Native Procreate Brushes: Don't overlook Procreate's built-in brushes. Brushes like "Tamar" from the Painting set can offer beautiful painterly effects, while the "Airbrush" set can be used for soft gradients and subtle shading.
Experimenting with different brushes is key to finding the aesthetic you desire. Some artists even recommend keeping a record of the brushes used for a particular piece to ensure consistency or to replicate a specific style in the future.
Common Beginner Mistakes to Avoid
Even with the powerful tools Procreate offers, certain common pitfalls can lead to frustration for beginners. Being aware of these can help you navigate your coloring journey more smoothly.
- Small Gaps in Line Art: As mentioned with ColorDrop, tiny gaps in your line art are the primary cause of color filling outside the intended area. Before using ColorDrop, zoom in and inspect your lines carefully. You can often use a small brush to manually close these gaps.
- Working on the Wrong Layer: This is arguably the most frequent mistake. If you're trying to color a section but your color isn't appearing, or if you're accidentally coloring over your line art, you're likely on the wrong layer. Always double-check which layer is currently active in the Layers panel before making any marks. Using reference layers and keeping line art on its own separate, locked layer can prevent this issue.
- Forgetting About Canvas Size and Resolution: When importing images, especially from external sources or PDFs, pay attention to the canvas size and resolution. If you create a canvas that is too large for the imported image, you might end up with blurry lines when you try to scale the image up. Conversely, a canvas that is too small might limit the number of layers you can use or impact the print quality. It's generally best to import the image directly into Procreate from your photo library or files app, allowing Procreate to create a canvas that matches the image's dimensions and resolution. If you need a specific print size, it's often better to start with a canvas set to that size (e.g., 8.5x11 inches at 300 DPI) and then import your coloring page, ensuring it fits appropriately without significant scaling.
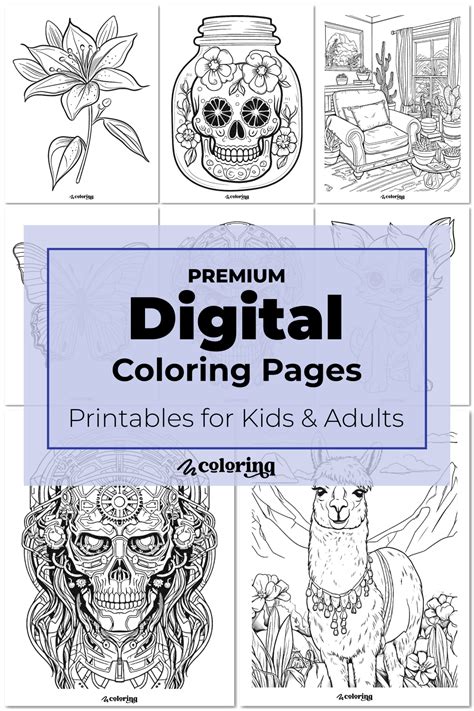
Practicing with Ready-Made Pages and Resources
To truly master these techniques, consistent practice is essential. Using ready-made coloring pages helps you skip the setup phase and jump straight into practicing techniques. This allows you to focus on learning the tools and developing your coloring style without the added complexity of creating the line art itself.
Many artists offer free coloring pages for download, which are perfect for practice. Resources like the "Secret Garden Coloring Book" are designed for both printing and digital use, making them ideal for Procreate users. Exploring these pre-made resources allows you to immediately apply the techniques discussed in this tutorial.
Final Thoughts on Your Procreate Coloring Adventure
Ultimately, thereâs no single "correct" coloring method in Procreate. The beauty of digital art lies in its flexibility and the ability to experiment. Try each approach and see what feels best for your style. The more you experiment with different tools, brushes, and techniques, the faster and more confident your Procreate coloring will become. Many artists, including experienced professionals, utilize a combination of all these methods for both coloring pages and creating original digital art from scratch. Embrace the process, have fun, and happy coloring and creating!