Embarking on the journey of creating your own stickers with Procreate is an exciting endeavor that blends artistic expression with practical application. This guide will walk you through the process, from sketching simple, charming illustrations to achieving a polished, realistic sticker effect within the app. Whether you're a budding digital artist or a seasoned Procreate user looking to expand your skills, you'll discover valuable techniques for transforming your artwork into tangible stickers.
Unleashing Your Inner Artist: Sketching with Procreate Brushes
The foundation of any great sticker lies in its artwork. Procreate offers a vast array of brushes, and for those seeking a playful, child-like aesthetic, the "Kids Make Art!" brush set is an excellent starting point. This free pack is designed to evoke the joy of childhood art, featuring brushes that mimic crayons, markers, paint, and colored pencils. These tools are perfect for creating simple yet endearing illustrations.
For the initial sketch, the Colored Pencil brush from the "Kids Make Art!" set provides a wonderfully tactile feel, allowing for expressive lines and shading. As you move to defining shapes, the Fine Point Marker brush is ideal for clean, crisp outlines. For fluid elements like a snake or a rainbow, the Marker brush offers a smooth, consistent stroke. Adding finer details and line work is easily accomplished with the Colored Pencil brush once more. To imbue your artwork with a touch of realism and depth, consider incorporating subtle shadows. The Soft Brush from Procreate's built-in Airbrushing set is perfect for gently blending and refining these shadowed areas, adding a sense of dimension to your characters and objects.
The "Kids Make Art!" brush set, comprising six high-quality Procreate brushes, is a fantastic resource for aspiring artists, especially younger ones learning the ropes of digital art. It also serves as a delightful gateway for anyone wishing to recapture the carefree spirit of creating art with traditional supplies. With brushes that authentically replicate beloved art materials, this free set opens up a world of creative possibilities.
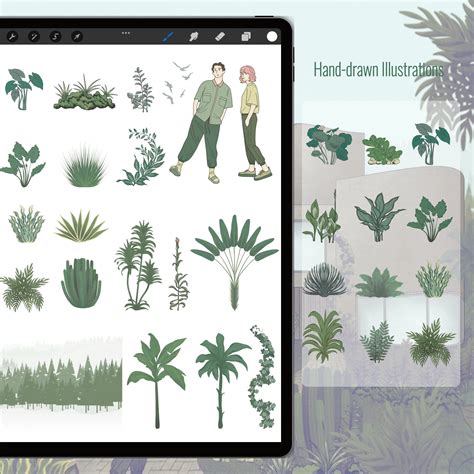
Bringing Illustrations to Life: Drawing Popular Sticker Motifs
With your chosen brushes at the ready, you can begin sketching a variety of popular sticker motifs. These are designs that resonate with a broad audience and lend themselves well to the sticker format.
The Tropical Palm Tree: Start with a simple curved line for the trunk, widening slightly at the base. For the fronds, draw several elongated, pointed leaf shapes emanating from the top. You can vary the angle and overlap of these fronds to create a natural, wind-swept look. Using the Colored Pencil brush will give the trunk a textured appearance, while the Marker brush can define the sharp edges of the leaves.
The Arching Rainbow: A classic symbol of hope and joy, the rainbow can be drawn with a series of concentric arcs. The Marker brush is excellent for achieving smooth, vibrant bands of color. You can experiment with different line weights for each color band to add visual interest.
The Adorable Dog: Begin with a basic head shape, perhaps a rounded square. Add two floppy ears and a simple snout. For the eyes, small dots or ovals work well. A curved line for the mouth can convey expression. The Fine Point Marker is ideal for defining the dog's features clearly.
The Playful Cat: Similar to the dog, start with a rounded head. Add triangular ears and two large, expressive eyes. A small, inverted triangle can serve as the nose, with a "w" shape below for the mouth. Whiskers can be added with thin lines using the Colored Pencil brush.
The Musical Ukulele: Draw an oval for the body of the ukulele, with a slightly indented top. Add a slender neck extending upwards, topped with a rectangular headstock. Four thin lines can represent the strings. The Marker Line details brush is perfect for the precise lines of the tuning pegs and strings.
The Sweet Ice Cream Cone: Sketch a classic cone shape, perhaps with some subtle texture lines. For the ice cream, draw one or two rounded scoops on top. You can add a cherry by drawing a small circle on the uppermost scoop.
The Mighty Dinosaur: For a simple dinosaur, start with an elongated, curved body. Add a long neck and tail, and a small head. Three or four simple legs will complete the basic form. The Marker brush can provide bold outlines for a strong silhouette.
The Savory Pretzel: Create a loop shape, then twist it into the characteristic pretzel knot. The Colored Pencil brush can add a slightly rough, baked texture to the pretzel.
These are just a few examples, and the possibilities are endless. The key is to keep the shapes relatively simple and bold, which translates well to the sticker format.
Achieving the Realistic Sticker Effect in Procreate
Once your illustrations are complete, the next step is to imbue them with a realistic sticker appearance. This involves several key techniques within Procreate.
Creating a Die-Cut Edge
The most common sticker style is the die-cut, where the sticker is cut precisely around the artwork. To achieve this, you'll need to create a selection around your illustration.
- Duplicate Your Artwork Layer: Always work non-destructively. Duplicate the layer containing your final illustration.
- Create a Vector Outline: On the duplicated layer, use the Alpha Lock feature. This ensures that any drawing you do stays within the bounds of your existing artwork. Now, select a brush that will serve as your cut line - a bold marker brush often works well. Carefully trace around the outer edge of your illustration, creating a solid, closed shape that follows the contours of your art. This new shape will represent the edge of your sticker.
- Fill and Expand: Fill this new shape with a solid color (white is a common choice for sticker backing, but you can use any color). Then, go to the Selection Tool (the dotted square icon) and ensure "Rectangle" is selected. Tap on your filled shape layer to create a selection. Go to the Adjustments menu (the magic wand icon) and select "Expand." Expand the selection by a few pixels (e.g., 5-10 pixels, depending on your canvas size and desired sticker thickness). This creates a small border around your artwork.
- Create the Sticker Backing: Create a new layer below your expanded selection and fill it with your chosen sticker backing color (e.g., white). You can also use a textured brush here to mimic paper.
- Refine the Cut: Deselect everything. You should now have your artwork, a colored border, and a sticker backing layer. You can further refine the cut by using the Eraser tool with a soft brush to gently blend the edges between the artwork and the border, or between the border and the backing, creating a more seamless transition.
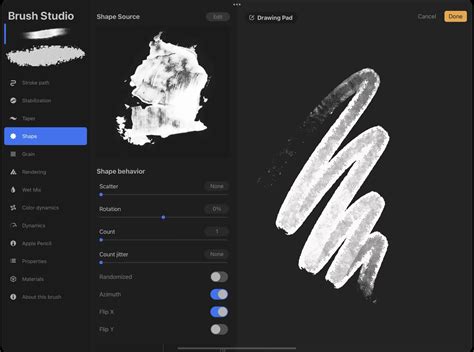
Adding a Realistic Shadow and Bevel
To make your sticker pop off the surface it's applied to, a subtle shadow and bevel effect are crucial.
- Duplicate the Sticker Layer: Duplicate the layer that contains your artwork and its die-cut border.
- Apply a Gaussian Blur: Go to the Adjustments menu and select "Gaussian Blur." Apply a moderate blur to this duplicated layer. This will serve as your sticker's shadow. Adjust the blur amount until you achieve a soft, natural-looking shadow.
- Position the Shadow: Use the Selection Tool to move this blurred layer slightly down and to the side. This creates the illusion that light is coming from above and to the front. Adjust the opacity of this shadow layer to make it more or less pronounced.
- Create a Bevel (Optional): For a more pronounced 3D effect, you can add a subtle bevel. Duplicate your original artwork layer again. On this new duplicate, apply a slight Gaussian Blur and then use the Adjustments menu to select "Liquify." Using the "Push" tool with a small brush size, gently push the edges of the artwork inwards, creating a subtle inward curve. This mimics the edge of a physical sticker. Alternatively, you can create a new layer above your artwork, clip it to the artwork layer, and use a white brush to paint a thin highlight along one edge and a dark grey/black brush to paint a highlight along the opposite edge.
How To Add DROP SHADOWS in Procreate | Procreate 101
Beyond the Digital: Producing Your Stickers
Once you've perfected your sticker design in Procreate, you have several options for bringing them into the physical world. The "Sticker Resource Page" serves as an ultimate resource for making stickers using Procreate art, detailing various methods from DIY to professional manufacturing.
Method 1: Printing at Home and Hand-Cutting
This is the most accessible method for creating a small batch of stickers.
- Prepare Your Canvas: Ensure your Procreate canvas is set to a suitable size and resolution for printing (e.g., 300 DPI).
- Export Your Sticker: Export your sticker design as a PNG file with a transparent background. If you've created a backing layer and shadow, you can export that as a separate layer or as a combined image.
- Print: Print your sticker design onto sticker paper using an inkjet or laser printer. Ensure you're printing at the correct scale.
- Cut: Carefully cut out your stickers using sharp scissors or a craft knife. For intricate shapes, a cutting mat is essential. This method requires patience and a steady hand for clean results.
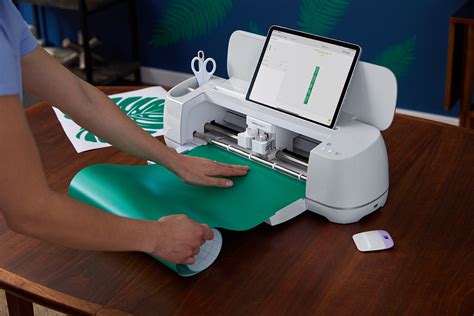
Method 2: Procreate and a Cricut Machine
For a more precise and automated cutting process, a cutting machine like a Cricut is invaluable.
- Design in Procreate: Create your sticker designs in Procreate, ensuring they have a clear outline that the Cricut can follow. You might want to add a small offset or border in Procreate to give the Cricut machine a clear cutting line.
- Export for Cutting: Export your design as a PNG or JPG file.
- Import into Cricut Design Space: Upload your image into the Cricut Design Space software.
- Create Cut Lines: Use the software's tools to create a precise cut line around your sticker design. You'll typically "flatten" your design to create a single layer for cutting.
- Print Then Cut: The Cricut machine will print registration marks around your design, and then its blade will precisely cut out your stickers. This method is excellent for achieving professional-looking results with intricate shapes.
Method 3: Ordering Professionally Printed Stickers
For larger quantities or a truly professional finish, ordering from a sticker printing company is the best option.
- Finalize Your Design: Ensure your Procreate artwork is finalized and meets the specifications of the printing company (resolution, color mode - usually CMYK for printing, file format).
- Choose Your Sticker Type: Companies offer various sticker materials (vinyl, paper), finishes (glossy, matte), and cutting options (die-cut, kiss-cut).
- Submit Your Artwork: Upload your design files to the printing company's website.
- Receive Your Stickers: Professionally printed stickers offer durability, vibrant colors, and precise cutting, making them ideal for businesses, events, or personal projects where quality is paramount.
Procreate Sticker Resource Page: Your Ultimate Guide
The "Sticker Resource Page" is your definitive hub for all things Procreate stickers. It delves deeper into the nuances of each production method, offering detailed tutorials and tips. Whether you're interested in the simplicity of home printing, the precision of a Cricut machine, or the professional quality of outsourced printing, this resource provides the knowledge to turn your digital art into beautiful, tangible stickers. It emphasizes that there are many ways to produce stickers, catering to different needs and scales of production.
Free Procreate Color Palette
To further enhance your sticker-making journey, a free Procreate color palette can be a valuable asset. Color palettes help maintain consistency and can inspire new design ideas. The "Kids Make Art!" brush set often comes with complementary color palettes, or you can create your own based on your desired aesthetic.
By combining the creative power of Procreate with thoughtful production methods, you can unlock a world of possibilities for your custom stickers. Whether for personal enjoyment, as a creative business venture, or simply to add a touch of artistic flair to your everyday items, making stickers in Procreate is a rewarding and engaging process.