Ansel Adams famously stated, "the negative is the score, and the print the performance." In the digital age, this sentiment translates directly to the RAW file as the score, and the final edited image as the performance. RAW files, much like film negatives, offer unparalleled malleability, granting photographers significantly more control over the final aesthetic of their images. This guide is meticulously crafted to help you harness the power of Darktable, an open-source RAW developer, to unlock the full potential of your RAW files. This tutorial is kept up-to-date with Darktable releases and is currently written for Darktable 5.4, released December 2025.
While nearly every modern camera, including many smartphones, can capture RAW files, it's crucial to ensure your camera is set to do so. Often, devices default to JPG capture, so consult your camera's manual or menu settings to locate the "image format" option and select RAW. The necessity of "developing" these RAW files, akin to processing film, can initially seem daunting. However, with the right tools and understanding, the process becomes both manageable and rewarding. Adobe Lightroom is a popular choice, but for those seeking more extensive adjustment options, Darktable presents a compelling, open-source alternative.
From RAW to Ready: Setting Up Your Darktable Environment
Before diving into the editing process, it's essential to establish a consistent working environment within Darktable. This ensures that default settings align with the tutorial's guidance, leading to predictable results.
Downloading and Installing Darktable:Darktable is readily available for Linux, macOS, and Windows. Download the appropriate installer from the official Darktable website and follow the on-screen instructions.
Initial Settings Configuration:Upon launching Darktable for the first time, you'll be greeted with a blank library screen. Navigate to the preferences by pressing Escape (on Linux, this is the typical method to close the preferences window and save changes). Within the preferences, locate the "processing" section and under "auto-apply pixel workflow defaults," select "scene-referred (agx)." While other workflows, such as "scene-referred (sigmoid)," are viable, sticking to "scene-referred (agx)" will ensure consistency with the rest of this tutorial.
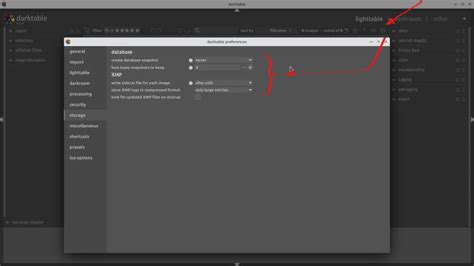
Importing and Organizing Your Images:Darktable's "Lighttable" view serves as your digital light table, a central hub for managing your image library. While Darktable offers import functionalities, it's not primarily designed for moving or renaming files. Many users prefer to maintain their own organizational system outside of Darktable. A common approach involves a directory structure based on year and month, followed by event names, with images named using a timestamp and event descriptor (e.g., YYYY-MM-DD_HHMMSS_event-name.ARW).
The Darktable import dialog provides key options:
- "Select only new pictures": Useful for folders where new images are regularly added.
- "Find new images recursively": Scans subfolders for new images.
Crucially, Darktable will not automatically add new images to its database. Manual import is required even if the folder is already recognized.
Navigating the Darktable Interface: Lighttable and Darkroom Views
Darktable offers two primary views: the Lighttable for organization and selection, and the Darkroom for editing.
The Lighttable View:This view is your central workspace for managing your photo library. You can zoom in and out of images, facilitating a closer inspection. For users who prefer keyboard navigation, Darktable offers numerous shortcuts. A fundamental shortcut is d, which toggles between the Lighttable and Darkroom views.
Culling Your Images:A critical step in any workflow is selecting the best images to edit. Darktable's "culling" mode, accessed by pressing x, allows you to compare images side-by-side. This is particularly useful for identifying the strongest shots from a series, especially when dealing with underexposed images where details might be obscured.
Streamlining Your Workflow with Keyboard Shortcuts:To expedite the process of reviewing and culling images, consider mapping essential functions to keyboard shortcuts. A highly recommended shortcut is mapping the Exposure module to Shift+e. This allows for rapid adjustment of exposure by holding Shift+e and using the mouse scroll wheel.
To set up custom shortcuts:
- Open the preferences pane.
- Select "Shortcuts" from the left menu.
- Expand the "processing modules" section.
- Scroll down to "exposure" and double-click on "exposure."
- Press
Shift+eto assign the shortcut. - Similarly, you can map
Shift+jandShift+kfor navigating between images (under "views >> darkroom" for "image back/image forward"). - Press
Escapeto save and exit preferences.
Testing your shortcuts in the Darkroom view by adjusting exposure and navigating between images will confirm their functionality. If issues arise, re-checking the shortcut assignments is recommended.
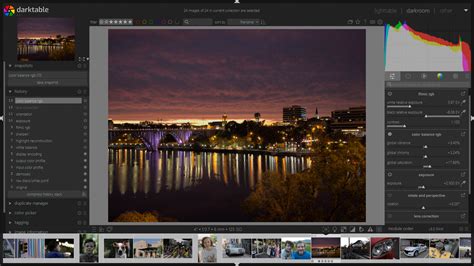
The Darkroom: Unveiling the Power of Modules
The Darkroom view is where the magic of RAW development truly happens. Here, you'll encounter Darktable's extensive collection of modules, each designed for specific image adjustments. While the sheer number of modules (over 60) can be intimidating, most users find themselves relying on a core set for their regular workflow.
Understanding Modules and Presets:Each module is a distinct tool for a particular type of adjustment. For instance, the Exposure module controls exposure, black levels, and other related settings. To manage this vast array of options, Darktable allows you to hide modules you don't frequently use, creating a personalized workspace.
Customizing Your Module Layout:
- Open the preferences and navigate to "Processing."
- Select "Manage module layouts."
- Click the preset dropdown and choose "workflow: scene-referred." This optimizes the module list for the chosen workflow.
- Click "Duplicate" and give your new layout a descriptive name (e.g., "My Workflow Layout").
- Customize this layout by deleting unnecessary columns (like the "quick access" column if not needed).
- Press
Escapeto save your custom layout.
This tailored approach ensures that only the modules you need are readily accessible, significantly streamlining your editing process.
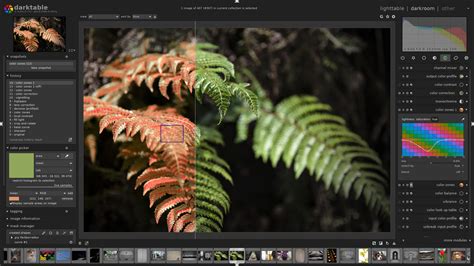
A Beginner-Friendly Workflow in Darktable 5.4
This section outlines a practical workflow for developing photos in Darktable 5.4, focusing on a few key modules to achieve a polished result efficiently. This workflow assumes you are using the "scene-referred (agx)" pixel workflow.
1. Demosaic Module (Capture Sharpening & Denoising):When you first open a RAW image in Darktable's Darkroom view, it might appear somewhat bland. This is because no camera profile is applied by default to mimic a JPG output.
- In the Demosaic module, enable "Capture sharpening." If your camera is supported, this option will apply a denoising profile tailored to your camera and the ISO of the image, performed early in the demosaicing process.
2. Lens Correction Module:This module applies profiled corrections for vignetting and distortion based on your lens's characteristics. If your lens is supported, a correction profile will be automatically applied. If not, you can leave this module disabled.
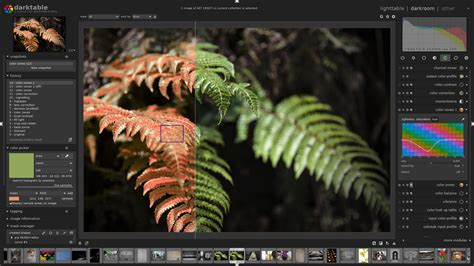
3. Crop Module:The Crop module functions similarly to those in other RAW editors. It offers pre-defined aspect ratios or a freehand selection for cropping your image.
4. Exposure Module:The Exposure module is crucial for setting your mid-tones to an appropriate level, ideally near mid-gray. This is important for subsequent tone mapping.
- You can use the picker tool to select an area of the image and adjust exposure based on that selection.
- By default, Darktable applies a +0.7 EV adjustment to all images, aiming to provide mid-tone brightening comparable to in-camera tone curves.
5. White Balance and Color Calibration:
- White Balance: In Darktable, the White Balance module is considered a technical module and is often best left at its default settings. It typically reads white balance information from the image's EXIF data.
- Color Calibration: This module allows for color corrections, similar to white balance tools in other editors. While it offers more advanced options, for a basic workflow, you can rely on the default settings which utilize the image's EXIF data. The picker tool here also allows for manual adjustment.
darktable ep 083 - Color Calibration module (pt 2 of 2 - white balance)
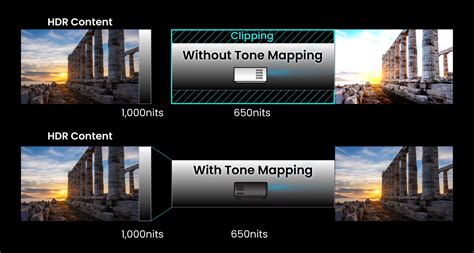
6. Tone Mappers (AGX):Tone mappers are vital for converting the high dynamic range of a RAW file into a displayable range. The agx module, new in Darktable 5.4, is a powerful tone mapper that often yields excellent results, particularly with subtle color shifts in subjects like flowers and insects.
- Within the
agxmodule, click the picker icon for "Auto tune levels." This will automatically adjust contrast and color. A warning icon next to the "shoulder power" slider is normal and can be disregarded for this workflow.
7. Sharpening and Local Contrast (Diffuse or Sharpen / Contrast Equalizer):Darktable offers several modules for sharpening and local contrast.
- Diffuse or Sharpen Module: This is a complex but powerful module with many useful presets. The "lens deblur | medium" preset is often adequate for sharpening.
- Contrast Equalizer Module: This module can achieve similar results to Diffuse or Sharpen but with a different interface. The "clarity" preset can add "pop" to your subject by applying a uniform change in contrast.
8. Color Balance RGB Module:This module provides refined controls for vibrance, chroma, and saturation, offering more natural adjustments than simple global saturation sliders found in other software.
- Saturation Adjustments: Darktable's understanding of how our eyes perceive saturation in different tonal regions allows for more nuanced control. A common starting point involves increasing shadow saturation, mid-tone saturation, and slightly decreasing highlight saturation. The "global vibrance" control can restore colorfulness in less saturated areas.
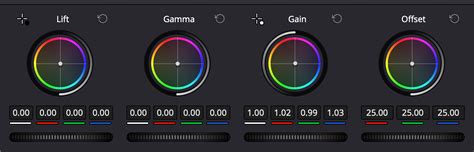
- "4 Ways" Tab: This tab allows for color grading. You can use the picker tool to select specific areas for color adjustments, neutralizing color casts or applying creative color grading.
Advanced Techniques: Module Instances and Masks
Darktable's true power lies in its advanced features, including module instances and masking.
Module Instances:Modules can be duplicated to perform different tasks. For example, the Exposure module can be duplicated to manage global exposure separately from local adjustments using masks. Similarly, the Color Balance RGB module can have multiple instances dedicated to saturation, contrast, and color grading. To create a new instance, right-click on the module header and select "duplicate." You can then label each instance for clarity.
Masking:Masks allow you to apply edits to specific areas of an image. Darktable supports various mask types:
- Shape Masks: Basic geometric shapes.
- Drawn Paths: Custom drawn masks.
- Parametric Masks: Based on attributes like hue, saturation, or luminosity.
- Combination Masks: Blending different mask types.
To apply a mask to a module:
- Click the mask icon at the top of the module.
- Choose your desired mask type and adjust its parameters.
- For example, when applying sharpening with the Diffuse or Sharpen module, you might draw a mask around the in-focus subject to avoid over-sharpening the background. You can then reuse this mask for other modules, such as the Contrast Equalizer, by selecting "use same shape as" within the mask manager.
Leveraging Styles and Presets for Efficiency
Presets:Many modules come with pre-installed presets that offer a quick starting point. You can also save your own custom presets for specific module settings. To create a preset:
- Adjust the module's sliders to your desired settings.
- Click the module's hamburger icon (three horizontal lines).
- Select "save as new preset" and give it a descriptive name.
Styles:Styles are more comprehensive than presets. They capture an entire image processing history, allowing you to apply a sequence of module adjustments to one or multiple images with a single click.
To create a style:
- Edit an image with your preferred basic processing steps.
- In the Lighttable view, select the edited image.
- In the right-hand panel, find the "Styles" section.
- Click "Create."
- A list of applied modules will appear. Untick any modules you don't want to include in the style.
- Give your style a unique name and click "Save."
To apply a style:
- Select one or more images in the Lighttable view.
- In the Styles panel, click your newly created style name.
- Click the "Apply" button.
Styles are invaluable for applying consistent basic edits to large batches of images, significantly speeding up your workflow.
Further Resources and Learning
The Darktable community offers a wealth of resources to deepen your understanding:
- The Official Darktable Manual: Considered an excellent and comprehensive resource.
- Darktable Tutorials Hub: Provides a range of tutorials from beginner to advanced.
- "darktable vs Lightroom" and "Migrating from Lightroom to darktable": Articles that can help users transitioning from other software.
- User-Created Styles: The Darktable website and community forums often link to user-created style libraries.
It's crucial to be aware that online resources, especially video tutorials, can quickly become outdated due to Darktable's rapid development. Always verify the information against the current version of Darktable. Furthermore, avoid the misconception that Darktable is simply a "Lightroom clone." While it offers equivalent functionality, its workflow and underlying principles are distinct. Embracing Darktable's unique approach will lead to a more rewarding editing experience.
By mastering the concepts of modules, presets, styles, and the powerful masking system, you will unlock the full potential of your RAW files and elevate your digital photography to new heights.