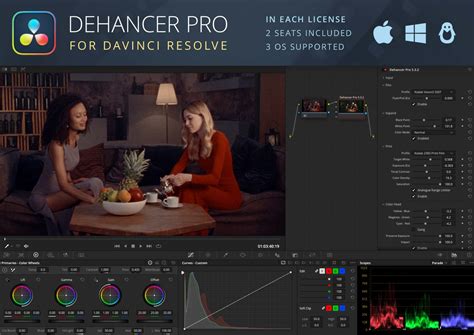
The allure of film, with its distinctive personality and organic rendering of light, has long captivated filmmakers. While digital cinematography offers unparalleled convenience and cost-effectiveness, many perceive a gap in achieving that coveted "film look." Dehancer, a powerful plugin for DaVinci Resolve, bridges this divide by meticulously emulating the complex characteristics of analog film. This tutorial delves into the intricacies of using Dehancer, guiding you through its installation, activation, and the nuanced application of its tools to imbue your digital footage with authentic filmic qualities.
The Genesis of Dehancer: Emulating Film's Soul
Digital sensors, by their nature, capture images differently than film. While a digital sensor records linear data, film stock possesses inherent, non-linear responses to light and color. These characteristics are shaped by the film's emulsion, the chemical development process, and even the optical printing stage. Dehancer's developers, possessing their own film lab and a deep understanding of these analog processes, have engineered a tool that goes beyond superficial effects like simple grain or bloom. They have studied countless film stocks, researched human visual perception, and developed sophisticated mathematical models to accurately replicate the entire film workflow. This dedication to accuracy is what sets Dehancer apart, offering a genuine emulation rather than a mere approximation.
Installation and Activation: Setting the Stage
Before embarking on your Dehancer journey, a straightforward installation process is required.
Installation on macOS:
- Ensure your computer meets the system requirements for the plugin to function correctly.
- Download the latest version of the plugin from the official Dehancer website. Navigate to "Products," select "Dehancer Pro," and choose the free trial or purchased version. Select macOS as your operating system and initiate the download.
- Unzip the downloaded file.
- Close DaVinci Resolve if it is currently running.
- Run the installer application and follow the on-screen instructions. Older versions are typically removed automatically, but if compatibility issues arise, the new version may install as a separate plugin.
- Restart DaVinci Resolve.
- Within DaVinci Resolve, navigate to Preferences > System > Memory and GPU and confirm that the Metal option is available and enabled.
Installation on Windows:
- Verify that your system meets the plugin's requirements.
- Download the latest plugin version from the Dehancer website. Go to "Products," select "Dehancer Pro," choose Windows as your operating system, and download.
- Unzip the downloaded file.
- Ensure DaVinci Resolve is closed.
- Run the appropriate installer: CUDA for NVIDIA GPUs or OpenCL for AMD GPUs. Follow the installation steps. Similar to macOS, older versions are usually uninstalled automatically.
- Restart DaVinci Resolve.
- In DaVinci Resolve, go to Preferences > System > Memory and GPU and select CUDA for NVIDIA or OpenCL for AMD.
Installation on Linux:
- Confirm your system meets the necessary specifications.
- Download the latest plugin version from the Dehancer website. Access "Products," select "Dehancer Pro," choose Linux, and download.
- Unzip the downloaded file.
- Close DaVinci Resolve.
- Run the installation file and follow the installation prompts. Older versions are generally removed during the process.
- Restart DaVinci Resolve.
- In DaVinci Resolve, navigate to Preferences > System > Memory and GPU and ensure the compatible GPU option is selected.
Adding Dehancer to Your Project:
After installation, you'll need to add Dehancer to your DaVinci Resolve project.
- Open DaVinci Resolve and ensure you have a timeline with footage.
- Navigate to the Color tab.
- In the Library panel, locate "Dehancer" within the Film Emulation plugin section.
- Drag and drop the "Dehancer" plugin onto a node of your chosen clip.
License Activation and Profile Download:
- With Dehancer added to a node, scroll down within the Dehancer settings area on the right side of the Color Page.
- Set the quality to "High."
- Click "Disable All Tools" to start with a clean slate.
- If you have purchased the plugin, click "License Info," paste your license key, and activate.
- Click "Check Profiles." This will open the Dehancer Profiles widget, allowing you to download and install essential film and camera profiles. Close the widget once complete.
Troubleshooting Plugin Visibility:
If Dehancer does not appear in the plugin library or fails to load:
- Go to DaVinci Preferences > System > Video Plugins.
- Re-enable the checkbox for the Dehancer plugin(s).
- Restart DaVinci Resolve.
Navigating the Dehancer Interface: A Deep Dive
Once installed and activated, Dehancer presents a comprehensive set of tools designed to meticulously recreate analog film characteristics. Understanding the order and purpose of these tools is crucial for effective emulation.
Input Settings: The Foundation
The "Input" section of Dehancer provides fundamental adjustments that are processed early in the plugin's pipeline.
- Exposure, Temperature, Tint: While these tools are available, many users, including the author, prefer to make these primary adjustments within DaVinci Resolve's native tools, such as the Camera RAW tab for BRAW footage or the Resolve HDR palette. This allows for meta-data level adjustments or more direct control before applying film emulation.
- Defringe: This tool addresses chromatic aberrations, which manifest as color fringing or "rainbow" artifacts around high-contrast edges. Some Dehancer tools can react negatively to these aberrations, making "Defringe" a valuable correction tool. Remember to enable the checkbox for any changes to take effect. Chromatic aberration occurs when light waves bend as they pass through a lens, causing different colors to focus at slightly different points on the sensor.
It's important to note that adjustments made in the "Input" section precede those in subsequent modules. For instance, an "Input" exposure adjustment happens before an exposure adjustment within the "Print" module.

The "Film" Module: Emulating the Negative
This is where the core film emulation begins. Here, you select a specific analog film stock to influence your digital footage.
- Choosing a Film Stock: Dehancer offers an extensive library of film stocks, including popular Kodak Vision3 variants like 50D (daylight balanced, low ISO), 250D (daylight balanced), 200T (tungsten balanced, for lower light), and 500T (tungsten balanced, for low light). The "T" signifies tungsten balance, while "D" indicates daylight. Negative film, akin to log or raw footage, requires further interpretation to be viewed as a positive image. It's developed and then optically printed onto positive film.
- Push/Pull (Ev): This powerful setting manipulates exposure in a way that mimics the nuanced effects of pushing or pulling film. Unlike digital exposure adjustments that primarily affect highlights and shadows, film's response is non-linear and impacts color rendition. Dehancer has meticulously tested exposure changes on their film stocks to provide accurate "Push/Pull" data. These settings are dynamic and change based on the selected negative film stock.
Expand: Fine-Tuning Contrast
Dehancer recommends adjusting "Expand" before diving deep into "Film Developer" or "Film Compression" when working with a negative film stock.
- Contrast Adjustment: Film stocks have inherent contrast curves and black/white points. Dehancer avoids digital corrections on their end to maintain accuracy. When applying a negative film stock, you might observe a loss of contrast. The "Expand" tool allows you to compensate for this by adjusting the black point. Lowering the black point increases contrast, while raising it decreases contrast. While this tool is crucial, it's advised not to spend excessive time here initially, as other tools also influence contrast and exposure.
Film Developer: The Creative Lab
This module simulates the creative choices made during the film development process, allowing you to act as a lab technician.
- Contrast Boost: Directly increases the contrast of the image.
- Gamma Correction: Adjusts the mid-tones, shifting them towards the shadows or highlights.
- Color Separation & Color Boost: These tools manage saturation. "Color Separation" relates to the color filters within the film's emulsion layers. Defaulting to 100%, lowering this value desaturates the most intense colors first.
- Emulsion Layer: The emulsion is a gelatin layer containing crystals that react to light.
Dehancer's tools are designed to mirror specific stages of analog film development, including optical scanning and printing. This allows for creative applications across the entire chain.
Film Compression: Managing Dynamic Range
When shooting film, highlights don't clip as abruptly as they do with digital sensors. The "Film Compression" tool aims to replicate this behavior, though it cannot recover data clipped beyond digital sensor limits.
- Compressing Extremes: This tool brings extreme highlights and shadows back towards the mid-tones, simulating how film handles dynamic range.
- Impact: Controls the intensity of the compression.
- White Point: Dictates the transition point to the clipped area. Lowering this value increases contrast in the clipped range.
The "Print" Module: The Final Output
After selecting a negative film stock, the "Print" module allows you to apply the characteristics of a print film, emulating the optical printing process.
- Print Film Stocks: Dehancer offers two primary print film stock choices: Fujifilm 3513 and the classic Kodak 2383. Combining a Kodak Vision3 negative with Kodak 2383 print film can yield significant transformations in your footage.
- Target White & Color Temperature: This allows for fine-tuning of color temperature and subtle color shifts. By combining negative film choices with specific print film settings and color adjustments, you can achieve unique looks that are difficult to replicate with single tools.
- Exposure: Simulates exposure adjustments during optical printing. Dehancer suggests working with "Tonal Contrast" first, as exposure influences their interaction.
- Tonal Contrast: Employs sophisticated non-linear compression to adjust contrast. Always monitor your scopes to avoid clipping.
- Color Density: Provides perceptual saturation, affecting more significant colors to a greater degree.
- Color Head: Simulates changing the color of the light used for print exposure, allowing adjustments from 5500K to 6500K. You can adjust these individually or in unison, and even specify where these color changes occur (shadows, mid-tones, highlights) to mimic analog film's non-uniform color response.
- Preserve Exposure: When set to 100%, this ensures that color changes from the "Color Head" tool do not affect the overall exposure, preserving your dialed-in skin tones.
- Impact: Acts as an overall opacity control for the "Color Head" tool.
Dehancer recommends using "Color Head" over making adjustments in the "Input" section for color temperature and tint, as it offers a more authentic analog emulation.

Film Grain: The Organic Texture
Authentic film grain is not an overlay but an intrinsic part of the image. Dehancer reconstructs your footage to achieve this analog feel.
- Film Type and ISO: Choose from various film types (e.g., 8mm, 65mm) with different ISO settings. Lower ISOs result in less grain. The 65mm ISO 500 option is shown as an example.
- Amount: Controls the overall intensity of the grain.
- Custom Profiles: Selecting a film profile and then "Custom" allows you to access and modify all the individual settings that constitute that profile, including size, amount, and resolution. You can even specify grain distribution across shadows, mid-tones, and highlights.
- Chroma: Relates to the film emulsion layer.
- Film Type (Grain): Positive film generally has less grain than negative film.
- Mode: For final output, "Analog" is recommended. "Noise" can be used for quick previews.
This sophisticated grain tool is central to Dehancer's accurate emulation.
Film grain. What is it and how to emulate it?
Advanced Emulation Tools: Halation, Bloom, and More
Dehancer includes several other tools that further enhance the analog film emulation.
- Halation: This effect creates a red/orange glow or halo around bright light sources and high-contrast areas, a characteristic of film emulsion. However, it can affect skin tones, so caution is advised.
- Bloom: Mimics the soft glow often seen with vintage lenses or achieved with diffusion filters like Black Pro Mist. Dehancer's Bloom tool is preferred over in-camera filters as it avoids baking the effect into the image and can be more predictable with anamorphic lenses.
- Mask Mode: Some tools, like Bloom, offer a mask mode to visualize exactly which areas of the image are being affected.

- Film Damage: Replicates the imperfections of analog film, such as dust, hair, and scratches, adding a vintage aesthetic.
- Film Breath: Addresses frame-to-frame exposure variations, a common issue in older film projection.
- Gate Weave: Simulates the physical movement of film in the camera gate. These tools are generally for highly specific stylistic choices.
- Overscan: Emulates scanning outside the standard image area, sometimes revealing film perforations. This can be adjusted to match different film stocks.
- Vignetting: While often considered a lens flaw, vignetting can be used creatively. It's advisable to apply this early in your node tree as it can impact exposure and contrast.
Monitoring Tools: False Colors and Output
- False Colors: Dehancer includes a False Colors implementation, which can be useful for exposure monitoring if you don't have other preferred tools.
- Total Impact: Located under "Output," this setting allows for a global adjustment of all the changes made within a specific Dehancer node.
- LUT Generation: While not explicitly detailed, the presence of output settings suggests the potential for generating LUTs based on your Dehancer adjustments for use elsewhere.
Practical Application and Workflow
When faced with grading a project, even with DaVinci Resolve's powerful native tools, Dehancer offers a unique and often faster path to achieving a cinematic film look. While the plugin has a cost, its effectiveness and the time it saves in achieving authentic analog aesthetics can make it a worthwhile investment. The author notes that after using Dehancer, they were 90% through grading their current film with native Resolve tools, highlighting the plugin's transformative power.
By understanding and applying the principles of analog film emulation through Dehancer's meticulously crafted tools, filmmakers can elevate their digital footage, imbuing it with the timeless character and visual richness that has defined cinema for decades.