The world of digital photography offers an incredible canvas for creativity, but unlocking its full potential often requires mastering sophisticated software. For many photographers, Adobe Photoshop and Adobe Lightroom stand as the twin pillars of image editing and management. While both are powerful tools, they serve distinct purposes and cater to different stages of the photographic workflow. Understanding their fundamental principles, organization, and basic usage is the crucial first step for any aspiring digital artist. This guide aims to demystify these programs, offering insights for beginners and advanced users alike, and highlighting how they can be used in tandem to achieve breathtaking results.

The Fundamental Principles of Lightroom
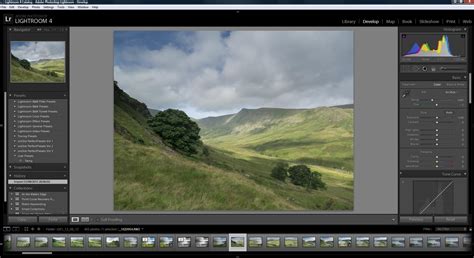
Lightroom, particularly Lightroom Classic, is designed with photographers at its core. At its simplest level, Lightroom was created to help you do just three main things: sort your photos, post-process them, and export them. It is a behemoth of photography software with enough functions and processes to make any photographer's workflow more efficient. Clearly, it is an important topic to learn, whether you are just starting out or you are an advanced photographer. This comprehensive guide will go over the process of using Lightroom Classic for beginners, from start to finish, including tips on the topics that tend to confuse people the most. This article covers Lightroom Classic rather than the cloud-based “Lightroom / Lightroom CC” that is a newer, less comprehensive software.
Organizing Your Photos: The Power of the Catalog
The most obvious function of Lightroom is to help you sort and organize your photos. Each time you import images into Lightroom, you are also seeing where they are located on your computer, meaning the file structure. This appears on the left-hand side of your screen. Photos that are already on your computer don’t automatically show up in Lightroom; you need to import them.
Beyond simply telling you where your photos are located, Lightroom offers many other ways to sort and organize your images. You can give a particularly liked photo a five-star rating, flag it, or add it to a “Best Photos” collection, among countless other options. These different methods allow you to sort and organize your photos however you want. Lightroom is one of the main programs - in fact, the most popular one on the market - that photographers use to organize and sort their photos.
At the heart of Lightroom's organizational prowess is the Lightroom Catalog. This isn't a place where your photos are stored; rather, it's a database file that keeps track of every edit, rating, keyword, and collection you create for your images. Every single edit that you make to a photo; each five-star rating you give; every time you add a photo to a collection - all of those changes are stored somewhere other than the actual photo on your computer. The Lightroom catalog file contains each change and adjustment you make to every single one of your photos. My Lightroom catalog file is only about 300 megabytes in size, yet it contains all the edits to each of my thousands of photos.
The catalog gets more complicated as you learn about it in-depth. If you want to use multiple catalogs, send a catalog of photos to someone else, or use the same catalog on multiple computers, things can be very tricky. However, if you just want to add photos to a single Lightroom catalog, you already know enough to start. By default, the photos on your computer (or memory card) won’t be a part of your Lightroom catalog, so you need to add them yourself. To add a photo to your Lightroom catalog, you need to start at the Import Dialogue.
Editing Your Photos: The Non-Destructive Workflow
Lightroom isn’t just about sorting photos; it’s also about editing them. While Lightroom doesn’t offer the same vast range of post-processing edits as software like Photoshop, its features cover all the main bases: brightness, contrast, color, sharpness, and many more adjustments. This includes the ability to apply local edits - adjusting certain parts of the photo selectively while leaving the rest untouched.
What makes Lightroom fundamentally different from other software, including Photoshop, is its non-destructive workflow. When you make a change to your photo in Lightroom, that change only shows up within Lightroom itself. The actual, underlying file remains completely unchanged. This is a fundamental part of Lightroom and is not a feature you can disable.
This non-destructive nature has significant benefits. When you export a photo from Lightroom, all the edits you've made are applied to create a new, separate file. This exported copy of the photo now has all the edits you made, along with any export settings you chose (file type, pixel dimensions, compression, file name, and so on). It doesn’t replace the original file, which remains safely on your computer. This system makes it essentially impossible to accidentally ruin your original files beyond repair. In contrast, if you open a photo in Photoshop, crop it, and save, your photo will be permanently cropped unless you take specific steps to preserve layers or use other non-destructive methods. Lightroom is great precisely because you’re never touching the original file.
Exporting Your Photos: Preparing for Delivery
One of the three key functions of Lightroom is exporting your photos. This isn't the most well-known feature, but it's crucial for preparing your images for various uses. Lightroom excels at creating copies of your photos with specific settings, such as shrinking the file size for web display or adjusting compression levels. If you export a 500-pixel copy of a photo, it’s just that - a copy. You can right-click on the photo in Lightroom, go to Export > Export, and pick all the settings you want for your final photo. This is a critical step for managing file sizes and preparing images for different platforms.
The Unrivaled Power of Photoshop
While Lightroom excels at organization and foundational edits within a non-destructive framework, Photoshop offers a level of creative control and manipulation that is unparalleled. It is a very powerful program, capable of a wide range of things. For starters, just stick with the basics: contrast adjustment (levels), sizing, and sharpening (unsharp mask). Many photographers, especially those in landscape photography, find themselves using both programs together to achieve their desired results.
When to Reach for Photoshop: Beyond Basic Adjustments
Photoshop is where you can truly bring your creative vision to life. While Lightroom might be the place to "purify the canvas," Photoshop is where the "creative stage" truly unfolds. It's where you can perform color grading, intricate dodging and burning, intense tonal shifts, and profound perspective changes. These precise tools allow for a level of refinement that is not possible in Lightroom.
For instance, luminosity masks in Photoshop allow you to automatically create custom selections based on the unique tonal ranges of your image. This means you can automatically select your brightest tones and manually blend in a shorter exposure bracket with just a few clicks, a technique known as exposure blending. Similarly, you can select a specific color range, like the blue of a sky, and adjust its hue or saturation without affecting the clouds or other parts of the image. These selections are feathered, meaning the effect applied has a natural transition. In Lightroom, while you can adjust color groups, the tools are rudimentary and creatively limiting compared to Photoshop's specialized capabilities.
Easiest Way to Make & Adjust Luminosity Masks in Photoshop For Light & Dark Tones: Without Plugins!
Another area where Photoshop shines is in perspective correction and warping. When creating panoramas, especially with wide-angle lenses, significant perspective distortion can occur. While Lightroom offers some sliders to counteract exaggerations, you can only push them so far before hitting a wall, and these adjustments are linear. Photoshop's transform and warp tools, however, allow you to greatly alter the perspective of your scene, recapturing original perspectives without wide-angle distortion and creating more balanced compositions. This is invaluable for redistributing foreground focal points or correcting distortions that would otherwise unbalance a composition.
Advanced Retouching and Compositing
Photoshop also boasts superior capabilities for retouching and compositing. The content-aware fill feature is a powerful tool for retouching impurities in a photo, seamlessly removing unwanted elements. Photo compositing, the process of transferring elements from one photo into another, is only possible in Photoshop and grants unlimited creative freedom. This can range from adding elements that were not present at the time of capture to creating entirely new scenes. For example, if two deer were together at a location but appeared one by one in separate frames, Photoshop can be used to composite them into a single frame, creating a more compelling narrative.
The Importance of Layers in Photoshop
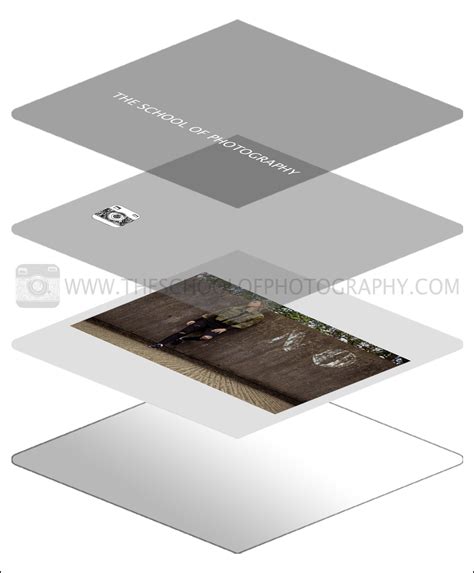
A common misconception is that layers are an unnecessary complexity. However, layers are fundamental to Photoshop's power and are crucial for a non-destructive workflow within the program itself. Layers allow you to compartmentalize your editing techniques into separate zones, or "layers." This is incredibly beneficial because it means you can make changes on one layer without affecting the underlying image data on other layers. If you decide an edit is not working, you can simply delete or modify that specific layer without impacting the rest of your image. This prevents harm to the original ongoing image changes. It's only at the very end of the process that you might flatten all layers to create a final PSD file or convert to a JPEG for internet usage. This meticulous approach ensures maximum flexibility and control throughout the editing process.
Integrating Lightroom and Photoshop: The Best of Both Worlds
Many professional landscape photographers end up choosing to use both Lightroom and Photoshop together. This approach leverages the strengths of each program. Lightroom excels at organizing, managing, and performing initial, global adjustments on your images. It provides a friendly user interface, less complicated tools, and is specifically designed for photographers, all within the protective boundaries of a non-destructive workflow. Its image intake (importing) and organization features, particularly collections and smart collections, are near-perfect.
Once you've organized and performed your initial edits in Lightroom, you can then seamlessly transition to Photoshop for more specific, advanced, or creative adjustments. For instance, if you need to sharpen 20 photos quickly for web display, Lightroom is your program. However, for more specific or advanced color and tonal adjustments, also known as the "creative" stage, Photoshop offers many more possibilities. It's about knowing which tool is right for the job, not which tool is necessarily stronger.
For example, while Lightroom has a fantastic HDR merge feature, images blended in Photoshop using luminosity masks can sometimes yield superior results, especially when dealing with complex tonal ranges or avoiding unwanted side effects. Similarly, for initial global sharpening, Lightroom and Adobe Camera Raw (ACR) handle this very well. However, if you want to pull as much detail as possible out of your image or perform print sharpening, Photoshop offers more granular control.
The decision to use Photoshop, Lightroom, or both often depends on individual needs and the desired outcome. For beginners, starting with Lightroom is often recommended due to its intuitive interface and focus on core photographic adjustments. As your skills develop and your creative ambitions grow, integrating Photoshop into your workflow will unlock a new dimension of image manipulation and artistic expression. Whether you're a hobbyist artist or a working professional, understanding the distinct capabilities of both Photoshop and Lightroom is key to mastering your digital darkroom.