In the realm of graphic design and digital publishing, color is a fundamental element that breathes life into layouts, conveys emotion, and guides the viewer's eye. Adobe InDesign, a powerful tool for professional page layout, offers a robust suite of features for managing and applying color effectively. This tutorial delves into the intricacies of InDesign's color capabilities, from understanding the basic application of color to organizing complex palettes and extracting themes, ensuring your designs are not only visually appealing but also technically sound.
Understanding the Fundamentals of Color Application
At its core, applying color in InDesign involves distinguishing between a stroke and a fill. The stroke refers to the border of an object, while the fill is its background. Users can choose whether their applied color affects the object's stroke or fill. This selection is typically made through the Fill box (A) or the Stroke box (C) found in various InDesign panels or the Toolbox.

The Content Grabber or the Direct Selection tool can be employed to access and manipulate these attributes. For those working with grayscale or monochrome images, InDesign allows the application of color, provided the image does not contain alpha or spot channels.
The Color Picker: Your Gateway to Precise Color Selection
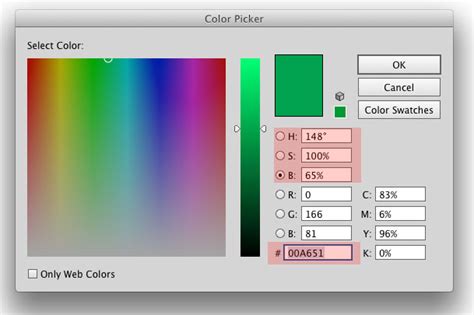
The Color Picker is an indispensable tool for achieving precise color control. It allows users to select colors from a visual color field (C) or to specify colors numerically. The Color Picker interface typically displays:
- Original color (A): The color currently applied.
- New color (B): The color being selected.
- Color field (C): A visual spectrum or gradient from which to choose.
- Color slider triangles (D): Indicators showing the current position within the color field.
Users can click or drag inside the color field (E) to visually select a hue, or they can enter specific values in the provided text boxes to define a color numerically. This precision is crucial for maintaining brand consistency and achieving specific aesthetic goals.
Applying and Saving Colors: Swatches and Drag-and-Drop
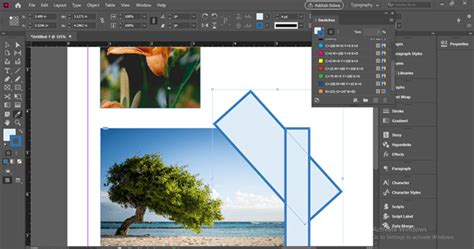
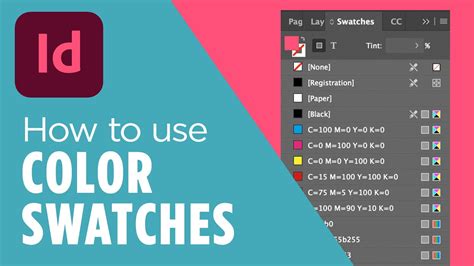
InDesign offers several intuitive methods for applying colors. The Swatches panel is the recommended hub for managing and applying colors, gradients, and tints. You can also use the Gradient panel or the Color panel to mix and apply colors.
An easy and efficient way to apply colors or gradients is through drag-and-drop. This method allows users to apply colors or gradients to objects without needing to select them first. You can drag colors or gradients from:
- The Fill or Stroke box in the Toolbox or a panel.
- The Gradient box in the Gradient panel.
- Swatches from the Swatches panel.
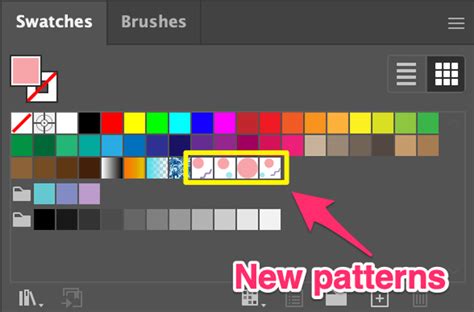
When you apply a color or gradient from the Swatches panel to the fill or stroke of a path, selected text, or an object (like a frame or a table), the corresponding swatch in the Swatches panel is highlighted. This visual cue confirms which swatch is currently in use.
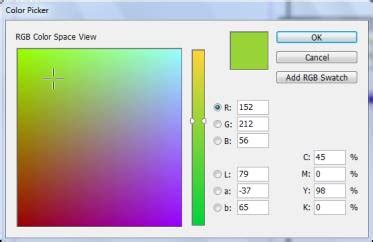
To save a chosen color for future use, you can add it to the Swatches panel by clicking Add CMYK Swatch, Add HSB Swatch, Add RGB Swatch, or Add Lab Swatch, depending on the color model used.
Working with the Color Panel
While the Swatches panel is central to color management, the Color panel provides an alternative for mixing colors. Within the Color panel, you can choose a specific color model (Lab, CMYK, HSB, or RGB) from the panel menu. Sliders are then used to adjust the color values. You can also position the pointer over the color bar at the bottom of the panel and click to select a color, or click inside the color spectrum.
The Color Picker can also be accessed through the Toolbox or the Color panel, allowing you to choose a desired color and click OK.
The Power of Color Themes
InDesign’s Color Theme tool offers a dynamic way to extract and generate color palettes directly from your document. You can extract color themes from:
- Selected areas within your InDesign document.
- Specific images.
- Individual objects.
- The entire layout.
Essentially, you can generate color themes from any colors present in your artwork. Once extracted, these themes can be added to your layout or saved to the Swatches panel.
To use the Color Theme tool, select it from the Tools panel. Clicking any part of the layout will pick a color. The selected color is retained even if you switch tools for other operations. The color theme picked earlier remains available for reuse unless you press the ESC key to close the panel.
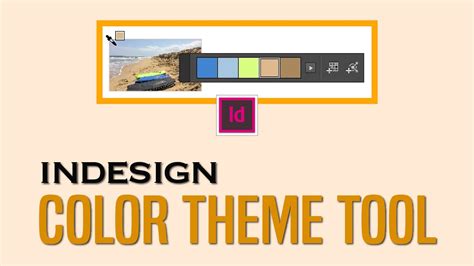
As you hover your mouse over the layout, InDesign automatically highlights areas from which you can create a color theme. A color theme typically consists of five different colors. You can click to view all available themes or add the current color theme to your swatches. A Shift+Click on the color field allows you to pick a single, precise color as the base for the theme.
When you apply colors using the Color Theme tool, they honor the document's intent and are automatically converted to the appropriate color space before being added to swatches or applied to other objects.
Leveraging Hexadecimal Color Values
For precise color specification, InDesign supports the use of hexadecimal RGB codes. This is particularly useful when working with web design elements or when a specific color needs to be matched across different platforms. You can apply color values using hexadecimal RGB code in the Color Picker, the New Swatch dialog, and the Edit Swatch workflow.
When using the Color Picker in a New Swatch workflow, you can click the screengrabber, hold down the mouse button, and click anywhere on your screen to view the hex color value from any source. This feature is incredibly powerful for capturing colors from external images or websites.
The Eyedropper Tool: Sampling and Applying Attributes
The Eyedropper tool is a versatile utility for sampling and applying attributes from existing objects. It can copy not only color but also type and transparency attributes. You can sample attributes from any object in an InDesign file, including imported graphics.
To use the Eyedropper tool:
- Select the Eyedropper tool.
- Click the object whose attributes you want to sample. The eyedropper icon will fill with the sampled color.
- Click the object you want to apply the attributes to.
You can also modify what the Eyedropper tool copies by changing the attributes in the box associated with its settings.
An important consideration when working with images in PSD format is that while they can contain multiple layers, the bottom layer must be opaque. InDesign cannot apply color to a PSD image with a transparent background.
Organizing Colors with Color Groups
Color groups provide a structured way to organize your color schemes within the Swatches panel. This feature is invaluable for managing complex projects and for exchanging frequently used color swatches across different applications.
To create a color group:
- Click the Color Group icon on the Swatches panel.
- You can choose to add Selected Swatches or swatches from Selected Page Items(s) to the new group. Holding
Ctrl(Windows) orOption(Mac) allows you to select multiple swatches before creating the group.
You can switch to a Color Group view by clicking the filter icon at the bottom of the panel and selecting "Show Color Groups." This view allows for extensive work with your organized color collections.
Within color groups, you can:
- Add a swatch to a color group by selecting the group first.
- Duplicate a color group, which also duplicates all the swatches within it.
- Ungroup a color group, separating its swatches.
- Rename a color group by double-clicking its name or using the Color Group Options.
- Delete a color group.
You can also create a color group directly from the swatches present in selected page items or artwork.
Importing and Exporting Swatches with ASE Files
The Adobe Swatch Exchange (.ase) file format is crucial for interoperability between Adobe applications like InDesign and Illustrator. ASE files enable the import and export of color swatches and color groups. This means you can create a palette in Illustrator and seamlessly load it into your InDesign project, or vice versa.
To import an .ase file, navigate to the Swatches panel flyout menu and select "Load Swatches." You can also save color groups as .ase files from the Swatches panel flyout menu.
Understanding Built-in Swatches
InDesign comes with several essential built-in swatches:
- None: This swatch is used to remove the stroke or fill from an object.
- Registration: This special swatch is used for PostScript printing, ensuring objects print on every separation. It should be used with caution.
- Black: A built-in, 100% process color black defined using the CMYK model. By default, this black overprints underlying inks.
- Paper: This swatch simulates the color of the paper on which you are printing. It's primarily for previewing and does not print on a composite printer or in color separations. You can edit the Paper color to match your specific paper stock.
Advanced Swatch Management
The Swatches panel offers a wealth of options for fine-tuning your color workflow:
- Swatch Options: You can edit individual swatch attributes here.
- Naming Swatches: While you can create colors using the Color panel or Color Picker, unnamed colors can be difficult to manage. The "Add Unnamed Colors" option in the Swatches panel menu helps find and name these colors. You can also choose to "Name With Color Value" to have InDesign automatically name process color swatches based on their component percentages.
- Duplicating Swatches: This is useful for creating variations of existing colors, such as warmer or cooler tones.
- Deleting Swatches: When you delete a swatch that is already applied to an object, InDesign prompts you to choose a replacement swatch.
- Sorting Swatches: You can sort swatches by name or by color values.
- Selecting Unused Swatches: The "Select All Unused" option in the Swatches panel menu helps in cleaning up your swatch list.

Working with External Color Libraries
InDesign allows you to load swatches from various external sources, including:
- InDesign files (.indd)
- InDesign templates (.indt)
- Illustrator files (.ai or .eps)
- Adobe Swatch Exchange files (.ase)
You can also load swatches from predefined color matching systems, such as:
- ANPA (American Newspaper Publishers Association) colors
- DIC Process Color Note
- Focoltone colors
- PANTONE colors
- Toyo Color Finder
These libraries ensure consistency and accuracy when working with industry-standard color systems.
Make Hundreds of Color Palettes from 1 COLOR! - Design Tutorial
By mastering these InDesign color features, designers can create visually compelling and technically precise layouts, ensuring their color palettes are not only aesthetically pleasing but also efficiently managed and consistently applied across their projects. The ability to extract themes, organize with color groups, and leverage external libraries provides a comprehensive toolkit for any InDesign user aiming to elevate their design work.