When engaging in digital sketching, artists frequently encounter the need to refine specific elements within their artwork. A common scenario involves adjusting the position or size of a character's mouth to better convey emotion or improve composition. The lasso tool in ibisPaint offers a powerful and intuitive solution for precisely selecting and manipulating these areas, allowing for seamless edits without compromising the integrity of the overall drawing. This guide will delve into the functionalities of the lasso tool, demonstrating how to leverage its various modes and transformations to achieve desired adjustments.
Understanding the Lasso Tool's Core Functionality
The lasso tool is your primary instrument for defining specific regions within your digital canvas. Once activated, it allows you to "draw" a boundary around the area you wish to isolate. This selected portion of the image is then subject to a variety of editing operations, such as moving, resizing, rotating, or even deleting.
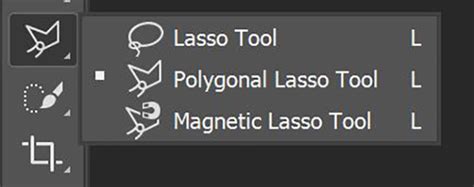
To begin using the lasso tool, navigate to the Tool Selection window and tap the Lasso tool icon. The tool's interface, typically located at the bottom of the screen, presents three distinct modes: Set, Add, and Subtract. Understanding these modes is crucial for effective selection.
Lasso Tool Modes Explained
- Set Mode: This is the default mode. When you use Set Mode, your current stroke creates a new selection, and any previously existing selection is automatically deselected. This is ideal for starting fresh with a new selection.
- Add Mode: As the name suggests, Add Mode allows you to expand an existing selection. If you have already made a selection, using Add Mode will incorporate the area defined by your new stroke into the current selection. For beginners, focusing on Add Mode is a good strategy as it offers a straightforward way to build up your selection incrementally.
- Subtract Mode: Conversely, Subtract Mode enables you to refine your selection by removing areas. If you've over-selected a region or wish to exclude a specific part from your current selection, Subtract Mode allows you to "cut out" that portion with your stroke.
For those new to ibisPaint, it is highly recommended to begin by utilizing only Add Mode. This simplifies the selection process and helps in grasping the fundamental mechanics before venturing into more complex combinations of modes.
Selecting and Manipulating Artwork Elements
Let's consider a practical example: adjusting the position of a character's mouth.
Initiate Selection: With the Lasso tool selected and set to Add Mode, carefully draw a stroke around the mouth. As you draw, a dashed line will appear, delineating the boundaries of your selection. The area enclosed by this dashed line is the portion of your drawing that is currently selected.
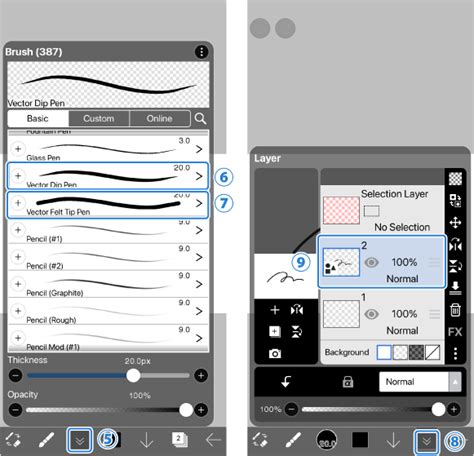
Visualizing the Selection: To confirm precisely what has been selected, you can utilize the Layer window. Within this window, a small blue dot will appear on the Selection Layer, typically located at the top and often indicated with a pink background. On this Selection Layer, the selected area of your image is visually represented in blue. While the dashed line can be somewhat ambiguous, the blue highlight in the Layer window provides a clear indication of whether the interior or exterior of your stroke is selected. Once you've confirmed your selection, close the Layer window to return to your canvas.
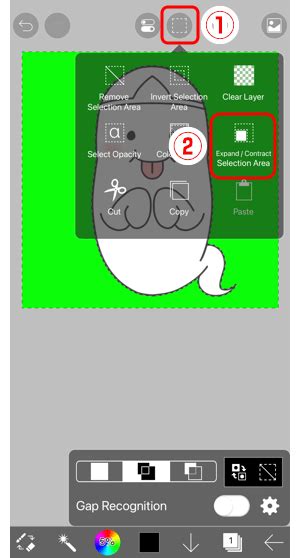
Inverting Selections: The "Invert Selection" button offers a powerful way to switch your selection focus. Tapping this button once will not immediately change the visual representation on your canvas. However, if you re-open the Layer window, you will observe that the Selection Layer has been inverted. This means that the area outside of your original dashed line is now selected. This function is particularly useful when you want to select everything except a specific object or area. To revert the selection back to the original area (the inside of the dashed line), simply tap the "Invert Selection" button again.
- Clearing Selections: After you have completed your selection and any necessary edits, it is crucial to clear the selection. This is done by tapping the "Clear" button. If you forget to clear the selection, it can lead to frustration, as you might find that you can only apply color or edits within the previously defined dashed line area, making it seem as though you cannot edit elsewhere. This is a common oversight for new users, so always remember to clear your selections once your work on them is finished.
Transforming Selected Areas
Once a region is selected, you can modify its position, size, and orientation using the Transform tool.
Activating Transform: To adjust the mouth, re-select it using the Lasso tool in Add Mode. Then, zoom out your canvas so that the entire face is visible. Navigate to the Transform tool, typically by tapping its icon.
Performing Transformations:
- Moving: Use one finger to drag the selected area to your desired new position.
- Scaling: Use two fingers (pinch gesture) to resize the selection. Pinching inwards will shrink it, while pinching outwards will enlarge it.
- Rotating: To rotate the selection, first switch "Rotate ON." Then, use a two-fingered drag gesture to rotate the selected area.
Finalizing Transformations: Once you are satisfied with the new position, size, and rotation of the mouth, tap the "Done" button to exit the Transform tool. After this, remember to clear your selection as previously described.
Refining Your Artwork Beyond Selection
The lasso tool is just one of many powerful features within ibisPaint designed to enhance your digital art workflow. After utilizing selection and transformation tools, you will likely proceed to refine your line drawing. This may involve using the brush tool to add details, the eraser to correct mistakes, the undo command to revert actions, or even further applications of the lasso tool for subsequent adjustments.
Organizing Layers for Efficiency
Effective use of layers is fundamental to a smooth digital art process. Once your line drawing is complete and you are happy with its appearance, you can hide your initial sketch draft. This is achieved by tapping the "Eye Icon" associated with the sketch layer. Hiding the draft allows you to focus on the refined linework without visual clutter.
For an unobstructed view of your canvas, particularly when working on smaller screens or if the lower toolbar is obstructing your view, ibisPaint offers a "Full Screen" button. Tapping this button hides the Quick Slider bar and makes the Main toolbar transparent, maximizing your available drawing space.
By mastering the lasso tool and understanding its integration with other ibisPaint features like layer management and transformation, artists can achieve a higher level of precision and efficiency in their digital art creation process. This allows for greater creative freedom and the ability to iterate on ideas with ease, ultimately leading to more polished and impactful artwork. The ability to isolate and manipulate specific elements is a cornerstone of digital art, and the lasso tool in ibisPaint provides a robust and accessible means to accomplish this. Whether you are adjusting facial features, repositioning an object, or isolating a complex shape for further editing, the lasso tool, combined with its various modes and transformation capabilities, empowers artists to bring their visions to life with remarkable accuracy and flexibility. The iterative nature of digital art often requires adjustments, and the lasso tool ensures that these adjustments can be made with surgical precision, preserving the quality and integrity of the artwork.