Adobe InDesign is a cornerstone of professional design, empowering creatives to craft everything from intricate book layouts and dynamic magazines to polished corporate communications and eye-catching marketing collateral. While its robust feature set is a significant advantage, navigating its extensive capabilities can sometimes feel like a labyrinth. Fortunately, Adobe has equipped InDesign with a vast arsenal of keyboard shortcuts, designed to significantly streamline your workflow. Mastering these shortcuts is not merely about speed; it's about enhancing efficiency, reducing physical strain, and allowing your creative focus to remain unbroken. This guide delves into a comprehensive collection of InDesign shortcut keys, categorized for clarity, to help you navigate, edit, and format your designs with unparalleled ease.
Navigating Your InDesign Canvas with Precision
Efficiently moving around your InDesign document is crucial for a smooth workflow. Instead of relying on scroll bars or the mouse wheel, a few key combinations can instantly reposition your view.
Essential Navigation Shortcuts
- Zooming In and Out: To magnify your view, use Command + Spacebar + Click on a Mac, or Ctrl + Spacebar + Click on Windows. For zooming out, the combination is Option + Spacebar + Click on a Mac, or Alt + Spacebar + Click on Windows. This allows for quick adjustments to your viewing scale, essential for both detailed work and an overview of your layout.
- Fitting the Page to the Window: To instantly see an entire page within your document window, press Command + 0 on a Mac, or Ctrl + 0 on Windows. This is incredibly useful for quickly assessing the overall composition.
- Fitting the Spread to the Window: When working with facing pages, fitting the entire spread to your window is just as important. Hold down Command + Option on a Mac, or Ctrl + Alt on a PC, and then press 0. This command brings both pages of a spread into view, allowing you to check their relationship and balance.
- Panning (Moving Around the Document): A universally useful shortcut, holding down the Spacebar and then clicking and dragging allows you to pan across your document. This method is significantly faster and more accurate than using scroll bars, and it works across many Adobe applications, including Photoshop and Illustrator. This is an essential shortcut for you to know and also works in Ps & Ai. It allows you to quickly move around your document and is much faster and more accurate than scrolling.
3 EASY InDesign Clipping Techniques You Should Know
Mastering Typography: Shortcuts for Text and Type Formatting
InDesign is a powerhouse for typography, and its shortcuts reflect this. Fine-tuning type is often a repetitive task, making keyboard shortcuts indispensable for efficiency and precision.
Advanced Keyboard Shortcuts for Type
- Adjusting Leading: The space between lines of text, known as leading, is critical for readability. The shortcut Option/Alt + Up/Down arrow allows you to adjust leading in two-point increments. Pressing the Up arrow pushes lines closer together, while the Down arrow increases the space between them. The term leading refers to the space between each line of copy, it's important to adjust your leading to make sure text is readable. Using this shortcut will change the space by two point increments. Up will push the lines of text closer together. Down will push them further apart.
- Kerning and Tracking:
- Kerning: This refers to the adjustment of space between individual characters. To kern, simply place your cursor between two characters and use Option/Alt + Left/Right arrow to move them closer or further apart. Kerning refers to the individual space between characters in a word. To make adjustments simply click in between two characters and use the shortcut above to move the letter closer or further away from its neighbour.
- Tracking: This applies a global change to the spacing between all characters in a selected block of text. Use the same Option/Alt + Left/Right arrow shortcut after selecting the text you wish to adjust. Tracking refers to a global change between all of the characters in a sentence or paragraph. You just need to select a body of text and use the same shortcut.
- Kerning Words: For more granular control over word spacing, use *Cmd/Ctrl + Opt/Alt + * to increase the space between words and *Cmd/Ctrl + Opt/Alt + Del* to decrease it. Use these shortcuts to either increase or decrease the space between individual words within a sentence.
- Baseline Shift: Text sits on an invisible line called the baseline. The shortcut Option/Alt + Shift + Up/Down arrow allows you to shift this baseline, making text appear higher or lower. This is similar to adjusting leading but affects the text's vertical position relative to its original line. You can push words, sentences and paragraphs up and down. Top Tip: Good coffee is essential to the learning process!
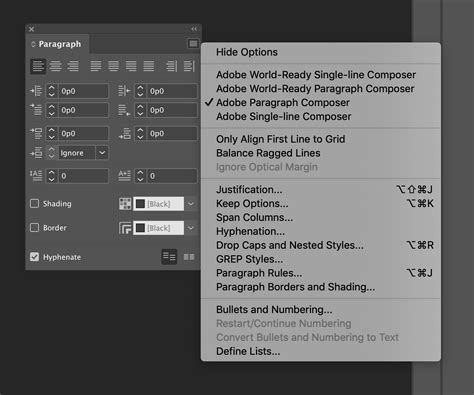
- Hyphenation Toggle: To quickly turn hyphenation on or off for a paragraph, use Cmd/Ctrl + Opt/Alt + Shift + H. This shortcut affects the entire paragraph containing the selected text. HyphenationCmd/Ctrl + Opt/Alt + Shift + HThis shortcut will toggle Hyphenation of words on and off. It can only be applied to a paragraph of text. So even if you have just selected one word it will still effect the full paragraph that word is in.
- Font Size Adjustment: Increase font size with Command + Shift + > on Mac or Ctrl + Shift + > on Windows. Decrease it with Command + Shift + < on Mac or Ctrl + Shift + < on Windows.
- Text Alignment: Quickly align text left with Command + Shift + L (Mac) or Ctrl + Shift + L (Windows), center with Command + Shift + C (Mac) or Ctrl + Shift + C (Windows), and right with Command + Shift + R (Mac) or Ctrl + Shift + R (Windows).
Displaying and Applying Styles
- Show Special Characters: To reveal hidden characters like spaces, tabs, and paragraph breaks, which can help troubleshoot formatting issues, use Cmd/Ctrl + Option/Alt + I. Showing Hidden Characters is a great way to spot double spaces or unwanted breaks in the text which are causing trouble with the format. Try turning this feature on and off so you can see the difference and how useful it can be.
- Assign Styles: Instead of navigating to the Paragraph Styles panel, you can assign styles directly using Option/Alt + Numeric keys. This shortcut allows you to switch between pre-defined Paragraph Styles, saving significant time. Use this shortcut to switch between the Paragraph Styles you have set up in a document. This saves you from going to the Paragraph Styles dialogue box which you may not even have open.
- Quick Apply: For an even faster way to apply styles, use Cmd/Ctrl + Return/Enter. This opens a dialog box where you can simply type the name of the desired style and select it. This is another handy way of applying Styles to your text. The shortcut opens a Dialogue Box. Then you just need to type in the name of the style and select it once it comes up.
Layout and Object Handling: Streamlining Your Design Process
Working with objects, frames, and layers in InDesign often involves repetitive actions. These shortcuts are designed to accelerate those tasks, allowing for more fluid manipulation of your design elements.
Object Manipulation Shortcuts
- Switch Between Text & Frame: The J key allows you to quickly toggle between selecting the Frame Attributes and Text Attributes of an object. This is incredibly useful when you're constantly working with both the container and its content. This enables you to quickly switch between selecting the Frame Attributes and Text Attributes which is something you will find yourself constantly making use of in InDesign!
- Duplicating Objects: To create an instant copy of a selected object, hold down Option on a Mac or Alt on a PC and drag the object.
- Grouping and Ungrouping: Select multiple objects and press Command + G (Mac) or Ctrl + G (Windows) to group them. To ungroup, use Command + Shift + G (Mac) or Ctrl + Shift + G (Windows). Group or ungroup objects: Mac: Command + G (Group), Command + Shift + G (Ungroup)Windows: Ctrl + G (Group), Ctrl + Shift + G (Ungroup)
- Locking and Unlocking Objects: Secure an object in place by selecting it and pressing Command + L (Mac) or Ctrl + L (Windows). To unlock all locked objects, use Command + Option + L (Mac) or Ctrl + Alt + L (Windows). Lock or unlock InDesign objects: Mac: Command + L (Lock), Command + Option + L (Unlock All)Windows: Ctrl + L (Lock), Ctrl + Alt + L (Unlock All)
- Bringing Objects Forward/Backward: To control the stacking order of overlapping objects, use Command + ] (Mac) or Ctrl + ] (Windows) to bring an object forward, and Command + [ (Mac) or Ctrl + [ (Windows) to send it backward. Bring an InDesign object forward or send it backward: Mac: Command + ] (Bring Forward), Command + [ (Send Backward)Windows: Ctrl + ] (Bring Forward), Ctrl + [ (Send Backward)
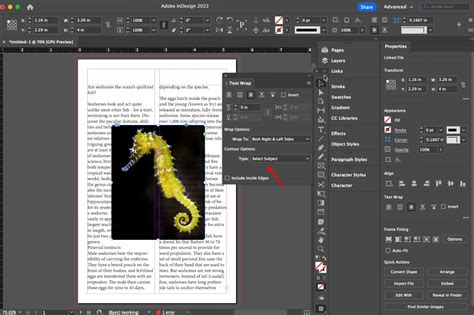
- Placing Images: To import an image into your InDesign document, use Command + D on a Mac or Ctrl + D on Windows. Place an image in your InDesign document:Mac: Command + DWindows: Ctrl + D
Working with Guides and Grids
- Show/Hide Guides: Toggle the visibility of guides with Command + ; on Mac or Ctrl + ; on Windows. Show or hide InDesign guides: Mac: Command + ;Windows: Ctrl + ;
- Snap to Guides: To ensure objects align precisely with your guides, enable snapping by pressing Command + Shift + ; on Mac or Ctrl + Shift + ; on Windows. Snap objects to InDesign guides: Mac: Command + Shift + ;Windows: Ctrl + Shift + ;
- Creating New Guides: A quick way to create guides is by dragging from the rulers at the top and left edges of your document. If rulers are not visible, use Command + R (Mac) or Ctrl + R (Windows) to show/hide them.
Panels and Productivity: Enhancing Your InDesign Workflow
InDesignâs power lies in its panels, which offer access to a vast array of tools and options. These shortcuts make accessing and manipulating them much more efficient.
Panel and Mode Toggles
- Layers Panel: Access the Layers panel instantly with F7 on both Mac and Windows. Opening the InDesign layers panel:Mac: F7Windows: F7
- Duplicating Layers: To quickly duplicate a layer, drag it in the Layers panel while holding Option (Mac) or Alt (Windows). Duplicating an Adobe InDesign layer: Mac: Option + Drag layer in panelWindows: Alt + Drag layer in panel
- Normal and Preview Mode: Toggle between the standard editing view (with frames, guides, etc.) and a clean preview mode (showing the final output) by pressing W on both Mac and Windows. Toggling between Normal and Preview mode in InDesign: Mac: WWindows: W
File and Editing Operations: Essential InDesign Commands
These fundamental shortcuts cover the essential file and editing operations, ensuring you can save, undo, and manage your work seamlessly.
Core Editing Shortcuts
- Undo/Redo: Revert your last action with Command + Z (Mac) or Ctrl + Z (Windows). To redo an action that was just undone, use Command + Shift + Z (Mac) or Ctrl + Shift + Z (Windows).
- Save: Save your current document with Command + S (Mac) or Ctrl + S (Windows).
- Export: To export your InDesign document, use Command + E (Mac) or Ctrl + E (Windows).
- Find and Replace: Open the Find/Change dialog box with Command + F (Mac) or Ctrl + F (Windows) to quickly locate and modify text or formatting. Find and replace text: Mac: Command + FWindows: Ctrl + F
- Spell Check: Initiate a spell check for your document using Command + I (Mac) or Ctrl + I (Windows). Spell check your InDesign document: Mac: Command + IWindows: Ctrl + I
Miscellaneous Shortcuts for Enhanced Productivity
Beyond the core categories, several other shortcuts can significantly boost your efficiency in InDesign.
General Productivity Boosters
- Toggle Toolbox Visibility: Hide or show the InDesign toolbox by pressing Tab on both Mac and Windows.
- Select All: Select all objects and text on your current page or spread with Command + A (Mac) or Ctrl + A (Windows). Select all objects and text in InDesign: Mac: Command + AWindows: Ctrl + A
- Full-Screen Mode: Enter or exit full-screen mode (hiding all panels and toolbars) with Shift + W on both Mac and Windows. Toggle full-screen mode in InDesign: Mac: Shift + WWindows: Shift + W
- Activate Eyedropper Tool: Quickly sample colors or settings with the Eyedropper tool by pressing I on both Mac and Windows. Activate the eyedropper tool in InDesign: Mac: IWindows: I
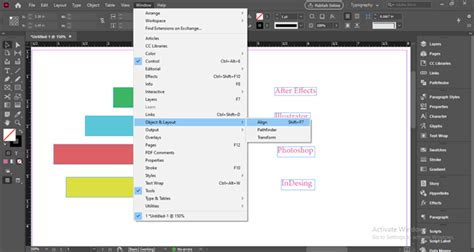
- Align Objects: Align selected objects to the page or margins by pressing Shift + F7 on both Mac and Windows. This often brings up a dialog box with specific alignment options. Align objects to the page or margins: Mac: Shift + F7Windows: Shift + F7
- Preview Without Distractions: Get a clean view of your layout, free from guides and frames, by pressing Command + Shift +
** (backtick) on Mac or **Ctrl + Shift +on Windows. Preview your document without distractions: Mac: Command + Shift +Windows: Ctrl + Shift +
Customizing Your InDesign Shortcut Experience
While InDesign comes with hundreds of built-in shortcuts, the true power of efficiency often lies in personalization. You can create your own custom shortcuts or modify existing ones to perfectly match your workflow.
Creating Custom Shortcuts
- Close all documents, if any are open.
- Navigate to Edit > Keyboard Shortcuts… on Windows, or InDesign > Keyboard Shortcuts… on Mac.
- This action opens a dialog box where you can manage shortcut sets.
- Select or create a new shortcut set. The "Default" and "QuarkXPress" sets cannot be edited directly; selecting them creates a new set based on their configurations.
- In the Product Area dropdown menu, select the category containing the command you wish to assign a shortcut to (e.g., Tools, Type, Object).
- In the list that appears, select the specific command you want to define or redefine.
- Click in the New Shortcut field and press the desired key combination. Be cautious not to assign single-key shortcuts that could interfere with typing text.
- If the key sequence is already in use, InDesign will display the command currently assigned to it.
- You can specify when the shortcut should function by changing the Context. For instance, a shortcut might apply to grouping objects (Object Context) or merging table cells (Table Context). "Default Context" ensures the shortcut works regardless of the document state.
- Click OK to save and close the dialog box, or click Save to keep the dialog box open while entering more shortcuts.
Remember, the goal is to create shortcuts that are both memorable and functional, reducing the need to navigate menus and freeing up cognitive load for creative tasks. Itâs advisable not to overdo it; focus on the shortcuts you use most frequently. For keeping track of custom shortcuts, consider writing them down or taking screenshots of your customized shortcut sets.
Beyond Shortcuts: Further Productivity Enhancements
While keyboard shortcuts are a cornerstone of efficient InDesign work, other strategies can further supercharge your productivity.
Scripting and Automation
InDesign supports scripting, allowing you to automate complex or repetitive tasks. Scripts written in languages like ExtendScript can handle anything from batch processing files to applying intricate formatting. GREP expressions, a powerful pattern-matching tool, can also be used within InDesign's Find/Change feature to automate complex text transformations.
Workflow Management and Tools
- GoProof and Ziflow: For collaborative design workflows, tools like GoProof and Ziflow offer streamlined feedback and approval processes. They integrate with Adobe Creative Cloud, allowing for efficient review cycles without leaving your design environment.
- File Management: Establishing a consistent and logical folder structure for your projects is crucial. Consider creating a template folder for new jobs, including subfolders for assets, drafts, client feedback, and final deliverables. This not only keeps your files organized but also saves time when starting new projects.
- Learning and Practice: Continuously learning new InDesign features and practicing your shortcuts is key to ongoing improvement. Explore InDesign tutorials, courses, and blogs to stay updated and discover new techniques.
By combining the power of keyboard shortcuts with these additional strategies, you can transform your InDesign workflow from a series of clicks and menu navigations into a fluid, efficient, and highly productive creative process.