Inkscape's Live Path Effects (LPEs) offer a powerful and non-destructive way to creatively modify objects within your documents. These effects allow you to twist, replicate, transform, and apply a myriad of other modifications to shapes in a sequential and repeatable manner, fundamentally changing how you approach vector design. This tutorial will delve into the core concepts and practical applications of LPEs, using examples to illustrate their versatility.
Understanding Live Path Effects
Live Path Effects are a cornerstone of modern Inkscape workflows. They operate by modifying the appearance of an object in real-time, while crucially preserving the original shape information. This "live" nature means that LPEs can be easily undone, modified, or removed entirely. The Path Effect Editor is the central hub for managing these transformations.
Accessing the Path Effect Editor
To access the Path Effect Editor, you can navigate to Path > Path Effect Editor. In version 0.91 and later, this dialog is often docked by default along the right side of the canvas, though it can be undocked if preferred. If you are using an older version of Inkscape and cannot locate the dialog, it's possible it has opened outside your visible screen area. In such cases, checking your operating system's window management or consulting Inkscape forums for specific troubleshooting advice is recommended.
Applying Path Effects to Text and Objects
A common initial hurdle when working with Path Effects is understanding their application to different object types. For instance, live text in Inkscape cannot have Path Effects applied directly. To enable this, the text must first be converted into a path. This is achieved by selecting the text object and navigating to Path > Object to Path. Once converted, the plus (+) button in the Path Effect Editor becomes active, allowing you to add effects.
Inkscape Basics: Wrapping Text Around A Circle
Navigating the Live Path Effects Selector
The Live Path Effects selector is where you discover and choose the vast array of available effects. These effects are typically organized alphabetically in rows, offering a comprehensive library for creative manipulation. The sheer number of options can be extensive, and the interface is designed for browsing and searching to efficiently find the desired effect.
Common Path Effects and Their Applications
While the full list of LPEs is extensive, several stand out for their utility and common use cases.
Power Stroke
The Power Stroke effect is particularly useful for creating variable-width strokes along a path. It introduces a control node directly on the canvas, often a pale pink on Windows or a more vibrant pink on other systems, which can be dragged to adjust the stroke's width dynamically. This offers an intuitive, on-canvas method for refining stroke appearances without needing to delve into complex dialogs.
It's important to note that the Power Stroke effect was introduced in Inkscape version 0.91. For users with older versions, the functionality can be achieved using the "Pattern Along Path" effect, though the workflow differs.
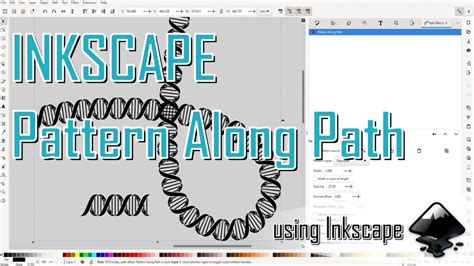
Pattern Along Path
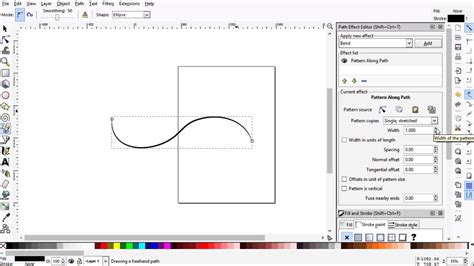
The "Pattern Along Path" LPE takes a selected path and applies it along another designated "skeleton" path. This effect is incredibly versatile, allowing for the creation of repeating patterns, decorative borders, or even complex textures.
How Pattern Along Path Works:
- Skeleton Path: This is the primary path that defines the overall shape or trajectory along which the pattern will be applied.
- Pattern Path: This is the object or group of objects that will be replicated or stretched along the skeleton path.
The Pattern Along Path LPE offers several specific options to control how the pattern is applied:
- Width: Adjusts the width of the pattern as it's applied.
- Pattern is vertical: Rotates the pattern 90 degrees.
- Pattern copies: Determines whether the pattern is stretched, repeated, or a combination. Options include "Single, stretched," "Single," "Repeated, stretched," and "Repeated."
- Spacing: Controls the gap between repeated pattern instances.
- Offset: Allows for normal and tangential offsets, influencing the position of the patterns relative to the skeleton path.
Example: Creating a Tree Trunk
A practical demonstration of "Pattern Along Path" involves creating a tree trunk.
- Begin by creating a skeleton path for the trunk, perhaps using the Spiro spline mode with the Pencil tool (F6 or P).
- Open the Path Effect Editor (
Shift + Ctrl + 7) and add the "Pattern Along Path" effect. - As the pattern source, you could use a simple triangle. The "Edit on-canvas" option allows you to directly manipulate the triangle's corners to widen the shape, making the "tree trunk" appear more robust.
- Adjusting the "Width" option in the LPE dialog can further refine the trunk's thickness.
- Experiment with the "Pattern is vertical" option, changing the "Pattern copies" from "Single, stretched" to "Repeated, stretched" or "Repeated," and adjust "Spacing" to achieve the desired texture.
Bend Path Effect
The Bend Path Effect is excellent for morphing simple shapes into more dynamic forms. It allows you to curve and shape objects in real-time.
Example: Creating a Waving Flag
- Start with a simple rectangle.
- Apply the "Bend" Path Effect.
- You will see a green Bezier segment appear on the object. Clicking and dragging this segment will bend the rectangle. Handles on the end nodes allow for more precise adjustments.
- To create a waving flag effect, you can duplicate the bent rectangle (
Ctrl + D), move it, and then adjust the bend on each instance to simulate the undulations of a flag. - The "Width" value in the Bend LPE can be adjusted if the shape appears distorted, especially if the original rectangle had similar length and width.
Linking Paths with Path Effects
A powerful feature of LPEs like "Bend" and "Pattern Along Path" is the "Link to path" option. This allows you to use another path on your canvas to control the deformation of the object with the applied effect. For example, you can link a "Bend" effect to a circular path to bend your object into a "C" shape. Editing the linked path will dynamically update the bent object.
Combining Multiple Path Effects
Inkscape empowers you to apply multiple Live Path Effects to a single object. This allows for complex and layered transformations, opening up a vast creative potential. The effects are applied sequentially, meaning the output of one effect becomes the input for the next. Understanding the order of operations is crucial for achieving the desired results.
Older Versions and Alternatives
For users working with versions prior to 0.91, some effects like "Power Stroke" are not available. In these cases, the "Pattern Along Path" effect remains a viable alternative for achieving similar outcomes. Additionally, Inkscape has historically offered extensions like "Pattern along Path" under the Extensions > Generate from Path menu, which provide similar functionality, though the LPE interface offers a more integrated and live editing experience.
The Ubiquity of Path Effects
It's worth noting that elements of Path Effects are integrated even into the basic drawing tools. For instance, when you choose a shape from the "Shape:" option of the Pen and Pencil tools, you are, in essence, using a pre-applied "Pattern Along Path" effect. This highlights how fundamental LPEs are to Inkscape's design philosophy.
Advanced Concepts and Tips
- Node Tool (F2 or N): Essential for fine-tuning paths, selecting nodes, and manipulating Bezier handles after applying effects.
- Show Path Outline: Enabling
View > Show outlineorShow path outline (without path effects)can be helpful to visualize the original shape beneath the applied effects. - Copy and Paste Path Effects: You can copy a path effect from one object and paste it onto another, saving time and ensuring consistency. This is done using the "Copy path" and "Paste" buttons within the Path Effect Editor. This is particularly useful if you've set up a complex effect and want to replicate it.
- Groups as Patterns: Groups can be used as patterns within "Pattern Along Path." However, direct modifications to a group used as a pattern in this context might not be as easily undone as with simpler path objects.
- Understanding "Control Path": In effects like "Pattern Along Path," the "control path" refers to the pattern itself that is being applied. Understanding this concept can clarify how the effect dictates transformations.
The ability to convert various objects, including stars, rectangles, circles, and even text, into paths unlocks a world of manipulation possibilities. By mastering Inkscape's Live Path Effects, designers can move beyond static shapes and create dynamic, intricate, and unique vector artwork with unprecedented flexibility and control.