Krita, a powerful and free open-source painting program, offers a robust suite of tools for artists and designers. Among these, the "Cut Tool" might seem straightforward, but its effective use, especially in conjunction with other features, unlocks a world of precise image manipulation. This guide delves deep into the functionalities of Krita's cutting and cropping capabilities, exploring how to refine selections, create intricate patterns, and even leverage vector tools for unparalleled control.
Understanding the Crop Tool in Krita
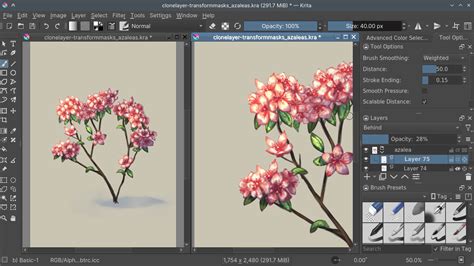
At its core, cropping an image in Krita is a process of removing unwanted outer areas, effectively refining the composition or adjusting the aspect ratio. The primary tool for this task is the Crop Tool. To initiate the cropping process, you simply need to select the Crop Tool from Krita's toolbox. Once activated, a crop box will appear around your image or selected layer.
The initial step involves adjusting the settings within the Crop Tool. These settings provide a significant degree of control over the cropping operation. You can then drag the handles on the crop box inwards to cut the image or layer to your desired dimensions. The process is designed to be intuitive, allowing for freehand adjustments to create custom aspect ratios and to cut the entire picture as needed.
Here's a simplified breakdown of the steps to quickly crop an image in Krita:
- Select the Crop Tool: Locate and activate the Crop Tool from the main toolbar.
- Adjust Crop Box: A bounding box will appear. You can click and drag its corners or sides to define the area you want to keep.
- Refine Settings (Optional): Access the Tool Options docker to fine-tune specific parameters.
- Confirm Crop: Press Enter or click inside the crop box to apply the changes.
Your image on the canvas will now be cropped to the dimensions defined by the crop box. If the picture was the base of your canvas, the entire canvas will be cropped to match the image size.
Advanced Crop Tool Settings for Precision
When using the Crop Tool in Krita, several settings allow for more granular control over the final outcome. These options are typically found in the Tool Options docker, usually located on the right side of the workspace.
- X and Y Axis Values: The "X" and "Y" boxes in the settings refer to the coordinates on the image's X and Y axes. By inputting a pixel value into one or both of these boxes, you can crop the image by a specific number of pixels from the corresponding side. This is particularly useful for precise, pixel-level adjustments.
- Grow Option: The "Grow" option offers the ability to extend the canvas beyond its original size. This is the inverse of cropping and can be used to expand your working area if needed, perhaps to add borders or more content.
- Width, Height, and Aspect Ratio: On the right side of the settings panel, you'll find boxes for "Width," "Height," and "Aspect Ratio." You can lock these values using the adjacent lock icon. Locking the aspect ratio, for instance, ensures that when you resize the crop box, its proportions remain constant, preventing distortion. This is invaluable for maintaining specific aspect ratios like 16:9 or 1:1.
- "Applies to" Setting: This crucial drop-down menu lets you define what the crop operation will affect. Your choices typically include:
- Image: This crops the entire image file, affecting all layers.
- Canvas: This adjusts the canvas size without altering the image content itself.
- Layer: This crops only the currently selected layer.
- Frame: In animation contexts, this might refer to a specific frame.Choosing the correct "Applies to" setting is vital for achieving the desired outcome without accidentally affecting other parts of your artwork.
- Decoration Setting: The "Decoration" setting, also a drop-down menu, influences what is displayed on the overlay crop box. These decorations can include grid lines, rule of thirds overlays, or other compositional guides. The decoration helps you compose the details within the image by providing visual aids for placement and alignment.
Beyond Cropping: Leveraging Bézier Curves for Precision
While the Crop Tool is excellent for defining boundaries, Krita's vector tools, particularly Bézier curves, offer a different kind of precision, especially for creating clean lines, shapes, and intricate details. Bézier curves are mathematical representations of smooth curves that can be manipulated by adjusting control points and handles.
To use Bézier curves in Krita, you'll typically employ the Path Tool. This tool allows you to draw and edit vector paths.
- Activate the Path Tool: Select the Path Tool from the toolbox.
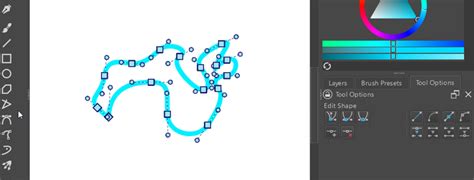
- Draw the Curve: Click on the canvas to place anchor points. Dragging between points creates Bézier handles, which control the curve's shape. You can add, delete, and move anchor points to refine the curve's form.
- Modify the Curve: Once a path is created, you can use the Edit Tool (often associated with the Path Tool or a separate selection tool) to further manipulate it. You can adjust the position of anchor points, change the length and angle of the Bézier handles, and even convert curve segments to straight lines and vice-versa.
These vector paths can then be used in various ways. You can stroke them with a brush to create lines, fill them with color to create shapes, or convert them into selections for pixel-based editing. This offers a level of precision and editability that is difficult to achieve with raster tools alone.
Bezier Curve Tool Krita
Creating Patterns with Krita's Tools
Krita's versatility extends to pattern creation, allowing artists to generate repeating elements for backgrounds, textures, and design assets. The "Cut Tool" and its related cropping functionalities play a role here, as does the ability to define and use patterns.
Making a Brick Pattern
Creating a stylized brick pattern in Krita can be achieved through a combination of layer manipulation, selection, and transformation. While a direct "brick pattern" tool might not exist, the underlying principles of repetition and alignment are key.
One approach involves creating a single brick shape, duplicating it, and then arranging these duplicates in a brick-laying pattern. You can use selections, the crop tool to precisely define the boundaries of your brick, and then transform or tile these elements. Krita's grid and snapping features are invaluable for ensuring perfect alignment.
Using Patterns in Krita
Krita offers multiple methods to insert and utilize patterns. These can be simple repeating tiles or more complex, custom-designed textures.
- Pattern Brushes: You can create brushes that stamp a pattern as you paint. This is often achieved by defining a pattern as a brush tip.
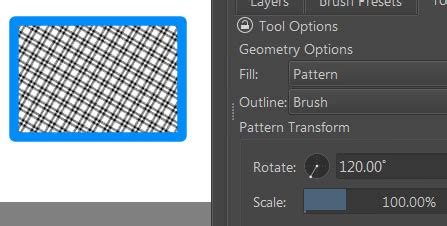
- Fill Layers: Krita allows you to create fill layers where the fill type is set to "Pattern." You can then select from a library of predefined patterns or import your own.
- Cloning and Tiling: For more manual control, you can create a tile, duplicate it, and arrange the duplicates across your canvas. Tools like the Mirror Tool and Transform Tool are essential for this. The "Applies to: Layer" setting in the Crop Tool can be useful here if you're working with a pattern tile on its own layer and want to precisely define its boundaries before tiling.
Enhancing Workflow with Shortcuts and Hotkeys
Efficiently using Krita, especially for repetitive tasks like cutting, cropping, and drawing complex paths, relies heavily on mastering its shortcuts and hotkeys. A comprehensive guide to these can significantly speed up your workflow. Krita offers a vast array of shortcuts, and understanding the main ones is crucial for both new and experienced users.
For example, when working with the Crop Tool, knowing the shortcut to activate it (often C) and shortcuts for confirming or canceling the operation can save valuable time. Similarly, for Bézier curves, understanding how to switch between adding points, moving points, and adjusting handles without constantly reaching for the mouse is a game-changer.
Here are some examples of how shortcuts can be integrated:
- Tool Switching: Quickly switch between the Crop Tool, Path Tool, and other essential brushes using dedicated hotkeys.
- Transformations: Shortcuts for scaling, rotating, and moving selections or layers are fundamental.
- Selection Tools: Mastering shortcuts for marquee, lasso, and magic wand selections allows for rapid area definition.
- Brush Settings: Hotkeys for adjusting brush size, opacity, and flow are indispensable for painting.
By familiarizing yourself with Krita's shortcut map (often accessible through Settings > Configure Krita > Keyboard Shortcuts), you can tailor the software to your specific needs and significantly improve your productivity.
Advanced Techniques: Dotted and Dashed Lines
Creating specialized line types, such as dotted or dashed lines, is another area where Krita's tools can be creatively applied. While not directly part of the "Cut Tool," these techniques often involve brush settings and path manipulation.
Drawing Dotted or Dashed Lines
There are several ways to achieve dotted or dashed lines in Krita:
- Brush Presets: Many Krita brush packs include presets designed to create dotted or dashed effects. You can select one of these brushes and draw directly.
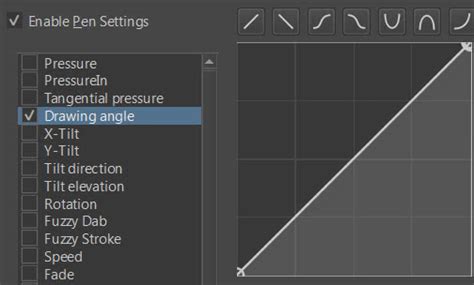
- Brush Tip Settings: You can manually configure a brush's "Spacing" setting. Increasing the spacing between brush dabs creates a dashed effect. For dotted lines, you might use a brush tip that is itself a dot and adjust spacing accordingly.
- Using Paths: A more controlled method involves drawing a path with the Path Tool and then stroking that path with a brush that has appropriate spacing settings. This allows for precise placement and modification of the line's shape before rendering.
The key is to experiment with brush spacing and potentially create custom brush tips that resemble dots or dashes. When combined with the ability to edit paths, this offers a flexible way to create custom line styles for various artistic purposes.
Conclusion: The Interconnectedness of Krita's Tools
The "Krita Cut Tool" is more than just a simple cropping function. When viewed in the context of Krita's extensive toolset, its true power emerges. From precise image manipulation with advanced crop settings to the clean scalability of Bézier curves, and the creative potential of pattern generation and specialized line work, Krita empowers users to achieve complex artistic goals. Mastering these interconnected tools, supported by efficient use of shortcuts, transforms Krita from a simple painting application into a comprehensive digital art studio. The ability to seamlessly transition between raster and vector editing, to define precise boundaries with the crop tool, and then to fill those boundaries with intricate patterns or clean lines, showcases the depth and flexibility that Krita offers to artists at all levels.