Krita, a powerful and free open-source painting program, offers a robust set of tools for digital artists. Among these, the ability to invert colors is a fundamental technique, particularly useful for tasks such as creating masks, manipulating normal maps, or achieving specific artistic effects. While the process might seem straightforward, users have occasionally encountered changes in shortcut assignments or methods across different versions of Krita. This guide aims to provide a clear and detailed explanation of how to invert colors in Krita, addressing common user queries and offering versatile approaches for both destructive and non-destructive workflows.
Understanding Color Inversion
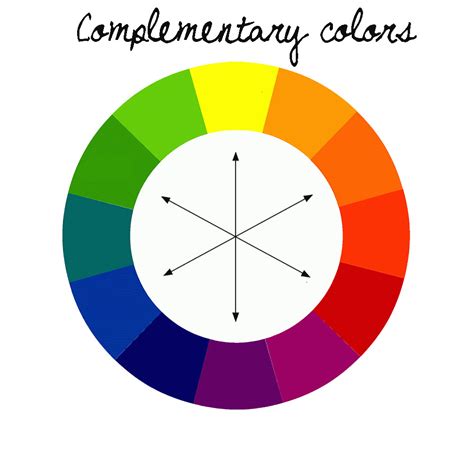
At its core, color inversion, often referred to as a "negative" effect, is a process where each color in an image is replaced by its complementary color. In a digital context, this is typically achieved by subtracting the current color value from the maximum possible value for that color channel. For instance, in an 8-bit color system (where values range from 0 to 255), inverting a pure red (255, 0, 0) would result in cyan (0, 255, 255). This fundamental operation has numerous applications in image editing and digital art creation.
Inverting Colors Destructively: The Direct Filter Approach
For artists who prefer a direct, immediate application of the inversion effect, Krita offers a straightforward destructive filter. This method directly alters the pixels of the selected layer or image.
- Accessing the Invert Filter: Navigate to the Filter menu at the top of the Krita interface. Within the dropdown, select Adjust. Here, you will find the Invert option.
- Applying the Filter: Once selected, the invert filter will be applied directly to the active layer. This change is permanent unless you immediately undo it (Ctrl+Z) or have not saved the document.
This method is quick and efficient for situations where you want a permanent inversion and are confident in the result. However, it lacks the flexibility of non-destructive methods, as it cannot be easily toggled or adjusted after application.
Inverting Colors Non-Destructively: The Power of Filter Layers
Krita's non-destructive workflow is a cornerstone of its flexibility, allowing artists to make changes that can be easily modified, toggled, or removed at any time. For color inversion, this is achieved through the use of Filter Layers.
- Creating a Filter Layer: Locate the Layers tab, typically found on the right-hand side of the Krita workspace. At the bottom of the Layers docker, you'll see a plus (+) button for adding new layers. Click on the small arrow to the right of this button. A popup menu will appear; select Filter Layer from the options.
- Configuring the Filter Layer: Upon creating a Filter Layer, you will be presented with the Color Adjustment menu. This is where the magic happens.
- Channel Selection: The primary method for achieving a true color inversion on a Filter Layer involves manipulating the color channels. While the default might be RGBA (Red, Green, Blue, Alpha), you can achieve a full color inversion by inverting each channel individually or by using a specific trick.
- The Green Channel Trick for Inversion: A common and effective method to achieve a full color inversion using a Filter Layer is to focus on the Green channel.
- Change the Channel dropdown to Green.
- You will see a visual representation of the channel's curve. To invert the green channel, you need to drag the circle in the lower-left corner up and the circle in the upper-right corner down. This effectively reverses the tonal values of the green channel.
- While this specifically targets the green channel, when applied in conjunction with how Krita layers and blend modes work, and if you were to replicate this for Red and Blue channels (or if Krita's "Invert" filter within the Color Adjustment menu is applied to the entire layer, which is the more direct non-destructive approach), you achieve the desired overall color inversion.
- Important Note: The provided text specifically mentions manipulating the Green channel to invert. This is a technique often used for specific effects, such as inverting normal maps. For a general color inversion of an entire layer non-destructively, the most direct method within the Filter Layer is to select the "Invert" filter from the Color Adjustment options if available, or to replicate the inversion across all R, G, and B channels. The "Green channel trick" is a more advanced technique for specific use cases.
- Saving Custom Presets: If you find yourself frequently using a specific color inversion setup, Krita allows you to save it as a preset for quick access.
- After configuring your filter layer to achieve the desired inversion, click on Edit Presets.
- Select Bookmark Current.
- You can then double-click the newly created preset in the list to rename it, giving it a descriptive name like "Color Invert" or "Mask Invert."
This non-destructive approach is highly recommended for its flexibility. You can easily toggle the visibility of the Filter Layer by clicking the eye icon next to it in the Layers docker, adjust the intensity of the inversion using the layer's opacity, or even remove it entirely without affecting the original image data.
Keyboard Shortcuts: Reclaiming Your Workflow
The user's initial query highlights a common point of confusion: the Ctrl+I shortcut for inverting colors. In some versions of Krita, this shortcut might not be assigned by default or could be associated with a different function.
- Finding and Assigning Shortcuts: Krita's robust customization options allow you to assign or reassign keyboard shortcuts to virtually any function.
- Go to Settings > Configure Krita.
- In the configuration window, select Keyboard Shortcuts from the left-hand menu.
- In the search bar at the top of the Keyboard Shortcuts dialog, type "invert."
- You should see an action related to inverting colors. If it doesn't have a shortcut assigned, or if you wish to change it, click in the shortcut field next to the action and press your desired key combination (e.g.,
Ctrl+I). - Click OK to save your changes.
The user's experience of Ctrl+I working in versions 4.1.1 and 4.2.0 pre-alpha, and then seemingly disappearing, suggests that either the default shortcut assignment changed, or it was inadvertently removed from their custom setup. By following the steps above, you can ensure your preferred shortcut is active.
Inverting Mask Layers: A Practical Application
A frequent use case for color inversion is with mask layers. Masks in Krita often operate on a grayscale spectrum, where white reveals the layer content and black conceals it.
- From Black to White: If you have a mask that is entirely black (meaning it's hiding the layer), inverting it to white will make the layer fully visible. This is a quick way to reveal or unhide a masked area.
- From White to Black: Conversely, if you have a white mask and want to hide the layer content, inverting it to black will achieve this.
Using a non-destructive Filter Layer for mask inversion offers the advantage of being able to fine-tune the mask's opacity, allowing for semi-transparency and partial revealing/hiding of the layer.
Understanding Normal Map Inversion
The context of inverting a normal map channel, as mentioned in the provided text, points to a specific application in 3D texturing and game development. Normal maps are typically RGB images that store directional information.
- Photoshop vs. Krita: In Photoshop, inverting a normal map channel (often the Green channel) using
Ctrl+Iis a common workflow. Krita's directCtrl+Ion a layer might invert all channels, which is not the desired outcome for a normal map. - Krita's Approach for Normal Maps: To achieve the equivalent of inverting a normal map channel in Krita non-destructively, you would use the Filter Layer method described earlier, specifically targeting the Green channel. By manipulating the curve of the Green channel (dragging the lower-left up and upper-right down), you effectively flip the direction of the normals stored in that channel. This is crucial for ensuring that lighting behaves correctly when the normal map is applied in a 3D rendering environment. Saving this configuration as a preset is highly beneficial for artists working with 3D assets.
How To Make A Normal Map Out Of A Diffuse Map Using Krita
Development Builds and Public Access
For users curious about the latest features or seeking fixes that might not yet be in a stable release, Krita's development builds are available.
- Accessing Development Builds: These builds are typically linked from the official Krita download page (krita.org). They are often provided as AppImages (on Linux) or other platform-specific installers.
- Public Availability: Development builds are generally open to the public for testing and feedback. While they offer the newest functionality, they may also contain bugs or be less stable than official releases. It's advisable to use stable releases for critical work unless you are specifically testing or require a feature only present in a development build.
Conclusion
Krita's color inversion capabilities are both powerful and flexible. Whether you prefer the immediacy of a destructive filter or the adaptability of non-destructive Filter Layers, Krita provides the tools you need. Understanding how to access and configure these options, including managing keyboard shortcuts, ensures a smooth and efficient workflow for all your artistic endeavors, from simple mask adjustments to complex normal map manipulations. The ability to save custom presets further streamlines repetitive tasks, allowing artists to focus more on creation and less on process.