Krita, the powerful and free digital painting program, offers a rich ecosystem of brushes, particularly for the intricate art of lineart. Lineart, the foundational drawing of lines that typically forms the basis of a finished piece, relies heavily on the right tools to achieve crisp, expressive, and controlled strokes. While Krita’s extensibility allows for the creation of custom brushes, this tutorial will delve into the pre-installed options and readily available downloadable brush packs that stand out as exceptional choices for lineart creation. Understanding and utilizing these brushes can significantly elevate your workflow and the quality of your lineart.
The Essence of Lineart Brushes in Krita
The effectiveness of a lineart brush is determined by several key characteristics. Foremost is its ability to produce clean, defined lines. This often translates to brushes with a sharp, consistent edge, capable of tapering smoothly to a fine point or maintaining a uniform thickness as desired. Pressure sensitivity is another critical factor; the capacity for a brush to respond to variations in stylus pressure allows for dynamic line weights, adding depth and visual interest to your artwork. The texture of the brush stroke also plays a role, with some artists preferring a perfectly smooth, vector-like line, while others seek a slightly textured or "painterly" feel that can lend character to the linework.
Krita’s brush engine is remarkably versatile, enabling a high degree of customization. Even a seemingly simple brush can be tweaked to behave in a multitude of ways. However, for those new to the program or seeking immediate solutions, exploring existing presets and community-shared brush packs is an excellent starting point. The ability to modify any brush in Krita to your taste or create new brushes from scratch is a testament to the software’s flexibility, and this tutorial will touch upon how to leverage this power.
Exploring Krita's Pre-installed Lineart Brushes
Krita comes equipped with a foundational set of brushes that can be surprisingly effective for lineart. These brushes often serve as excellent starting points for understanding Krita's brush engine and for developing your own preferred settings.
One of the most commonly recommended pre-installed brushes for lineart is found within the "Basic-5" brush preset pack, specifically the "Hard-edge Pencil." This brush, as its name suggests, provides a crisp, defined line with good pressure sensitivity. It behaves much like a traditional hard pencil, allowing for clean, sharp strokes that are ideal for sketching and initial lineart passes. Its straightforward nature makes it easy to control, and with slight adjustments to its opacity or flow, it can be used for a range of line weights.
Another valuable pre-installed option is the "Ink Pen" brush, often found in the "Ink" brush preset pack. This brush is designed to mimic the feel of a dip pen or a technical pen, producing consistent, smooth lines. It excels at creating uniform linework, which is essential for certain styles of illustration, comic art, and technical drawings. Its inherent smoothness means it doesn't typically introduce unwanted texture, making it perfect for achieving a polished, professional look. Experimenting with the "Stabilizer" settings in Krita while using this brush can further enhance the smoothness and control of your lines, especially for long, sweeping curves.
The "Chalk" brush, while not explicitly an "ink" or "pencil" brush, can also be surprisingly useful for a more textured lineart. When its opacity and flow are reduced, it can create a softer, more organic line that feels hand-drawn. This is particularly effective for character art or illustrations where a less rigid, more expressive line is desired. The subtle texture it imparts can add a unique character that a perfectly smooth line might lack.
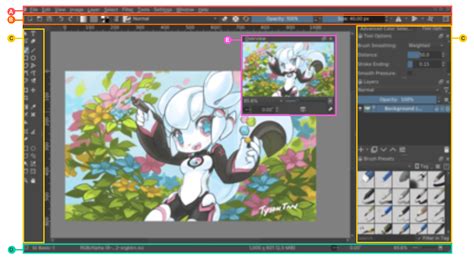
To access these brushes, navigate to the Brush Presets docker (usually found on the right-hand side of the Krita interface). You can browse through the different brush categories and select the presets mentioned. Clicking on a preset will load it into your active brush tool.
Expanding Your Lineart Arsenal: Downloadable Brush Packs
While Krita's built-in brushes are capable, the true power of the software lies in its community and the vast array of downloadable brush packs available. These packs are often created by professional artists who have refined their tools for specific purposes, including lineart.
A highly recommended avenue for discovering excellent Krita brush packs is by searching online communities. A simple search for “Krita brush packs download reddit” will yield numerous threads and links to brush sets shared by artists. These platforms are invaluable for finding curated collections that have been tested and approved by a wide user base.
Many artists share their favorite lineart brushes as part of larger packs. These often include specialized brushes designed for:
- Smooth, Vector-like Lines: Brushes that mimic the precision of vector graphics, ideal for clean comic book art or graphic design elements.
- Textured Inking: Brushes that simulate the look of traditional ink brushes, sumi-e brushes, or even brush pens with a subtle grain or bleed.
- Sketching and Initial Passes: Brushes that offer a slightly rougher, more forgiving line, perfect for the initial stages of lineart where flexibility is key.
- Hair and Detail Brushes: Specialized brushes with fine tips and specific tapering properties, designed for rendering intricate details like hair strands or fine patterns.
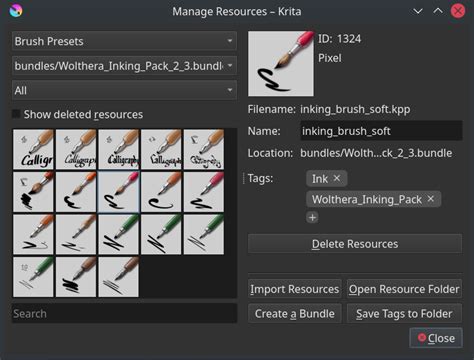
When downloading brush packs, they usually come in .kpp (Krita Paint Preset) files. To install them, go to the Krita main menu: Settings > Manage Resources. Click on "Import" and navigate to the downloaded .kpp file. Once imported, the new brushes will appear in your Brush Presets docker, often organized into a new category named after the brush pack creator or the pack itself.
Customizing and Creating Your Own Lineart Brushes
The ultimate control over your lineart experience comes from modifying existing brushes or creating new ones from scratch. Krita’s Brush Editor is a powerful tool that allows for deep customization of every aspect of a brush’s behavior.
To access the Brush Editor, select any brush, and then open the Brush Editor docker (usually found alongside the Brush Presets docker). You can also access it via Settings > Brush Editor.
Here are some key settings to consider when tailoring a brush for lineart:
- Brush Tip: This is the foundational shape of your brush. You can use pre-made brush tips (like circles, squares, or textured patterns) or create your own custom brush tips. For lineart, a sharp, well-defined tip is often preferred. You can even create a brush tip that tapers to a fine point, which is crucial for dynamic line weights.
- Shape: Under the "Shape" tab, you can control how the brush tip is rendered. Adjusting the "Spacing" can create a continuous line or a series of dots. For lineart, very low spacing is generally desired. The "Size" and "Ratio" can also be adjusted.
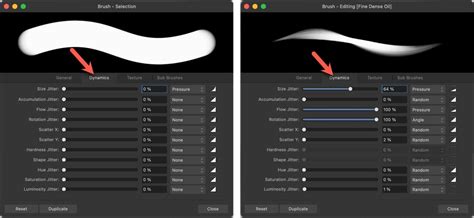
- Dynamics: This is where pressure sensitivity comes into play. Under the "Dynamics" tab, you can link various brush parameters (like size, opacity, flow, or hardness) to "Pen Pressure." This is essential for creating expressive lines that vary in thickness based on how hard you press with your stylus. For lineart, linking "Size" and "Opacity" to pen pressure is a common and effective practice.
- Stroke Options: The "Stroke Options" tab allows you to control how the brush behaves as you draw a stroke. "Dabs per second" and "Brush Smoothing" are particularly important for lineart. Increasing brush smoothing can help create very clean, steady lines, especially for long curves and diagonals. Krita offers different smoothing algorithms, such as "Stabilizer," "Weighted," and "Vector," each providing a different feel.
- Texture: If you desire a textured line, you can apply a texture under the "Texture" tab. This can simulate the grain of paper or the unevenness of certain traditional media. For clean lineart, you would typically disable or minimize texture effects.
- Color Options: While not directly related to the brush shape, the "Color Options" can be useful. For instance, "Color Options" under the "Transfer" tab can sometimes be used to achieve subtle variations in color or opacity along a stroke, though for traditional lineart, a solid black is often the goal.
To create a new brush, you can start from scratch by clicking the "+" icon in the Brush Presets docker and choosing "New Brush Preset." Alternatively, you can duplicate an existing brush and then modify its settings in the Brush Editor. This is often an easier way to begin, as you can leverage the work already done in a preset.
Tips for Effective Lineart with Krita Brushes
Regardless of the specific brush you choose, several techniques can enhance your lineart creation process in Krita:
- Utilize the Stabilizer: As mentioned, Krita's brush stabilization tools are invaluable for achieving smooth, controlled lines. Experiment with the different stabilizer modes (e.g., "Stabilizer" for general smoothing, "Weighted" for a slightly delayed response that can create elegant curves, and "Vector" for extremely precise adjustments). You can find these settings in the Tool Options docker when a brush is active.
- Master Pressure Sensitivity: If your drawing tablet supports it, learning to control line weight with pressure is fundamental to creating dynamic and engaging lineart. Practice varying your stylus pressure to achieve thick, bold lines for emphasis and thin, delicate lines for details.
- Work on a Separate Layer: Always create your lineart on a new layer above your sketch or base colors. This allows for easy editing, correction, and manipulation without affecting other elements of your artwork.
- Zoom In and Out: Regularly zoom in to ensure precision for fine details and zoom out to check the overall flow and readability of your lines.
- Clean Up Imperfections: Don't be afraid to use the Eraser tool to refine your lines. Krita's eraser can often be set to behave like a brush, allowing for precise erasing and blending.
- Consider Brush Size: While pressure sensitivity is key, sometimes adjusting the overall brush size is necessary. For very fine details, you might need to use a smaller brush size, even if you're applying light pressure. Conversely, for bold outlines, a larger brush size with significant pressure might be appropriate.
How to Use Line Smoothing in Krita
Conclusion: The Journey of a Thousand Lines
The journey to mastering lineart in Krita is one of exploration and practice. The program offers a robust set of pre-installed brushes, and the ability to download and customize further expands its capabilities exponentially. Whether you prefer the crispness of a digital pencil, the flow of an ink pen, or the unique character of a textured stroke, Krita has a tool for you.
By understanding the fundamental characteristics of effective lineart brushes, exploring the wealth of community-provided resources, and learning to harness the power of Krita's Brush Editor, you can develop a workflow that is both efficient and creatively satisfying. Remember that any brush in Krita can be modified to your taste or create new brushes from scratch. This inherent flexibility is what makes Krita such a powerful tool for artists of all levels. The best approach is to experiment, find brushes that resonate with your artistic style, and don't hesitate to tweak them until they feel just right. The world of Krita lineart brushes is vast, and your perfect tool is waiting to be discovered or created.