This tutorial delves into advanced shading techniques within Krita, a powerful and free open-source painting program. Moving beyond basic fill-ins, we will explore how to utilize selection tools and specialized brushes to achieve sophisticated and nuanced shading, breathing life into your digital artwork. This comprehensive guide is designed to benefit artists of all levels, from beginners seeking to understand the fundamentals of digital shading to experienced professionals looking to refine their workflow.
Understanding Krita's Brush Settings for Enhanced Workflow
Before diving into the intricate art of shading, it's crucial to optimize your Krita brush settings for a smoother and more efficient artistic process. A particularly useful, yet often overlooked, setting is "Temporarily saved tweaks to presets." Enabling this option can save you significant time, especially during fast-paced drawing sessions.
Normally, when you adjust the size of a brush preset, Krita might reset it to its default size whenever you switch to a different brush preset and then back again. This is because the brush size is saved to the preset itself. For example, if you enlarge an airbrush preset, then switch to a basic brush, and then return to the airbrush, its size will revert to its original setting. This constant readjustment can be highly frustrating.
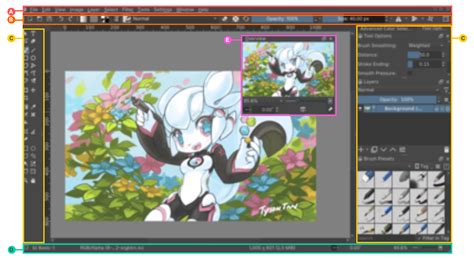
However, by activating "Temporarily saved tweaks to presets" in the brush settings window, Krita will remember the last used size for each brush preset. This means that when you switch between brushes and return to a previous one, its size will remain as you last set it, rather than resetting to its default. This feature ensures that your brush sizes persist across preset changes, allowing for a fluid and uninterrupted workflow. To access this setting, simply click on the brush setting button, usually found in your brush editor or toolbar, and ensure the "Temporarily saved tweaks to presets" option is checked.
The Brush Stabilizer - Krita features explained
Strategic Shading with Selections and Soft Brushes
One of the most effective ways to achieve detailed and controlled shading in Krita is by combining selection tools with soft brushes. This method allows for sharp transitions in some areas and soft, blended gradients in others, creating a sense of depth and form.
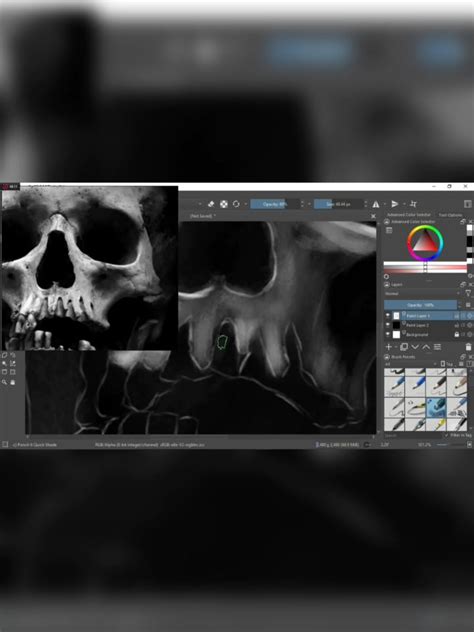
Let's begin by focusing on a specific area, such as the shadow beneath the jawbone of a skull object. To start, zoom in on the area where you want to apply shading. The next step involves picking a darker color. You can do this by freely selecting a darker shade within Krita's color picker or by using the color history. If you are just opening a file and need to pick the base color, you can temporarily turn off your shading layer, hold down the CTRL key, and click on the desired area to sample the base color.
Once you have your base color, press the I key twice. This action shifts the color to a much darker version of the original base color, preparing it for shading. Now, turn your shading layer back on. For this technique, we will primarily use the airbrush preset. However, to achieve more subtle brush strokes, it's essential to reduce its opacity. You can do this by pressing the I key multiple times until the opacity is around 50%.
Next, press the Z key to activate Krita's outline selection tool. Hold down the CTRL key and carefully draw a selection around the area you wish to shade. For instance, you might select the underside of the jawbone, closing the selection once you've outlined the desired shape. After creating the selection, press B to switch back to the brush tool. Confirm that you are indeed using the airbrush preset. Now, make several brush strokes within the selected area. Focus on making the right part of this area darker, as this will help define the form and create a sense of volume.
After applying the strokes, press Q to clear the selection. You will notice that you have created more complex shading with the aid of the selection. The right part of the shaded area appears sharp, while the left part exhibits a softer gradient. This combination of selection and brushwork allows for precise control over the shape and intensity of your shadows.
Refining Shading with Blender Brushes and Eraser Mode
While the selection and soft brush technique is powerful, it may not always produce the desired painterly effect. Sometimes, the resulting shading lines can appear jagged or harsh, especially when viewed independently of the sketch. If your artistic goal is a more blended and painterly style, these sharp lines will need to be smoothed out.
To achieve this, Krita's blender brushes are invaluable. Select a blender brush, such as the "Smear" brush, and gently drag several strokes along the harsh shading lines. This action will soften the edges and blend the colors, creating a more natural and organic transition. The smear brush effectively pushes and mixes the existing color pixels, smoothing out any abrupt edges and giving your shading a more cohesive appearance.
Following this, let's consider another anatomical detail. If you're working on a skull, you might notice a bony protrusion that holds the jawbone, likely part of the temporal bone. Sometimes, the shadows in these specific bony areas can obscure their form. To refine this, you can reduce the shadow in such areas. Press Z again to bring up the selection tool. Select the specific bone area you wish to adjust. Now, instead of painting, you can utilize the airbrush preset in eraser mode. This can be activated by clicking the eraser icon in the toolbar or by using a specific shortcut. With the airbrush in eraser mode, gently brush over the selected bone area. This will subtly lighten the area, revealing the underlying form of the bone and preventing the shadows from flattening its three-dimensional quality.
This demonstration highlights the versatility of Krita's tools. By combining selection tools, various brush presets (like the airbrush), and specialized modes (like eraser mode), along with essential refinement tools like blenders, you can construct complex shading that accurately conveys the shape and volume of any object you can imagine.
Applying Advanced Shading to Facial Features: Eyebrows and Eyes
The principles discussed can be systematically applied to various parts of your artwork, including intricate facial features like eyebrows and eye sockets. Let's continue with the eyebrows and eye areas of our skull object.
The process largely mirrors the techniques already employed. Begin by using the outline selection tool (Z) to define the area around the eyebrows. Once the selection is made, switch back to the brush tool (B) and select the airbrush preset. Apply several brush strokes within the selected area, focusing on making the upper part of the eyebrow darker to suggest form and depth.
Following the application of the base shading, use a blender brush, such as the smear brush, to smooth out any harsh shading lines, achieving a more natural transition. Subsequently, you can use the blur brush in conjunction with the selection tool to further refine the shading, perhaps by softly blurring the bottom areas of the eyebrows to create a subtle gradient.
The same procedural approach is applied to the eye sockets. Use the selection tool to isolate the eye area. Employ the airbrush preset to lay down the initial shading. Then, utilize the smear or blur brushes to blend and refine the shadows, ensuring that the depth and form of the eye socket are effectively represented. This iterative process of selecting, painting, and blending allows for meticulous control over the subtle nuances of light and shadow on these delicate features.
The Path Forward: Highlights and Textural Details
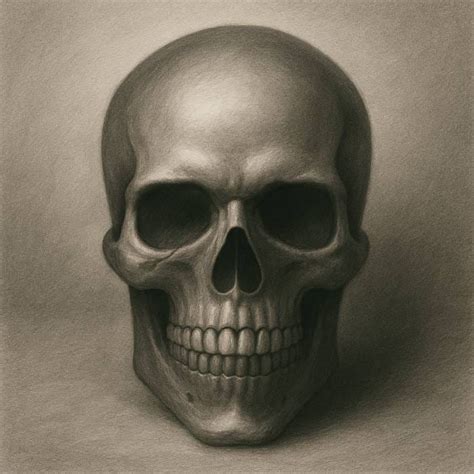
As we reach this stage of our shading process, we have successfully established a foundation of complex shadows and form using Krita's selection and brush tools. The skull object now possesses a discernible three-dimensionality, thanks to the careful application of light and dark values.
The next logical progression in rendering any digital artwork involves introducing highlights and incorporating more intricate textural details. Highlights are the areas where light directly strikes the surface, and they are crucial for defining form and adding a sense of material. These bright accents will contrast with the shadows we've already created, further enhancing the illusion of depth and realism.
Beyond simple shading, many objects possess surface textures that contribute significantly to their visual appeal and believability. For our skull, this could involve rendering subtle cracks, minor dents, or the porous texture of bone. These details, when rendered with care, can elevate the artwork from a basic representation to a more compelling and lifelike depiction. The techniques for applying highlights and textural details will build upon the foundational understanding of brushwork, opacity, and blending that we have explored throughout this tutorial.