Ever uploaded a video only to find black bars ruining your perfect shot, or your footage stretched in all the wrong ways? You’re not alone. Aspect ratio is simply the width-to-height ratio of your video, and it plays a huge role in how your content looks on different platforms. Understanding these ratios is just the first step. Once you know which aspect ratio fits your target platform, the next step is learning how to adjust aspect ratio properly in DaVinci Resolve. Fortunately, whether you’re working with a whole project, a specific timeline, or individual clips, there are clear methods to get your footage looking just right. Changing your video’s aspect ratio might seem tricky at first, but DaVinci Resolve actually gives you several ways to get it done-whether you’re adjusting an entire project, a specific timeline, or just a single clip.
Understanding Aspect Ratios in DaVinci Resolve
Aspect ratio refers to the proportional relationship between a video’s width and height. Whether you're editing for social media, film, or marketing, mastering aspect ratio adjustments ensures that your videos always look professional and optimized for their intended audience. Simply divide the width of the video by its height. For example, if a video has a resolution of 1920×1080 pixels, the aspect ratio is 1920 ÷ 1080 ≈ 1.778. However, on a TV screen, pixel ratios deviate from 1:1. When you watch a video on TV that has a 16:9 aspect ratio on a computer, you might notice the video appearing horizontally stretched.
A Brief History and Evolution of Aspect Ratios
4:3 Aspect Ratio: During the early stages of filmmaking, the standard film size was 4:3, which adhered to the principles of the "golden ratio" and offered pleasing visual aesthetics. The birth of this aspect ratio is somewhat tied to Thomas Edison. In 1909, the Motion Picture Patents Company, controlled by Edison, declared the 4:3 aspect ratio as the standard for all American films to be shot and screened. Similar to the 4:3 aspect ratio is the 1.37:1 ratio, also known as the Academy ratio. For 4:3 aspect ratio videos in DaVinci Resolve, set the resolution to 1440x1080 in Project Settings. This format is commonly used for vintage-style videos and older TV formats.
16:9 Aspect Ratio: The 16:9 aspect ratio has become the international standard for high-definition television. This aspect ratio falls between 4:3 and 2.35:1, making it suitable for displaying almost all types of films. Today, 16:9 is the preferred aspect ratio for streaming videos. For YouTube, use 16:9 (1920x1080 for HD, 3840x2160 for 4K).
2.35:1 Widescreen Aspect Ratio: The 2.35:1 widescreen aspect ratio originated in the 1940s as movie theaters sought to compete with television. The standard cinematic widescreen aspect ratio is 2.39:1 (4096x1716 resolution). To achieve this look, go to Project Settings > Timeline Resolution and input custom dimensions or use a letterbox overlay.
9:16 Aspect Ratio: Compared to other aspect ratios, the 9:16 ratio provides a narrow frame that makes it challenging to create visually appealing compositions with depth. The common size for vertical short videos with a 9:16 aspect ratio is 1080*1920. For Instagram Feed, use 1:1 (1080x1080).
The existence of various ratios is a reflection of the evolution of film, television, analog photography, and digital photography. In conclusion, wider aspect ratios provide a broader sense of light and space, allowing for larger scenes to be depicted.
Common Aspect Ratios and Their Uses:
- 1:1 - Square: Commonly used for Instagram feed videos where balanced framing is key.
- 16:9 - Widescreen: The standard for YouTube, modern televisions, and most online video content.
- 9:16 - Vertical: Ideal for TikTok, Instagram Stories, and other mobile-first platforms.
- 2.35:1 / 2.39:1 - Cinematic Widescreen: Used in feature films for a grand, cinematic feel.
Changing Aspect Ratio in DaVinci Resolve: Step-by-Step Methods
Changing your video’s aspect ratio might seem tricky at first, but DaVinci Resolve actually gives you several ways to get it done-whether you’re adjusting an entire project, a specific timeline, or just a single clip.
Method 1: Adjusting Project Settings
This is the most fundamental approach, as Project Settings are basically your video’s starting point. Changing the aspect ratio in project settings sets the default for your timeline, clips, and the whole project, so everything stays consistent.
Step 1: Open Your Project & Go to Project Settings
- Open DaVinci Resolve and load your project.
- Click on the gear icon (bottom right) to open Project Settings.
- Under the Master Settings tab, locate Timeline Resolution and Pixel Aspect Ratio.
Step 2: Adjust the Aspect Ratio in Timeline Settings
- In Master Settings, locate Timeline Resolution.
- Select a preset resolution or enter a custom resolution (e.g., 1080x1920 for vertical videos).
- Adjust the Pixel Aspect Ratio if needed (usually set to Square Pixels 1.0 for standard formats).
- Click Save to apply changes.
Pro Tip: Changing the timeline resolution affects the entire project, so make sure to adjust this before adding text or overlays. If your footage does not match the new aspect ratio, DaVinci Resolve will crop or add black bars. You can manually adjust framing in the Edit tab.
Method 2: Adjusting Timeline Settings on the Edit Page
The Edit Page is where most creators spend the bulk of their time, and it’s perfect for making precise adjustments to both your timeline and individual clips. This method allows you to customize a specific timeline independently of your Project Settings.
Step 1: Access Timeline Settings
- Head over to the Edit Page and locate your timeline in the Media Pool.
- Right-click on your timeline and choose Timeline Settings.
Step 2: Customize Timeline Resolution
- Uncheck "Use Project Settings" so you can set a custom resolution for this timeline.
- Enter your desired custom resolution values (e.g., 1080x1080 for a 1:1 aspect ratio).
- If your project already has existing timelines or clips, look for "Mismatch Resolution" and select "Scale full frame with crop." This ensures your footage fills the frame properly without stretching or leaving black bars.
Pro Tip: Use Adjustment Clips to maintain flexibility when creating different versions.
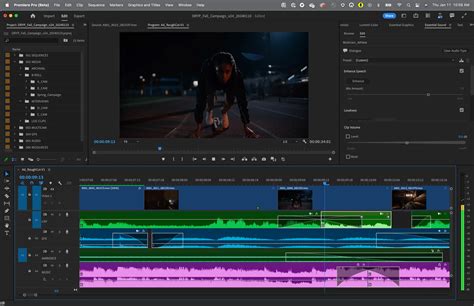
Method 3: Adjusting Individual Clips in the Inspector
Sometimes you don’t need to adjust the entire timeline-you just want a single clip to fit better into a different aspect ratio.
Step 1: Select the Clip
- Select the clip you want to adjust directly in your timeline.
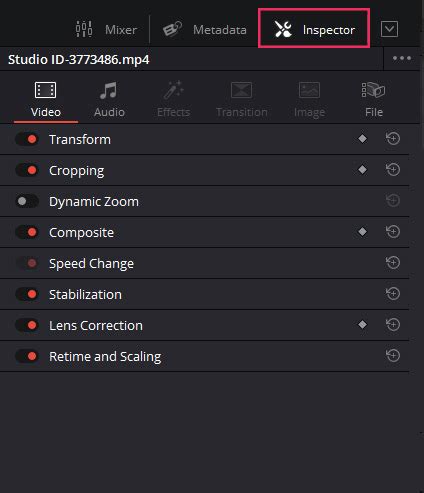
Step 2: Use the Inspector Panel
- Go to the Edit tab.
- Select the clip you want to adjust.
- Click Inspector (top right panel) and scroll to Transform settings.
- Adjust Zoom, Position (X/Y), and Rotation to properly fit the new aspect ratio. If you want full control over width and height, uncheck "Lock Aspect Ratio." Either input custom width and height values or pick from preset aspect ratios to match your platform.
Pro Tip: Use keyframes to dynamically adjust framing if you want a pan-and-scan effect on reframed footage.
Method 4: Quick Aspect Ratio Changes on the Cut Page
If you’re working on short-form content and need to change aspect ratio in DaVinci Resolve quickly, the Cut Page is your best bet.
Step 1: Access Aspect Ratio Presets
- Switch to the Cut Page.
- Click on the arrow next to the current aspect ratio display (usually in the top right corner) to reveal a dropdown menu with four presets: 38402160 (16:9), 19201080 (16:9), 10801920 (9:16), and 10801080 (1:1).
Step 2: Select Desired Aspect Ratio
- From the dropdown, select the aspect ratio you want to use.
Step 3: Refine Framing
- Once applied, check your clips in the timeline. If they don’t fit perfectly, open the Inspector and use the Zoom and Position controls to make sure your subject is centered and framed correctly.
How To Change Aspect Ratio in Davinci Resolve (Step by Step Tutorial)
Mismatched Resolution Settings Explained
When your footage’s resolution doesn’t match your timeline’s resolution, DaVinci Resolve needs to know how to handle it. This is controlled by the "Mismatch Resolution" setting.
- Center Crop with No Resizing: This option maintains the original clip size without scaling. This will result in black bars if the clip's aspect ratio doesn't match the timeline's.
- Scale Full Frame with Crop: This option scales the clip proportionally based on the shorter edge, aligning it with the project resolution's shorter edge. This ensures the frame is filled, but parts of the image might be cropped.
- Scale Entire Image to Fit: This is the default option. It scales the clip proportionally based on the longer edge, aligning it with the timeline resolution's longer edge. This will fill the frame but may result in black bars on the sides.
- Stretch Frame to All Corners: This option non-proportionally stretches the clip size to fit the timeline resolution entirely. This can distort your footage, so it's generally not recommended unless you have a specific creative reason.
Common Problems and Solutions
Even after you’ve set your project, timeline, or clip to the right size, you might run into a few common problems.
- Black Bars: These usually mean your footage doesn’t fit the new frame. You can address this by zooming and repositioning your clips in the Inspector, or by selecting "Scale full frame with crop" in the Mismatch Resolution settings.
- Cropping of Key Elements: Switching from widescreen (16:9) to vertical (9:16) or vice-versa often crops part of the frame. Use the Zoom and Position controls in the Inspector to reframe your shot and ensure important elements are visible. You can also use keyframes to create a dynamic pan-and-scan effect.
- Stretched Footage: This happens when "Stretch Frame to All Corners" is selected or if you manually uncheck "Lock Aspect Ratio" and stretch the clip. Ensure "Lock Aspect Ratio" is checked when scaling, or use the "Scale full frame with crop" or "Scale entire image to fit" options for automatic scaling.
Addressing Quality Concerns with Zooming
When you have footage shot at a higher resolution (e.g., 3200×1800) and you're editing in a sequence with a different aspect ratio (e.g., 3200×1340 for 2.35:1), you might be concerned about zooming in and losing quality. If you have footage shot at 3200×1800 (16×9) and you are editing in a 3200×1340 (2.35:1) sequence, the footage will initially appear with black bars on the left and right. Zooming it to 1.34 in the Transform Settings is effectively blowing it up and losing quality, as would be using the “fill” setting under Retime and Scaling. In this scenario, using the ‘Crop’ setting in Retime and Scaling is a better choice. Cropping removes the parts of the image that are outside the desired aspect ratio without scaling the remaining image, thus preserving its original quality. Therefore, make sure to define your Project settings, under Master settings, accordingly to your maximum frame resolution if you don’t want to upscale any footage.
Best Practices for Aspect Ratio Changes in DaVinci Resolve
- Always start editing in the highest resolution possible (4K preferred). This provides more flexibility for reframing and cropping without significant quality loss.
- Set your aspect ratio before adding text or overlays to avoid misalignment. Changes after adding elements can cause them to appear in the wrong place.
- Use Adjustment Clips to maintain flexibility when creating different versions. You can apply global transformations to all clips below them, which is useful when creating multiple versions of the same video for different platforms.
- Double-check framing after changing the aspect ratio to avoid cropping key elements. Review your footage carefully to ensure important subjects are still within the frame.
- Use keyframes to create dynamic aspect ratio transitions for creative effects. This allows for smooth, animated changes in framing.
- If you need more control over scaling, reframing, and bulk adjustments across many clips, consider using Fusion or dedicated tutorials on resizing frames and videos.
Advanced Techniques and Tools
Automating Aspect Ratio Changes with TourBox
For those who frequently change aspect ratios, tools like TourBox can streamline the process. By utilizing its macro function, you can avoid the hassle of manually entering numbers and create custom aspect ratios with a single click. You can create multiple macros to simulate manual aspect ratio changes in DaVinci Resolve and assign them with corresponding resolution names for easy identification in a TourMenu. This allows you to change the aspect ratio of your videos with just one hand.
Utilizing Adjustment Clips for Flexibility
Yes, adding an Adjustment Clip on top of your timeline allows you to apply global transformations to all clips below it. This is useful when creating multiple versions of the same video for different platforms, allowing for consistent aspect ratio adjustments across your project.
Applying Aspect Ratio Overlays
To apply an aspect ratio overlay, import a transparent PNG file with black bars or use Fusion to create a custom frame mask. This method ensures precise framing while maintaining the intended cinematic look, especially when working with specific aspect ratios like cinematic widescreen.
Exporting Videos in Different Aspect Ratios
Yes, you can export videos in different aspect ratios by adjusting the Timeline Resolution before rendering. Use Adjustment Clips to quickly apply changes across multiple versions. The best export format for different aspect ratios in DaVinci Resolve varies by platform. For YouTube, use H.264 MP4 (1920x1080, 16:9). For cinematic widescreen, export in 4096x1716 (2.39:1). These formats ensure compatibility across different platforms. You can automate exports using Render Presets in the Deliver tab. Create multiple export settings for different aspect ratios and batch render them to speed up the process.
Frequently Asked Questions
How do I change the aspect ratio in DaVinci Resolve?To change the aspect ratio in DaVinci Resolve, go to Project Settings by clicking the gear icon in the lower right corner. Under the Master Settings tab, adjust the Timeline Resolution to the desired aspect ratio (e.g., 1080x1920 for vertical videos or 4096x1716 for cinematic widescreen formats). Save the settings and reposition your clips in the Edit tab to fit the new dimensions.
Can I change the aspect ratio of an existing project in DaVinci Resolve?Yes, you can change the aspect ratio of an existing project by going to Project Settings > Timeline Resolution and selecting a new resolution. After applying the changes, you may need to manually adjust clip positions and scaling in the Edit tab to avoid cropping or black bars.
What is the best aspect ratio for YouTube videos in DaVinci Resolve?The best aspect ratio for YouTube is 16:9 (1920x1080 for HD, 3840x2160 for 4K). Then, go to the Edit tab and use the Transform controls in the Inspector panel to reframe your footage.
How do I crop a video to fit a new aspect ratio in DaVinci Resolve?In the Edit tab, select your clip, then go to the Inspector panel and adjust the Zoom, Position (X/Y), and Crop settings. You can also use the Dynamic Zoom tool for smooth resizing and reframing.
How do I remove black bars after changing the aspect ratio?To remove black bars, go to the Edit tab, select the clip, and use the Zoom and Position settings in the Inspector panel to adjust framing. If necessary, use the Crop tool to ensure a clean fit without stretching the video.
How do I change aspect ratio dynamically in DaVinci Resolve?You can animate aspect ratio changes using Fusion or keyframes. In Fusion, create a custom frame mask and use keyframes to gradually transition between aspect ratios.
What resolution should I use for 4:3 aspect ratio videos in DaVinci Resolve?For 4:3 videos, set the resolution to 1440x1080 in Project Settings.
How do I resize multiple clips at once in DaVinci Resolve?To resize multiple clips at once, select all clips in the timeline, open the Inspector panel, and adjust the Zoom and Position settings. You can also create a Group Clip or use an Adjustment Clip for bulk modifications.
Can I automate aspect ratio changes for multiple exports in DaVinci Resolve?Yes, you can automate exports using Render Presets in the Deliver tab. Create multiple export settings for different aspect ratios and batch render them to speed up the process.
What are the recommended aspect ratios for different social media platforms?For YouTube, use 16:9 (1920x1080 or 3840x2160). For Instagram Feed, use 1:1 (1080x1080). For cinematic widescreen, use 2.39:1 (4096x1716). For TikTok and Instagram Stories, use 9:16 (1080x1920).