Weight painting is a crucial technique for character rigging and animation in Blender, allowing for precise control over how a mesh deforms when its underlying bones are manipulated. This mode provides a visual and intuitive way to assign influence, often proving to be the fastest method for achieving desired results. Understanding how to effectively navigate and utilize Weight Paint Mode is fundamental for any aspiring 3D animator or character artist working with Blender.
Entering Weight Paint Mode
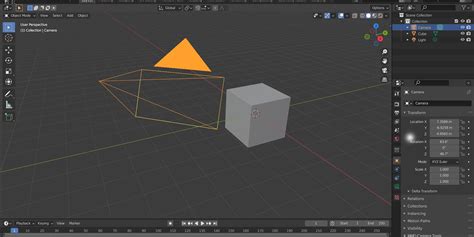
To begin working with weight painting, you first need to enter the specific mode within Blender. This is a straightforward process. Locate the "Interaction Mode" selector in the header of the 3D Viewport. This selector typically displays an icon representing the current mode (e.g., Object Mode, Edit Mode). Click on this selector and choose "Weight Paint" from the dropdown menu. Once selected, your 3D model will appear with a color overlay, indicating the current bone weights.
Understanding the Color Spectrum of Bone Weights
Upon entering Weight Paint Mode, the most striking visual change is the colorization of your model. This color gradient is not merely decorative; it directly represents the influence of the currently selected bone on the mesh vertices. The spectrum typically ranges from blue to red, with intermediate colors like green and yellow.
- Blue: Represents zero influence. Vertices colored blue will not be affected by the movement of the selected bone at all.
- Green: Indicates a moderate level of influence.
- Yellow: Signifies a stronger influence than green.
- Red: Denotes full influence. Vertices colored red will move directly with the selected bone.
The transition between these colors signifies a gradual change in influence, allowing for smooth and natural deformations. This visual feedback is essential for making informed adjustments to your weights.
The Weight Paint Mode Interface and Tools
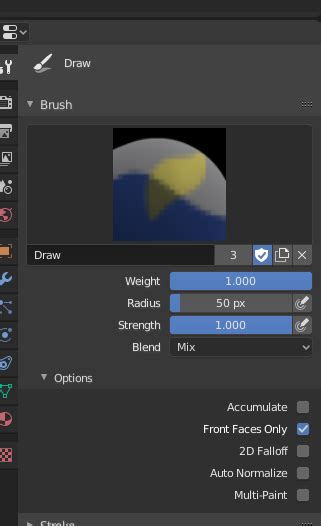
Weight Paint Mode shares many similarities with other painting modes in Blender, such as Texture Paint Mode. On the left-hand side of the 3D Viewport, you'll typically find a panel containing various painting tools and settings. This is where you'll access the brushes and options to modify your bone weights.
Brush Types and Blend Modes
The primary tools for weight painting are brushes, which you use to "paint" influence onto your mesh. In recent versions of Blender, the organization of these brushes may have seen some re-organization. While older tutorials might show specific "Add" or "Subtract" brushes, newer versions often achieve these functionalities through the "Blend Mode" settings of the primary "Paint" brush.
- Paint Brush: This is your main tool. When set to "Mix" blend mode, it functions similarly to the "Draw" brush in older versions, applying the weight value you've set.
- Blend Modes: To replicate the functionality of "Add" and "Subtract" brushes, you can adjust the blend mode of the Paint brush.
- Add: Setting the blend mode to "Add" allows you to increase the weight of the selected bone at the painted area. This is equivalent to the "Add" brush in older Blender versions.
- Subtract: Conversely, setting the blend mode to "Subtract" will decrease the weight of the selected bone, effectively removing its influence from the painted vertices. This mirrors the functionality of the "Subtract" brush.
- Average Brush: This brush type is useful for smoothing out transitions between areas of different weights, helping to create more natural deformations.
- Blur Brush: Similar to the Average brush, the Blur brush helps to soften sharp transitions and create smoother weight distributions.
- Smear Brush: The Smear brush allows you to "drag" existing weights around the mesh, which can be useful for fine-tuning specific areas.
Adjusting Brush Settings
Beyond the blend mode, several other brush settings significantly impact your weight painting:
- Weight: This slider controls the intensity of the weight you are applying. A weight of 1.0 means full influence, while 0.0 means no influence.
- Radius: Determines the size of the brush.
- Strength: Controls how strongly the brush's effect is applied. This is similar to the "Weight" setting but can be adjusted independently for more nuanced control.
- Falloff: Affects the shape of the brush's influence, determining how the weight tapers off from the center of the brush.
Selecting Bones for Weight Painting
A critical aspect of weight painting is ensuring you are applying weights to the correct bone. There are several methods for selecting bones:
- Armature Selection: In Object Mode, you can select the armature and then enter Pose Mode. From Pose Mode, you can select individual bones. When you then switch to Weight Paint Mode (while the armature is still selected), the weights for the selected bone in Pose Mode will be displayed.
- Direct Bone Selection in Weight Paint Mode: While in Weight Paint Mode, you can often select bones directly in the 3D Viewport. This typically involves using modifier keys in conjunction with mouse clicks. A common and effective method for selecting individual bones without accidentally painting is using Shift + Ctrl + Left Click. Alternatively, Alt + Left Click can also be used in some contexts for bone selection. It's important to note that if the bone icon in the header is active, clicking on a bone might initiate painting instead of selection. Using the keyboard shortcuts ensures you are targeting bone selection specifically.
Blender 4.0 - Weight Paint Workflow (& Techniques!!)
Advanced Weight Painting Techniques and Considerations
As you become more comfortable with the basics, you can explore more advanced techniques and considerations to refine your character rigs.
Vertex Groups and Their Role
Weight painting in Blender is intrinsically linked to vertex groups. Each bone in an armature typically has a corresponding vertex group assigned to it. The weights you paint directly modify the influence values within these vertex groups. You can view and manage these vertex groups in the Object Data Properties tab of your mesh.
The Importance of Smooth Deformations
The goal of weight painting is to achieve smooth and natural deformations of your mesh as the bones move. Sharp transitions in weight can lead to undesirable "pinching" or "stretching" artifacts. The Average and Blur brushes are invaluable for smoothing these transitions. Additionally, carefully painting weights with a soft brush and lower strength can help create more organic results.
Addressing Specific Rigging Challenges
- Errant Vertices: Sometimes, individual vertices can become unintentionally influenced by a bone, leading to strange movements. Identifying and correcting these errant vertices is a common task. This often involves carefully selecting the problematic vertex and adjusting its weight for the relevant bones, possibly using the Subtract blend mode or a brush with low strength.
- Complex Meshes: For characters with intricate geometry, such as flowing clothing or detailed facial features, weight painting can become more complex. Breaking down the process into smaller, manageable sections and focusing on one bone or area at a time can be very helpful.
- Mirroring Weights: For symmetrical characters, you can often mirror weight paint data from one side of the mesh to the other. This can be a significant time-saver, though it often requires manual touch-ups to account for subtle asymmetries.
Workflow Tips for Efficiency
- Work with the Rig: It's often beneficial to have the armature in Pose Mode while weight painting. This allows you to see how your weight adjustments affect the deformation in real-time as you move the bones.
- Test Frequently: Don't wait until you've painted a large amount of weight before testing your deformations. Regularly pose your character to identify any issues early on.
- Save Iterations: As you make significant progress, consider saving incremental versions of your Blender file. This provides a safety net in case you need to revert to an earlier state.
By understanding these principles and actively practicing, you can master Weight Paint Mode in Blender and create compellingly animated characters with realistic and fluid movements. The visual feedback provided by the color spectrum, combined with the versatile brush tools, makes weight painting a powerful and rewarding aspect of the 3D animation pipeline. Remember that patience and attention to detail are key to achieving professional-quality results.