As digital photography expands and the volume of raw images and associated program-generated files grows, managing storage becomes a critical challenge. Many users find their internal computer hard drives quickly becoming saturated with the demands of applications like Adobe Lightroom and Photoshop. This article addresses the common question of how to effectively utilize external hard drives to alleviate this pressure, ensuring a smooth and efficient workflow for photographers of all levels.
Understanding Lightroom's Storage Architecture
At its core, Lightroom is designed to manage your photo library efficiently. While the application itself requires installation on your computer's internal drive for optimal performance, the vast majority of your photographic assets-including original raw files, previews, and catalog data-can and often should reside on external storage. This separation is key to preventing your primary system drive from becoming a bottleneck, which can lead to slower performance and the frustrating "disk full" errors.
The primary components of your Lightroom setup that consume significant storage space are:
- Original Raw Files: These are the uncompressed or minimally compressed image files captured by your camera. They are the foundation of your library and are typically the largest files.
- Smart Previews: Lightroom can generate smaller, optimized versions of your raw files called Smart Previews. These allow for editing and catalog management even when the original files are offline or on a slower drive.
- Catalog File (.lrcat): This is the central database that stores all information about your photos, including metadata, develop settings, keywords, and organizational structure. While not as large as raw files individually, the catalog can grow substantially over time, especially with large libraries.
- Previews: Lightroom generates various types of previews (e.g., standard, 1:1) to speed up the display and editing process. These can consume considerable space, particularly the 1:1 previews, which are full-resolution representations of your images.
- Exported Files: When you export finished images for sharing or printing, these JPEGs, TIFFs, or other formats also require storage.
- Photoshop Documents: If you frequently use Photoshop for advanced editing, the resulting PSD or TIFF files can also be substantial.
By strategically placing these components on an external drive, you can ensure that your computer's internal SSD or HDD remains free for the operating system and applications, leading to a snappier and more responsive experience.
Setting Up Lightroom for External Storage: The Initial Configuration
When setting up Lightroom CC for the first time, or when migrating an existing library, you are presented with key decisions regarding where your data will be stored. The primary goal is to direct Lightroom to use your external drive for the bulk of its data.
1. Initializing Lightroom and Catalog Location:Upon launching Lightroom for the first time, you will likely be prompted to create or import a catalog. This is your first opportunity to specify storage.
- Create a New Catalog: When prompted to create a new catalog, you will have the option to choose the save location. Navigate to your desired external hard drive and create a new folder for your Lightroom catalog. A common practice is to name this folder something like "Lightroom Catalog" or "Photo Library."
- Specify Catalog File Location: Within this folder, Lightroom will create a
.lrcatfile. It is crucial that this file resides on your external drive.
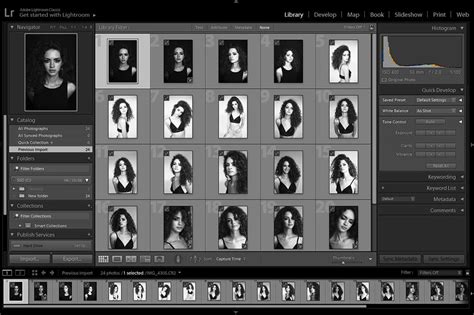
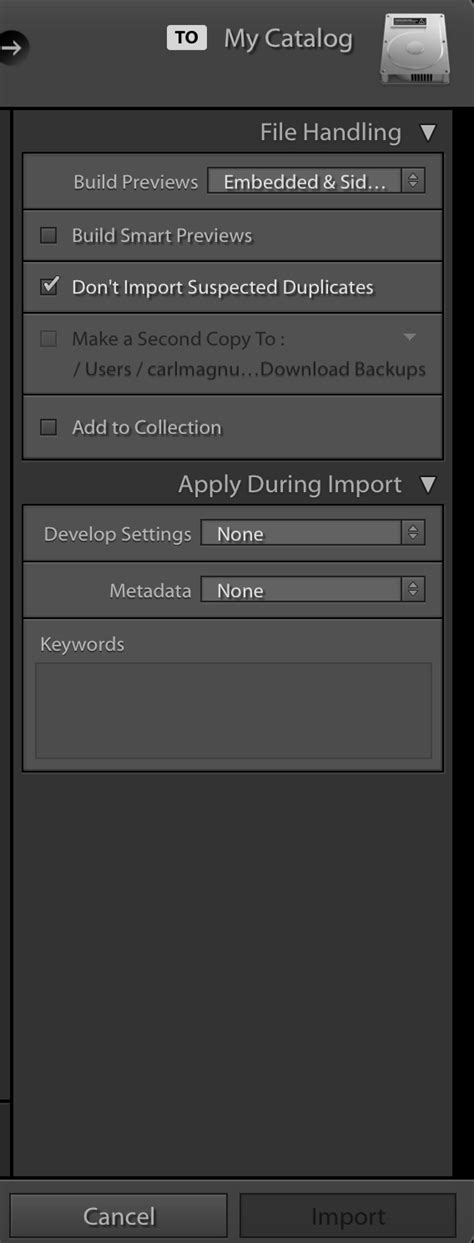
2. Importing Photos: The Crucial Step:The most critical decision point for external storage management occurs during the import process. When you import your first batch of photos, Lightroom will ask you where to store them.
"Copy" vs. "Move" vs. "Add":
- Add: This option simply tells Lightroom where the files already are. If your photos are already on an external drive, you can use "Add." However, if they are on your computer's internal drive, this is not a solution for freeing up space.
- Move: This option moves the original files from their current location to a new location you specify.
- Copy: This option duplicates your original files from their current location to a new location you specify.
For the purpose of moving your primary photo library to an external drive, the "Copy" option is generally the safest and most recommended. This ensures that your originals are duplicated to the external drive before you consider removing them from the internal drive.
Destination Folder: During the import process, under the "File Management" section, you will see options for "Destination." This is where you specify the folder on your external hard drive where your raw image files will be copied. You can create subfolders here to organize your photos by year, month, event, or any other logical structure that suits your workflow.
3. Managing Previews and Smart Previews:Lightroom's performance is heavily influenced by how it handles previews.
Catalog Settings: Within Lightroom, go to
Edit > Catalog Settings(Windows) orLightroom Classic > Preferences > Catalog(macOS). Here, you can configure how previews are managed.- Build Previews: You can choose to build standard previews or 1:1 previews. Building 1:1 previews creates a full-resolution copy of each image within the catalog folder (which is on your external drive), significantly speeding up zooming and editing but consuming more space. Building standard previews creates smaller previews, saving space but potentially slowing down certain operations. For most users with external storage, building 1:1 previews is a worthwhile trade-off for performance.
- Smart Previews: Ensure that "Build Smart Previews" is checked if you plan to work with your library while the external drive is disconnected, or if you want to maintain a smaller, manageable set of previews. Smart Previews are stored within the catalog file itself.
Location of Previews: By default, Lightroom stores previews alongside the catalog file. Therefore, ensuring your catalog is on the external drive automatically places your previews there as well.
Strategies for Optimal External Drive Usage
Simply moving files to an external drive is the first step; optimizing their usage requires a thoughtful strategy.
1. Choosing the Right External Drive:The type of external drive you choose significantly impacts performance.
- HDD (Hard Disk Drive): These are generally more affordable and offer higher capacities, making them suitable for long-term storage of large archives. However, their mechanical nature means slower read/write speeds, which can affect Lightroom's responsiveness, especially when working with many large raw files.
- SSD (Solid State Drive): SSDs offer dramatically faster read/write speeds due to their lack of moving parts. This translates to quicker import times, faster preview generation, and a more fluid editing experience. While more expensive per terabyte, an SSD is highly recommended for your active Lightroom catalog and frequently accessed images. For very large libraries, a combination of an SSD for the catalog and active projects, and an HDD for archive storage, can be an effective solution.
- Connection Type: For optimal performance, ensure your external drive connects via a fast interface like USB 3.0, USB 3.1, USB-C, or Thunderbolt. These offer significantly higher data transfer rates than older USB 2.0 connections.

2. Organizing Your External Drive:A well-organized external drive is crucial for efficient management.
- Dedicated Folders: Create a clear folder structure on your external drive. For example:
/Lightroom Catalog/(for your .lrcat file and associated previews)/Original Photos//2023//2023-01-15_New_York_Trip//2023-03-20_Portrait_Session/
/2024//2024-02-10_Mountain_Hike/
- Consistency is Key: Stick to a naming convention for your folders and files. This will make it easier to locate specific shoots or images later.
3. Backing Up Your External Drive:This cannot be stressed enough: an external drive is not a backup solution on its own. Hardware failures can and do occur.
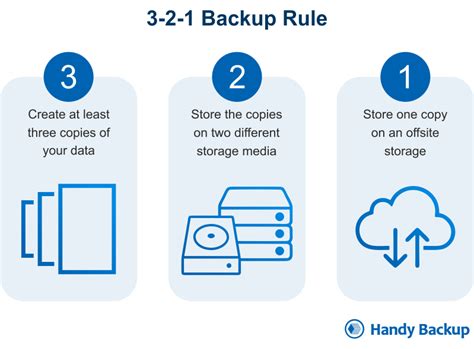
- The 3-2-1 Backup Rule: Implement a robust backup strategy. The 3-2-1 rule suggests having at least three copies of your data, on two different types of media, with one copy offsite.
- Copy 1: Your primary working library on your main external drive.
- Copy 2: A backup copy on a second external drive, stored locally.
- Copy 3: An offsite backup, which could be another external drive stored at a different physical location, or a cloud backup service.
4. Managing Storage Space:Even with an external drive, storage can fill up.
- Regular Review and Culling: Periodically review your photos and delete unwanted images (duplicates, out-of-focus shots, etc.). This process, known as culling, is essential for keeping your library manageable.
- Archiving Older Projects: For completed projects that you don't actively work on, consider moving them to a slower, larger-capacity archival drive (e.g., a large HDD) or a cloud archive service.
- Optimize Catalog: Periodically optimize your Lightroom catalog (
File > Optimize Catalog). This can help to reduce its size and improve performance.
Advanced Considerations and Troubleshooting
1. Drive Performance and Reliability:When choosing an external drive, consider its intended use. For active editing and frequently accessed images, an SSD is highly recommended. For archiving, an HDD can be more cost-effective. Always opt for reputable brands and ensure sufficient capacity for your current and future needs.
2. Catalog Corruption and Recovery:While rare, catalog corruption can occur. Regular backups are your best defense. If you suspect corruption, Lightroom often prompts you to restore from a backup upon launching. Always choose to restore from the most recent valid backup.
3. Drive Disconnection and Reconnection:If your external drive becomes disconnected while Lightroom is running or when you try to access files, Lightroom will display "missing file" icons.
- Locate Folder: You will need to tell Lightroom where the drive has been reconnected. Navigate to
Library > Find All Missing Photosand thenLibrary > Find Missing Folders. Lightroom will then prompt you to locate the parent folder, and it will relink all the photos within that folder. - Avoid Frequent Disconnection: For the smoothest workflow, it's best to keep your primary Lightroom external drive connected whenever you are actively working on your photos.
How to Find & Reconnect Missing Photos in Lightroom Classic
4. Lightroom CC vs. Lightroom Classic:The advice in this guide primarily applies to Lightroom Classic, which offers more granular control over catalog and file management. Lightroom CC (the cloud-centric version) stores originals in the cloud by default, with options for "Smart Previews" or "Originals" to be kept locally. If your goal is to offload storage from your computer's internal drive, ensuring that originals are stored on an external drive is the key. However, the workflow and control offered by Lightroom Classic are generally preferred by professionals who need detailed management of their local storage.
By implementing a well-planned external hard drive setup, you can significantly enhance your Lightroom workflow, ensuring that your computer's performance remains optimal while providing a secure and accessible home for your valuable photographic collection. This approach not only prevents storage limitations but also contributes to a more efficient and enjoyable editing process.