The Adobe Lightroom Classic software, a powerful tool for photographers, relies on a catalog to manage image files and their associated editing information. However, users can sometimes encounter a frustrating error message: "The file could not be found." This typically manifests as question marks (?) on folders in the Folders panel and exclamation marks (!) on individual photos in the grid or filmstrip view. When attempting to access these images, particularly in the Develop module, Lightroom is unable to locate the original files on your computer, leading to the error.
Lightroom's catalog, a database file with the .lrcat extension, stores references to the original photo files, including their location on internal or external storage drives. It does not store the actual image data itself. Consequently, if these original files are deleted, moved to a different directory, or if the storage drive they reside on becomes inaccessible (offline), Lightroom loses its connection to them. While Lightroom may still display thumbnail previews from its catalog, the actual image data remains inaccessible for editing or export.
Understanding Why Files Go Missing in Lightroom
The primary reason for the "file could not be found" error is a disruption in the link between Lightroom's catalog and the actual image files on your storage. This link can break for several reasons:
- Moving or Renaming Files/Folders Outside of Lightroom: This is perhaps the most common cause. If you use your operating system's file manager (like Windows File Explorer or macOS Finder) to move, rename, or delete folders or individual image files that have already been imported into Lightroom, the catalog's references become outdated. Lightroom will then be unable to find the files at their new location or under their new name. It is strongly recommended to perform all file and folder management within Lightroom itself to maintain these crucial links.
- Deleting Files Directly from the Hard Drive: If the original image files are permanently deleted from your hard drive, bypassing Lightroom's import/deletion process, the catalog will obviously be unable to find them.
- External Drive Disconnection: If your photos are stored on an external hard drive and that drive is offline or unmounted when you try to access them in Lightroom, the software will report them as missing.
- Catalog Corruption (Less Common): While rarer, corruption within the Lightroom catalog file itself could potentially lead to lost references, though this is less frequent than external file manipulation.
- Accidental Import Settings: Sometimes, photos might be imported using the "COPY" option, leading Lightroom to believe the files are in a different location than where the user expects them to be.

Strategies for Recovering Missing Photos and Fixing the Error
When faced with the "file could not be found" error, the core task is to re-establish the connection between Lightroom's catalog and the missing image files. This often involves locating the files and then telling Lightroom where they are.
Method 1: Reconnecting Folders and Files Directly in Lightroom
This is the most straightforward and recommended approach when you know the files have been moved or renamed.
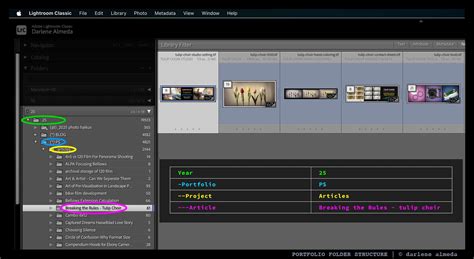
- Identify the Missing Folder or File: In Lightroom's Library module, look for folders with a question mark icon or individual photos with an exclamation mark icon.
- Locate the Missing Folder (If Entire Folder is Missing):
- Right-click (Windows) or Control-click (macOS) on the question-marked folder in the Folders panel.
- Select "Find Missing Folder" from the context menu.
- A dialog box will appear. Click "Locate" and navigate your file system to the correct current location of that folder.
- Once you select the correct folder, Lightroom will relink all the photos within it.
- Locate a Specific Missing Photo (If Individual Photo is Missing):
- Click on the exclamation mark icon on the photo in the grid or filmstrip view, or click on the "Photo is missing" icon at the bottom of the Histogram panel.
- A dialog box will appear prompting you to locate the file. Click "Locate."
- Navigate your file system to the correct current location of that specific photo.
- If the photo has been moved, you can specify its new location. If you've moved the entire folder containing the photo, it's often more efficient to use the "Find Missing Folder" method.
- If you have moved the linked folder or any contained photo using File Explorer, you can alternatively place it in its exact referenced location rather than specifying the new location from Lightroom.
How to find missing images and folders in Lightroom Classic
Method 2: Moving Folders or Files Back to Their Original Location
If you've moved files or folders outside of Lightroom using your operating system's file manager, the simplest solution is often to reverse that action.
- Identify the Last Known Location: Try to recall where the photos were originally stored within Lightroom's catalog.
- Use File Explorer/Finder: Open your computer's file manager and navigate to the location where you believe the files or folders were moved from or to.
- Restore to Original Location: Move the affected folders or individual image files back to their exact original referenced location as indicated by Lightroom. Once they are in the correct spot, Lightroom should automatically recognize them.
Method 3: Renaming Photos or Folders Correctly
If you've renamed a folder or an individual photo file using your operating system's file manager, Lightroom will lose its reference.
- Check Lightroom's Reference: If possible, try to determine the exact name Lightroom is looking for. Sometimes, the error message or the thumbnail might provide a clue.
- Use File Explorer/Finder: Navigate to the folder containing the missing file using your operating system's file manager.
- Rename to Match Lightroom: Rename the file or folder back to its original name as it was when it was imported into Lightroom. This ensures the link is re-established.
Method 4: Recovering Deleted Photos
If the photos were accidentally deleted, you'll need to recover them before you can reconnect them in Lightroom.
- Check the Recycle Bin/Trash: The first place to look is your computer's Recycle Bin (Windows) or Trash (macOS). If the files are there, restore them.
- Lightroom Cloud Storage: If you utilize Lightroom's cloud storage features, check your Lightroom cloud library for deleted items. You may be able to restore them from there.
- Backup Folder: If you have a backup system in place, check your backup folders for the missing images.
- File History (Windows): For permanently deleted files on a PC or laptop, Windows' "File History" feature can be a lifesaver. Connect your backup drive and use File History to restore the deleted files.
- Photo Recovery Software: In cases where files are permanently deleted and not found in backups or the Recycle Bin, specialized photo recovery software can be used. These tools scan your storage drive for deleted file fragments. After the scanning process is complete, you can search for and preview the missing photos. Once recovered, save them to a safe location, and then use Lightroom to reconnect them as described in Method 1. Note that the trial version of such software often allows scanning and previewing, but saving recoverable files typically requires activation.

Method 5: Addressing Potential Catalog Issues
While less common, sometimes the issue might stem from how Lightroom is interacting with its catalog.
- Opening the Correct Catalog: It's possible you might have accidentally opened a different Lightroom catalog than the one containing your images. In your menu options, try choosing "File" > "Open Recent" and select the catalog you were previously working with.
- Resetting Preferences (Advanced): In rare instances, a corrupted preferences file can cause unusual behavior. Resetting Lightroom's preferences can sometimes resolve persistent issues, but be aware that this will reset your custom settings. The process typically involves holding down specific keys while launching Lightroom.
Preventing Future "File Could Not Be Found" Errors
The best approach to the "file could not be found" error is prevention. By adhering to a few best practices, you can significantly reduce the likelihood of encountering this problem:
- Always Manage Files Within Lightroom: This is the golden rule. Never move, rename, or delete folders or image files that are part of your Lightroom catalog using your operating system's file manager. Always perform these operations within Lightroom's Library module.
- Keep External Drives Connected and Online: If your photos are stored on external drives, ensure these drives are connected and powered on when you intend to work with your Lightroom catalog.
- Regularly Back Up Your Catalog and Photos: Implement a robust backup strategy. This includes regularly backing up your Lightroom catalog file (.lrcat) and, most importantly, your actual photo files. This could involve using external hard drives, network-attached storage (NAS), or cloud backup services.
- Understand Import Options: Be mindful of the import options you select (Copy, Move, Add). Ensure you understand where Lightroom is placing your files. If you're unsure, using the "Add" option and then manually moving files to your desired organizational structure within Lightroom is often safer.
- Avoid Renaming Folders in Finder/Explorer: As mentioned, renaming a folder with Finder or File Explorer (e.g., from "MyPhotos" to "My Photos") will cause all images within that folder to go "missing" in Lightroom. Always rename within Lightroom.
By understanding how Lightroom manages your files and by adopting these preventative measures, you can ensure a smoother and more efficient workflow, keeping your precious photographic memories accessible and editable.