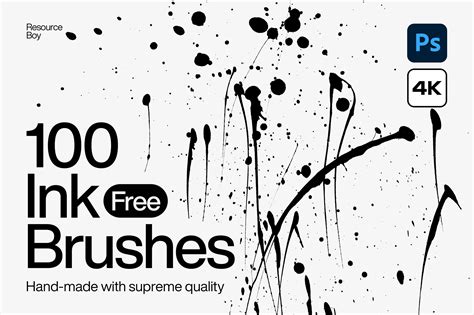
The ability to create custom Photoshop brushes opens up a universe of creative possibilities for designers and illustrators. Gone are the days when one was limited to the stock options; now, you can imbue your digital artwork with the unique textures and strokes of your own imagination. Whether you're looking to replicate the subtle charm of traditional ink or the organic feel of a sponge, Photoshop provides the tools to transform your ideas into powerful digital assets. This guide will walk you through the process, from sourcing your initial textures to defining and refining your unique brush presets.
From Physical Textures to Digital Assets
Throughout the 19th and 20th century, print was king. This era, rich with tactile mediums, offers a wealth of inspiration for digital artists. To begin crafting your own custom brushes, the first step involves creating some subtle textures to use as source material. You can really use any canvas size to get started creating custom brushes in Photoshop. However, for best results, it is recommended to work on a larger canvas. When you create custom brushes using a larger pixel size, the details tend to be more visible and stay intact when you resize the brush.
Experimentation is key in this phase. You can use anything to experiment with finding new textures for your custom Photoshop brushes. Play around with using old sponges, inks, pens, paints, and pencils. Grab a piece of paper and make an assortment of strokes, blobs, and shapes. Feeling stiff? Try these 12 drawing warm-up exercises. Once your blobs are dry, scan the paper with a scanner, or take a good photo using your phone. I like to scan at 600 DPI in black and white. I've cut the paper so it would fit my scanner. I've also numbered my paper to keep track of what I've scanned. In this image you can see I'm on page 37. You definitely don't have to do as many pages of textures.
Preparing Your Source Material in Photoshop
Once your textures are digitized, the next crucial step is to prepare them within Photoshop. In Layers, make a new layer without a background. For custom Photoshop brushes, you can work with a file or drawing that has color, but the image will translate to black and white (wherein the black or color variation becomes the brush pattern).
You’ll need to remove the background color in order to make your custom brush. In the Blending Options menu, go down to Blend If. Move the arrows along the gradient bar. If you have a white background, use the white arrow; if you have a black background, use the black arrow. Adjust the layer background until the background color is gone. If the edges around your objects seem harsh, hold the Option/alt key to split the arrow.
In this example, we're using sponge brush tips so all we really need to do is add a Levels layer from the Adjustment panel. This allows you to fine-tune the tonal range of your texture, ensuring that the important details are preserved and the background is effectively eliminated. The black areas will become the visible shape of the brush (known as the brush tip). Photoshop paints using the current Foreground color, and as luck would have it, the default for the Foreground color is black, which means there's a very good chance yours is already set to black. You can see the current Foreground and Background colors by looking at their color swatches near the bottom of the Tools palette (the Foreground color is the swatch in the top left).
Defining Your Brush Preset
Now for the best part. With your prepared texture ready on its own layer, the process of turning it into a brush is remarkably straightforward. In the main menu of Photoshop, select Edit > Define Brush Preset. This will open a panel where you can name your brush. Be sure to give it a descriptive and fun name. The descriptive part makes it easy to find. Congratulations! You’ve just created your first custom Photoshop brush. You can now further adjust your brush in the Brush panel. That's it!
Every Photoshop Custom Brush Setting Explained
Refining Your Brush with the Brush Settings Panel
Of course, this is just the beginning of making brushes. Think of it like a warp tube from Super Mario Bros. The Brush panel offers a wide variety of settings, including Size, Spacing, Shape Dynamics, and many more. To access these advanced options, open the brush settings panel (Window > Brush settings).
The brush tip shape setting allows you to choose from a wide range of brush shapes and sizes, including round, square, and custom shapes. Spacing controls how frequently the brush tip is stamped as you drag your mouse. For a smooth brush stroke, the default spacing setting is usually too high. Lowering this value will create a more continuous stroke, while increasing it will result in a more stippled or broken effect.
Shape dynamics determine how the brush shape changes as you paint, allowing for more organic and varied brush strokes. With the Shape Dynamics option selected, you can control parameters like Size Jitter, Angle Jitter, and Roundness Jitter. A particularly useful setting here is the Angle control, which can be set to "Direction." This ensures that the brush tip rotates to follow the direction of your stroke, creating a much more natural and responsive feel. If you're using a pressure-sensitive pen tablet, you can also set the Size control to Pen Pressure, allowing your stylus's sensitivity to dictate the brush size.
Scattering creates random or scattered marks, which can add a sense of chaos or energy to your artwork. Texture can be added to your brush strokes, giving them a more realistic and tactile feel. This setting allows you to use two brushes simultaneously, which can create interesting and unique effects. Adding noise to your brushwork can create a more textured and interesting effect.
Understanding Brush Dynamics and Settings
The core of a Photoshop brush lies in its "tip shape" and how that shape is dynamically rendered as you paint. When you define a brush, you are essentially capturing a grayscale image that Photoshop uses as a stamp. White areas in your source image become transparent, while black areas become opaque. Shades of gray translate to varying levels of opacity.
The Brush Settings panel (Window > Brush Settings) is where the true magic happens, allowing for an immense level of customization. Let's delve into some of the key areas:
- Brush Tip Shape: This is where you select your defined brush or one of Photoshop's many presets. You can also adjust the Spacing, which dictates the distance between successive stamps of the brush tip. A lower spacing creates a smoother, more continuous stroke, while a higher spacing results in individual stamps becoming more apparent.
- Shape Dynamics: This section controls how the brush tip's properties (size, angle, roundness) change as you paint.
- Size Jitter: Randomizes the size of the brush tip.
- Angle Jitter: Randomizes the rotation of the brush tip.
- Roundness Jitter: Randomizes the roundness of the brush tip.
- Control: This is a powerful setting. "Pen Pressure" allows your stylus's pressure to control brush size, angle, or roundness (if you have a graphics tablet). "Direction" makes the brush tip rotate to follow the stroke's path. "Initial Direction" sets the angle based on the initial direction of the stroke.
- Scattering: This setting distributes the brush tip randomly around the stroke path.
- Scatter: Controls the amount of scattering.
- Count: Determines how many instances of the brush tip are scattered.
- Texture: This allows you to overlay a pattern onto your brush strokes, adding another layer of depth and realism. You can select from Photoshop's built-in patterns or load your own.
- Scale: Adjusts the size of the texture pattern.
- Brightness/Contrast: Modifies the tonal values of the texture.
- Mode: Determines how the texture blends with the brush stroke.
- Dual Brush: This advanced feature allows you to combine two brush tips to create complex brush marks. The second brush texture is applied within the brush stroke of the primary brush; only the areas where both brushstrokes intersect are painted. You can control the size, spacing, and blending mode of the dual brush.
- Color Dynamics: This setting allows for variations in color as you paint, such as foreground/background jitter, hue jitter, saturation jitter, and brightness jitter.
- Transfer: This section controls the opacity and flow of the brush strokes.
- Opacity Jitter: Randomizes the opacity of the brush stamps.
- Flow Jitter: Randomizes the flow of paint from the brush.
- Control: Similar to Shape Dynamics, Pen Pressure can be used to control opacity and flow.
- Other Options:
- Noise: Adds random pixels to the brush stroke, creating a grainy effect.
- Wet Edges: Simulates the look of watercolor brushes, where paint builds up at the edges of the stroke.
- Build-up: Mimics the effect of accumulating paint with repeated strokes, similar to an airbrush.
- Smoothing: Helps to create smoother brush strokes by reducing jaggedness.
- Protect Texture: Ensures that the texture applied to the brush remains consistent across all brush strokes.
Practical Application and Creative Exploration
The beauty of creating custom brushes lies in their versatility. You can transform scanned smudges, accidental paint drips, or even vector shapes into unique artistic tools. For instance, if you have a Wacom tablet, I highly recommend the RetroSupply Turbo Textures Brush Pack. If you work mostly with your mouse, you'll love our Standard Issue Subtle Brushes.
Custom Photoshop brushes can be made using images, shapes, or brush strokes. You can even turn traditional tools like ink and paint into custom Photoshop brushes. This ability to capture the essence of traditional media digitally is invaluable. Have an arsenal ready for when inspiration strikes!
When creating your own brushes, remember that the size at which you initially create the brush will become its default size. Brushes we create ourselves are pixel-based brushes, which means they're essentially images and behave exactly the same way as regular images when it comes to resizing them. Brushes will usually remain crisp and sharp when we make them smaller, but if you increase their size much beyond the default, they'll become soft and dull looking. The general idea, then, is to create your new brush just large enough to suit your needs, which may involve a little trial and error.
Beyond Creation: Installation and Usage
Once you've created and saved your custom brushes, you'll want to know how to use them. To install brushes, navigate to the location where you extracted the brush set and select the .abr file (this is the file type for Photoshop brushes). Once you've installed some brushes, it's time to start using them! Familiarize yourself with the Brush Tool, located in the toolbar on the left-hand side of the screen. Adjust your brush settings in the Options Bar at the top of the screen, where you'll find options for Brush Size, Opacity, and Flow.
Experiment with different brush types. Photoshop offers a wide variety of brush types, including round brushes, textured brushes, and scatter brushes. Use brushes sparingly; overusing a single brush type can make your work look repetitive and uninteresting. Choose the right brush for the job; not all brushes are created equal. Practice! Like any skill, using Photoshop brushes takes practice.
The process of creating custom brushes in Photoshop is a journey of exploration and personalization. By understanding the fundamental steps and leveraging the extensive options within the Brush Settings panel, you can develop a unique toolkit that perfectly complements your artistic style and workflow. This empowers you to achieve a wide range of effects and styles in your digital work, pushing the boundaries of your creativity.