The allure of aged paper lies in its ability to evoke a sense of history, nostalgia, and tangible depth. Whether you're aiming for a vintage aesthetic, a grunge-inspired look, or simply wish to imbue your digital creations with a physical quality, understanding how to create and apply old paper textures in Photoshop is an invaluable skill. This guide will walk you through the process, from crafting your own unique paper textures from scratch to seamlessly integrating them into your images, offering a versatile approach suitable for beginners and advanced users alike.
The Foundation: Understanding Vintage Paper Textures
In the realm of digital art and photography, a "vintage paper texture" in Photoshop refers to a texture or layer style that mimics the appearance of aged, grunge, or weathered paper. This can manifest in various forms, including rough, stained, torn, or yellowed photographic prints. The primary purpose of these textures is to impart a retro, antique, or distressed effect onto digital artwork or photographs, adding a layer of character and storytelling.
Creating Your Own Hand-Crafted Paper Textures
One of the most rewarding ways to achieve an authentic old paper texture is to create it yourself. This hands-on approach allows for unparalleled customization and a truly unique result. The process involves a few simple steps using common household items and Photoshop.
1. The Physical Canvas: Preparing the Paper
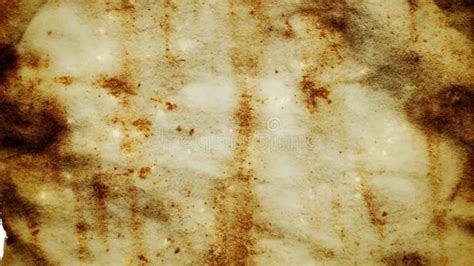
Begin by selecting a piece of paper. While any photo can be used for manipulation, the initial texture is key. To make the paper look old, you can cover it with coffee. This is a crucial step in achieving that aged, stained appearance. Experiment with different amounts of coffee and application methods to create varied effects. For instance, brewing a strong cup of coffee and lightly brushing it onto the paper, or even dipping sections of the paper into the coffee, can yield distinct results. Don't hesitate to crumple the paper once you've achieved the desired coffee-stained texture. The creases and folds will add another layer of realism.
2. Capturing the Texture: Scanning Your Creation
After the coffee has dried completely, it's time to capture your hand-crafted texture. Place the dried paper onto a scanner. If you've created a few different papers with varying degrees of staining and crumpling, scan each one. This will provide you with a collection of unique, high-resolution paper textures to work with. A scanner is ideal for capturing the fine details and subtle variations present in the physical paper.
Digital Alchemy: Crafting Textures within Photoshop
For those who prefer a purely digital approach or wish to enhance their scanned textures, Photoshop offers a powerful suite of tools and filters to simulate the aging process.
1. Setting the Stage: The New Document
Start by creating a new document in Photoshop. The dimensions you choose will depend on your intended use. For general purposes, a width and height of 1000 pixels at a resolution of 72 pixels/inch is a good starting point. If you plan to print your final result, you'll likely want to use inch measurements for width and height and set the resolution to 240 pixels/inch or higher to ensure adequate detail.
2. Establishing the Base Color
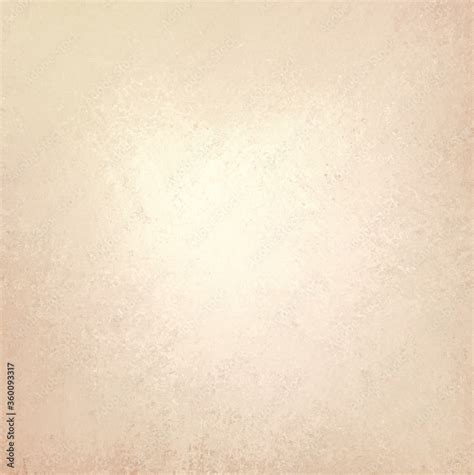
Once your new document is open, it will initially be filled with white. To begin building the aged paper effect, change this background color. Select "Edit" > "Fill." In the Fill dialog box, choose "Color" from the "Use" option. When the Color Picker pops up, select a yellowish or brownish color that closely matches the look of vintage paper. A light brown or tan hue is often a suitable choice, resembling old parchment.
3. Introducing the First Layer of Texture: Clouds Filter
Ensure your Foreground and Background colors are reset to their defaults by pressing the 'D' key. This sets the Foreground color to black and the Background color to white. Create a new layer by clicking the "New Layer" icon at the bottom of the Layers panel. Now, apply the Clouds filter by navigating to "Filter" > "Render" > "Clouds." This filter generates random cloud-like patterns, which will form the initial layer of your paper's texture.
4. Enhancing Detail: The Spatter Effect
With the Clouds layer still selected, it's time to add more definition. Navigate to "Filter" > "Brush Strokes" > "Spatter." Adjust the "Spray Radius" to around 25 and the "Smoothness" to 10. These settings help to mimic the irregular marks and imperfections found on aged paper. After applying the Spatter filter, change the layer's Blend Mode from "Normal" to "Overlay." This will blend the spatter texture with the underlying brown color, beginning to give the image a more textured appearance.
5. Mimicking Stains and Imperfections: Another Clouds Pass and Cutout Filter
To further enhance the realism and introduce elements that resemble stains or subtle discoloration, create another new layer. Again, ensure your color palette is set to black and white and apply the Clouds filter ("Filter" > "Render" > "Clouds"). This time, with this new Clouds layer selected, apply the "Cutout" filter ("Filter" > "Artistic" > "Cutout"). Set the "Number of Levels" to 4, the "Edge Simplicity" to 3, and the "Edge Fidelity" to 3. After applying the Cutout filter, change this layer's Blend Mode to "Overlay" and reduce its Opacity to somewhere between 10-15%. This subtle application will introduce darker, stain-like areas without overpowering the texture.
6. Adding Grain and Grit: The Noise Filter
Real paper, especially old paper, often has a subtle grain. To simulate this, create yet another new layer. Fill this layer with white using "Ctrl+Backspace" (Win) / "Command+Delete" (Mac). Then, apply the Noise filter by going to "Filter" > "Noise" > "Add Noise." Increase the "Amount" to around 120% and select "Gaussian" for the distribution. Crucially, ensure the "Monochromatic" box is ticked. This ensures the noise is black and white, contributing to the aged paper look. After applying the noise, change this layer's Blend Mode to "Overlay" and reduce its opacity to between 10% and 15% to create a fine grain effect.
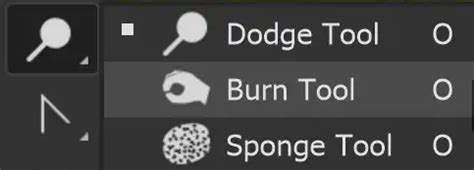
7. Darkening the Edges: The Burn Tool
A common characteristic of old paper is darkened or slightly burnt edges. Select the Burn Tool from the Tools panel. To make this step easier, you can switch to one of Photoshop's fullscreen modes by pressing the 'F' key. Using a large, soft-edged brush with the Burn Tool, carefully paint around the edges of your paper texture. You can adjust the brush size using the left and right bracket keys ('[' and ']') and soften the edges by holding Shift while pressing the left bracket key. Varying the brush size as you work will create a more natural, less uniform darkening effect.
8. Refining the Texture: Adjusting Levels and Gradients
To further refine the darkness or lightness of your texture, you can apply adjustment layers. Select "Layer" > "New Fill Layer" > "Gradient." Choose a gradient that goes from a dark color to transparent. Position this layer appropriately and adjust its blending mode and opacity. Alternatively, you can directly adjust the image's luminosity. Pressing "Ctrl+L" (Win) / "Command+L" (Mac) opens the Levels function, allowing you to fine-tune the tonal range of your texture.
9. Advanced Techniques: Halftone Patterns and Channel Masking
For more intricate effects, you can explore advanced techniques. Creating a stamped effect with half-turn patterns can be achieved by pressing "Ctrl+Alt+Shift+E" (Win) / "Command+Option+Shift+E" (Mac) to create a merged copy of all visible layers. Then, navigate to "Filter" > "Sketch" > "Halftone Pattern." Adjust the size and contrast to achieve the desired look. Subsequently, you can change the blend mode of this patterned layer to "Luminosity" and adjust its opacity. To introduce a grain effect with more control, you can select a suitable channel for contrast, copy it, and then use it as a mask for your image layer. Adjusting the levels on this mask can introduce a defined grain. If the effect appears too harsh, you can use the Blur filter to soften it.
Applying Your Old Paper Texture to Images
Once you have created or acquired your old paper texture, the next step is to apply it to your photographs. This process can dramatically alter the mood and aesthetic of an image, giving it a vintage or distressed feel.
Method 1: Using Blend Modes in Photoshop
- Open Your Image: Start by opening the Photoshop project you want to add your texture to, or begin a new one by adding your desired image as a background layer.
- Add the Texture: Open the Libraries panel, select the texture overlay you have created or downloaded. Create a new layer and position this texture layer above your background image layer in the Layers panel.
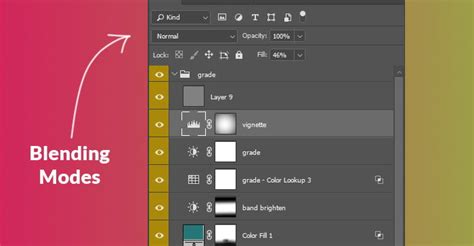
- Adjust the Texture: Your texture layer might initially hide your background layer completely. This is where blending modes come into play.
- Blend It: With the texture layer selected, use the "Blending Modes" drop-down menu and select "Overlay." This mode blends the texture with the underlying image, allowing the details of both to show through. Experiment with other blend modes like "Multiply," "Soft Light," or "Hard Light" to achieve different effects.
- Refine Opacity: Adjust the opacity of the texture layer to control the intensity of the old paper effect. Lowering the opacity will make the effect more subtle, while increasing it will make it more pronounced.
- Further Adjustments: You might need to make further adjustments to the texture layer or the original image. This could involve desaturating the image to remove colors if you're aiming for a monochrome vintage look (adjusting the saturation level to -100) or adjusting the luminosity using the Levels function ("Ctrl+L").
- Finishing Touches: Add rough patches or further distressing by using brushes on new layers, or by applying specific filters.
1-Minute Photoshop - Add Cool GRUNGE Texture!
Method 2: Applying Textures in Luminar Neo
Luminar Neo offers a streamlined approach to applying textures, often integrated as presets or easily blendable layers.
- Open Your Image: Load your target image into Luminar Neo.
- Add a New Layer: Add a new image layer above your original background image.
- Select Your Texture: Choose the old paper texture you created in Photoshop or a pre-existing texture from Luminar Neo's library. This texture will initially cover your original image.
- Adjust Opacity: To reveal the original image beneath the texture, simply reduce the opacity of the texture layer. Experiment with different opacity levels to find a balance that works for your image.
- Change Layer Mode: If the texture doesn't look quite right, explore the different layer modes available in Luminar Neo. Modes like "Overlay," "Hue," or "Darken" can significantly alter how the texture blends with the underlying image.
- Save: Once you've achieved the desired effect, save your image.
Where to Find High-Quality Textures
While creating your own textures is highly rewarding, there are also excellent resources for pre-made, high-quality paper textures.
- Envato Elements: This subscription-based service offers a vast collection of creative assets, including numerous high-quality paper textures, overlays, and backgrounds. You can find detailed old paper scans and even specialized packs like "30 Vintage Paper Textures Pack."
- Adobe Stock: Adobe Stock provides a selection of free, high-resolution texture images that can be a great starting point for your projects.
- Luminar Neo Presets: As mentioned, Luminar Neo itself offers texture presets that can be easily applied.
Considerations for Texture Use
Color Choices: While beige and yellow are classic choices for a vintage look, don't hesitate to experiment with other muted hues like tan, cream, or even subtle grays. The key is to select a light and unobtrusive color that enhances the aged and weathered feel.
Multiple Textures: For an even more realistic and authentic appearance, consider layering multiple textures. Real paper often possesses a variety of structures and imperfections, and combining different textures can effectively mimic this complexity.
Commercial Use: If you are using textures obtained from free sources, always check the licensing terms to ensure they permit commercial use. Textures you create yourself or those from reputable paid resources like Envato Elements generally offer more flexibility.
By mastering the techniques for creating and applying old paper textures in Photoshop, you unlock a powerful way to add depth, character, and a compelling narrative to your digital creations. Whether you're aiming for a historical feel or a contemporary grunge aesthetic, these methods will enable you to transform ordinary images into visually rich and evocative works of art.