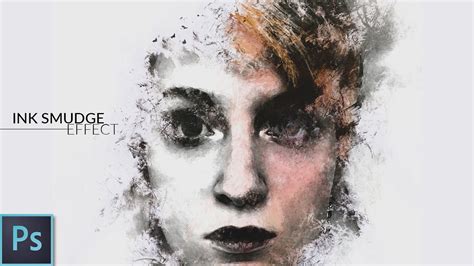
Inking with a brush, a technique that can seem daunting at first glance, offers a rewarding pathway for artists looking to add depth and character to their digital creations. While traditional pen and ink have their own unique charm, the versatility and control offered by Photoshop brushes can open up new avenues for expression, especially for those participating in challenges like Inktober. This tutorial aims to demystify the process, guiding you through the creation and application of Photoshop inking brushes, from foundational concepts to advanced techniques, ensuring a rich and nuanced outcome for both novice and experienced digital artists.
Understanding Ink Types and Their Digital Equivalents
The world of traditional inks offers a spectrum of properties that can be emulated and leveraged within Photoshop. Understanding these traditional inks provides a strong foundation for creating effective digital brush presets.
Indian Inks: Most Indian inks contain shellac, which allows them to dry waterproof. This property translates in Photoshop to brushes that, once applied, are less prone to smudging or bleeding when other layers or effects are applied over them. This waterproof quality is crucial for building up complex linework and washes without muddying the artwork.
Acrylic Inks: Acrylic inks are made from acrylics, which are plastisols. Plastisols harden when dried, and will be difficult to remove if you allow them to dry in your brush, so you need to clean your brushes well after use. In a digital context, this translates to brushes with a more permanent, opaque quality. Once applied, they hold their shape and color intensely, similar to how dried acrylic paint would. The emphasis on cleaning brushes well after use highlights the importance of brush management in Photoshop, ensuring that brush presets remain crisp and don't degrade in quality due to accumulated digital "residue" from previous uses.
Walnut Inks: Walnut inks are made from black walnuts, and are organic matter inks. These inks often have a rich, warm brown tone and a slightly translucent quality. In Photoshop, brushes created from walnut ink textures can offer a natural, organic feel, with subtle variations in opacity and color that mimic the organic nature of their traditional counterparts. They can be excellent for achieving a vintage or earthy aesthetic.
The Art of Ink Wash and Drybrush in Digital Art
Techniques like ink wash and drybrush, traditionally used to create midtones and texture, can be effectively replicated within Photoshop, adding significant mood and dimension to your digital artwork.
Inkwash: Inkwash can give your work a midtone (or several midtones), which is often helpful for establishing mood, particularly in dark scenes. Inkwash is fairly simple to do and is similar to watercolor. To create an ink wash brush in Photoshop, you can start with a new canvas and drop in an image of an ink or watercolor stroke. This source image is then used to define a new brush preset. By creating a new layer above both adjustment layers, keeping it set to Normal, and then going to Edit > Define Brush Preset, you can capture the essence of the ink wash. You can then use your new brush by selecting the Brush Tool and going into The Brush Preset Picker. Creating multiple ink wash brushes allows for a dynamic range of tones and textures.
Drybrush: Drybrush can also give your work midtones, but it can make the work look kind of dirty. This can be fine for certain artstyles, but if you have a clean artstyle, you should probably reconsider drybrush. Drybrush is applied using a dried brush that has had the majority of the fresh ink removed (usually on a scratch sheet of paper). In Photoshop, this effect can be achieved by creating brushes with specific texture settings, such as scattering, texture overlays, and reduced flow or opacity. The key is to simulate the sparse application of ink, leaving gaps and creating a textured, broken line. While traditional drybrushing often uses old, beat-up brushes, digital drybrush brushes can be designed to mimic this effect precisely, offering a controlled yet textured output. It's generally harder to achieve a consistent drybrush effect with a brushpen, and similarly, digital brushes that mimic brushpens might not inherently produce a drybrush look without specific adjustments.
Creating Your Own Photoshop Inking Brushes
The power of digital art lies in customization, and creating your own inking brushes in Photoshop allows for unparalleled control over your artistic output. This process can be broken down into several key steps, focusing on leveraging real-world textures and digital manipulation.
1. Source Material Creation: The first step involves creating subtle textures that will serve as the foundation for your brushes. This can be done by applying ink to paper in various ways - splattering, brushing, or even using a sponge. The goal is to generate diverse patterns and textures that capture the organic feel of real ink.
2. Scanning and Digitizing: Once the ink has dried, scan your favorite textures into your computer with a scanner. For optimal detail, it's recommended to scan at a high resolution (e.g., 600 DPI) in black and white. To ensure your scanned images fit your scanner and are easily manageable, you can cut the paper to size and number your pages. This meticulous approach helps in cataloging and recalling specific textures later.
3. Brush Preset Definition: In Photoshop, you can transform these scanned textures into usable brushes. For example, if you've created sponge brush textures, you can use adjustment layers like "Levels" to fine-tune the contrast and tonal range of the scanned image. The crucial step is to go to the main menu in Photoshop and select Edit > Define Brush Preset. This action opens a panel where you can name your brush. It's advisable to give it a descriptive and fun name, making it easy to find and identify its characteristics later.
4. Customization and Refinement: After defining a brush preset, Photoshop offers extensive options for customization. You can adjust settings such as spacing, jitter, shape dynamics, scattering, texture, dual brush, and color dynamics. These parameters allow you to fine-tune how the brush behaves, controlling everything from the thickness and flow of the lines to the texture and randomness of the ink application. For instance, adjusting the "Shape Dynamics" can control how the brush size and angle vary with pen pressure (if using a tablet), while "Scattering" can introduce a more organic, dispersed ink effect.
5. Leveraging Existing Resources: For those who may not have the time or inclination to create brushes from scratch, numerous premium brush packs are available. These packs often contain a wide array of brushes designed for specific effects, such as ink splashes, ink washes, or subtle textures. For example, some packs offer brushes created from real China ink samples, scanned and transformed for a highly realistic result. Others might include hand-painted strokes or hyper-realistic ink-in-water effects. These pre-made brushes can significantly speed up the workflow and provide access to professional-quality tools.
Advanced Techniques and Applications
Beyond basic brush creation, Photoshop offers sophisticated ways to integrate inking effects into your artwork, enhancing realism and artistic expression.
Creating Colored Ink Effects: To achieve a quick and easy colored ink effect, you can utilize Photoshop's adjustment layers. Open the Adjustments panel by going to Window > Adjustments. Then, double-click the gradient in the Gradient Map's Properties panel. You can then open the "Reds" preset folder and choose the first preset, which can instantly transform your ink strokes into a colored effect. Experimenting with different gradient presets allows for a vast range of color possibilities.
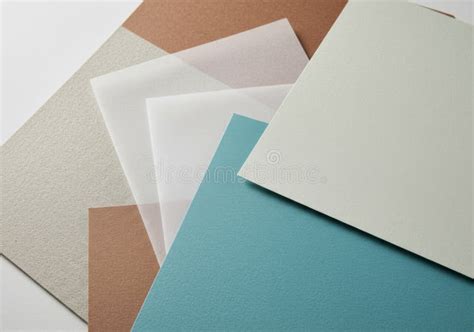
Simulating Paper Texture: To give your digital inks a more realistic feel, you can simulate the texture of paper. Create a new layer below your inked text or artwork. Drag and drop a wrinkled paper image onto this layer. Change the layer's blending mode to "Pin Light" and then convert the image to grayscale using Image > Adjustment > Black & White. This process overlays a subtle paper grid texture, adding depth and a tactile quality to your work.
Texture Your Designs Like a PRO! (Steal My Exact Method)
Masking and Text Integration: Ink brushes can be used creatively with text. After creating your ink brushes, you can add a Layer Mask to your text layer. Using one of your ink brushes set to black, you can mask out portions of the text, revealing the ink texture underneath. This technique is excellent for creating distressed or artistic typography.
Brush Maintenance and Performance
Just as with traditional brushes, maintaining your digital Photoshop inking brushes is crucial for peak performance. This involves not only cleaning but also "conditioning" them through proper usage and occasional refinement of their settings.
Regular Cleaning (of Presets): While digital brushes don't physically accumulate ink, their settings can become "cluttered" or their intended effect can be lost if not managed. Regularly reviewing and resetting brush dynamics or simplifying complex brush settings can help maintain their crispness. If you've experimented heavily with a brush and it's no longer performing as desired, it might be beneficial to redefine the brush preset from a cleaner source texture.
Conditioning (of Brush Settings): For peak performance, inking brushes require not only frequent cleaning but also frequent conditioning. This "conditioning" refers to understanding and utilizing the brush's dynamic settings effectively. For instance, if a brush is designed for fine lines, using it with a very high pen pressure might cause it to behave unexpectedly. Understanding how each setting (like size jitter, angle jitter, scattering) affects the output allows you to "condition" your use of the brush to achieve the desired results consistently.
Tools for Different Workflows
The choice of tools, whether traditional or digital, significantly impacts the inking process. In the digital realm, this extends to the input device and the software's capabilities.
Wacom Tablets: If you have a Wacom tablet, I highly recommend exploring brush packs like the RetroSupply Turbo Textures Brush Pack. Wacom tablets, with their pressure and tilt sensitivity, allow for a highly nuanced control over digital brushes, mimicking the natural feel of traditional inking tools. This sensitivity is particularly beneficial for brushes designed to respond dynamically to pen input, such as those simulating brush strokes with varying width and opacity.
Mouse-Based Work: If you work mostly with your mouse, you'll love our Standard Issue Subtle Brushes. While a mouse lacks the pressure sensitivity of a tablet, brushes designed for mouse users often incorporate more built-in variation through settings like scattering, spacing, and jitter, ensuring a less uniform and more organic output even without pen input.
The Evolution of Inking in Art
Throughout the 19th and 20th century, print was king. This era saw the rise of various printmaking techniques that relied heavily on linework and ink. Woodcuts, etchings, and lithographs all required precise inking methods. In the digital age, Photoshop inking brushes pay homage to these historical techniques, allowing artists to achieve similar aesthetics with greater ease and flexibility. The transition from physical print to digital pixels has not diminished the importance of skilled inking; rather, it has provided new tools and possibilities for artists to explore.
A Note on Supplies
While this tutorial focuses on Photoshop brushes, it's worth noting the traditional considerations that inspire their digital counterparts. When choosing physical supplies, artists often ponder: What brushes do I use? What papers? What inks? Brushes are hard to control for fine lines-how do you transition from single lineweight pens, like fineliners to brushes? Where do I buy my supplies? Understanding these traditional challenges helps inform the design and use of digital brushes. For instance, the difficulty in controlling brush tips for fine lines is a common reason for creating specialized Photoshop brushes that either mimic fine-tipped pens or offer specific settings to manage line weight dynamically.
Conclusion
Inking with a brush in Photoshop is a skill that, like its traditional counterpart, takes practice but can be quite rewarding. By understanding the properties of different ink types, mastering techniques like ink wash and drybrush, and learning to create and customize your own brushes, you can elevate your digital artwork. Whether you choose to craft your brushes from scanned textures or utilize expertly designed premium packs, the goal remains the same: to imbue your creations with the depth, character, and artistic nuance that only skilled inking can provide. This journey into Photoshop inking brushes is an invitation to experiment, to learn, and ultimately, to express your unique artistic vision.