Welcome to your ultimate resource for mastering Adobe Photoshop shortcuts on Mac! As an illustrator based in the US, I've found that familiarizing myself with these shortcuts can greatly enhance workflow and efficiency, whether you're a graphic designer, photographer, or digital artist. This guide is designed to help you navigate Photoshop like a pro, transforming potentially time-consuming tasks into swift actions. Let's dive into essential Photoshop shortcuts for Mac users, organized for easy reference.
Foundational Operations: Getting Started with Photoshop
When you're beginning your journey in Photoshop, or even as an experienced user looking to refine your process, understanding the basic commands for document management is crucial. These fundamental shortcuts allow you to create, open, save, and manage your files with speed and ease.
To begin a new project, the command is straightforward: Command+N for a New Document. When you need to access an existing file, Command+O will open the document. Saving your progress is vital, and Command+S is your go-to for saving. For more specific save options, such as changing the file type or location, Command+Shift+S initiates the "Save As" dialog. Printing your work is accessible via Command+P. Closing your current document without exiting the application is achieved with Command+W.
Mistakes are a natural part of the creative process, and Photoshop offers robust undo and redo capabilities. To undo your last action, press Command+Z. If you need to step forward through your history, reversing an undo, use Command+Shift+Z. For a more granular approach to stepping backward through your actions, Command+Option+Z allows you to retrace your steps one by one.
Managing selections is a core aspect of Photoshop editing. To deselect any active selection, Command+D is the command you'll frequently use. When you need to cut selected content, Command+X is the shortcut. To copy selected content, Command+C is used. To paste copied or cut content, Command+V will place it onto your canvas. For selecting all elements on your current layer or the entire canvas, Command+A is the universal select all command.
Transforming your layers or objects is often necessary for resizing, rotating, or skewing. Command+T activates the Free Transform tool, giving you control over these adjustments. To quickly duplicate a selected layer or object, Command+J is an invaluable shortcut.
When it's time to exit Photoshop, Command+Q will quit the application entirely. If you need to hide Photoshop temporarily without closing it, allowing you to access other applications, Command+H is the command.
Navigating Your Canvas: Efficiently Viewing and Moving Around
Working with large or complex images often requires extensive zooming and panning. Mastering these navigation shortcuts can prevent wrist strain and significantly speed up your workflow.
To zoom into your image, making details more visible, press Command++. Conversely, to zoom out and see a broader view of your image, use Command+-. If you want your entire image to fit within the screen boundaries, Command+0 is the command. For a precise view at 100% zoom, showing the image at its actual pixel dimensions, Command+Option+0 is the shortcut.
Visual guides and grids can be incredibly helpful for alignment and composition. To hide or show guides, use Command+;. Toggling the grid on and off is achieved with Command+' (Apostrophe). If you need to hide or display the rulers along the top and sides of your canvas, Command+R is the shortcut.
Sometimes the Photoshop interface itself can become distracting. Tab is a very useful shortcut that hides all palettes and panels, allowing you to concentrate solely on your image. Pressing Tab again will bring them back. For full-screen viewing modes, which can be useful for presentations or immersive editing, Control+Command+F cycles through different full-screen options.
When you're zoomed in closely, moving around your image without changing the zoom level is essential. Holding down the Spacebar temporarily activates the Hand Tool, allowing you to click and drag to pan across your image. To rotate your view of the canvas, without altering the image content, press R to select the Rotate View Tool and then click and drag.
Tool Mastery: Accelerating Your Creative Process
Photoshop's power lies in its vast array of tools, and knowing their shortcuts is key to unlocking maximum efficiency. Instead of constantly reaching for your mouse, you can switch between tools with a single keystroke.
The Move Tool, used for repositioning layers and selections, is activated by V. For freehand drawing and painting, the Brush Tool is B. To sample pixels from one area and paint them onto another, mimicking textures or removing blemishes, the Clone Stamp Tool is S. The History Brush Tool, which allows you to paint with the history of the image, is Y. To erase pixels, the Eraser Tool is E. For creating smooth color transitions, the Gradient Tool is G. The Dodge, Burn, and Sponge Tools, used for lightening, darkening, and adjusting color saturation respectively, are grouped under O. To create or edit vector shapes and paths, the Pen Tool is P. For adding text to your designs, the Type Tool is T. The Path Selection Tool, used for manipulating vector paths, is A. For making rectangular or elliptical selections, the Marquee Tool is M. For freehand selections, the Lasso Tool is L. To quickly select areas based on color and texture, the Magic Wand and Quick Selection Tool are W. For trimming and resizing your canvas, the Crop Tool is C. To sample colors from your image, the Eyedropper Tool is I. The Hand Tool, for panning, is H. And as mentioned earlier, the Zoom Tool is Z.
Layer Management: Organizing and Manipulating Your Work
Layers are the foundation of non-destructive editing in Photoshop. Efficiently managing them is paramount for complex projects.
To create a new, empty layer above the currently selected layer, press Command+Shift+N. Grouping related layers is a great way to keep your project organized. Select the layers you wish to group and press Command+G. To ungroup a layer group, select it and press Command+Shift+G. Merging selected layers into a single layer is done with Command+E. If you want to merge all visible layers into a new layer, use Command+Shift+E. To completely flatten your image, combining all layers into one background layer, Command+Shift+F is the command.
When arranging layers, bringing a specific layer to the very front of the layer stack is achieved with Command+Shift+]. Conversely, to send a layer to the back, use Command+Shift+[. Locking or unlocking a layer's transparency, position, or pixels is toggled with Command+/.
Adjusting the opacity of a layer is a common task. You can quickly set the opacity in 10% increments by pressing the number keys from 1 to 9 (e.g., pressing '5' sets opacity to 50%). Pressing '0' sets it to 100%, and '00' sets it to 0%. To fill a layer with the current foreground color, Command+Delete (Backspace) is the shortcut.
Creating adjustment layers allows for non-destructive color and tonal corrections. While there isn't a single shortcut for all adjustment layers, specific ones can be accessed with combinations like Command+Option+L for Levels, Command+Option+M for Curves, Command+Option+U for Hue/Saturation, and so on.
Text Editing and Image Adjustments: Fine-Tuning Your Content
Manipulating text and making image adjustments are core tasks for many Photoshop users. These shortcuts streamline those processes.
For text editing, applying Bold formatting is Command+Shift+B. To apply Italic formatting, use Command+Shift+I. Underlining text is done with Command+Shift+U. Increasing the font size of selected text is Command+Shift+>, and decreasing it is Command+Shift+<. For text alignment, Align Left is Command+Shift+L, Align Center is Command+Shift+C, and Align Right is Command+Shift+R. To switch to the Vertical Type Tool, Command+Shift+T is the shortcut.
Photoshop offers a powerful suite of image adjustment tools. To open the Levels dialog, press Command+L. For the Curves adjustment, it's Command+M. Brightness/Contrast is accessed via Command+Shift+B. To adjust Hue/Saturation, use Command+U. The Color Balance dialog opens with Command+B. For a quick Black & White conversion, Command+Shift+Alt+B is the shortcut. To invert the colors of your image, Command+I is used. Desaturating an image to remove all color is Command+Shift+U. To adjust the overall Image Size, use Command+Option+I. For modifying the Canvas Size, it's Command+Option+C.
Selections and Masking: Precision Editing Techniques
Selections and masks are fundamental to advanced Photoshop workflows, allowing for intricate edits and compositing.
To feather the edges of a selection, softening the transition, use Command+Option+D. If you need to select everything except your current selection, Command+Shift+I inverts the selection. The Refine Edge dialog, for advanced selection adjustments, is Command+Option+R. For a more comprehensive selection refinement experience, Select and Mask is accessed via Command+Option+M.
When working with masks, understanding how to interact with them is key. Toggling the visibility of a layer mask is as simple as Shift+Clicking on the layer mask thumbnail. This allows you to quickly see the effect of your mask without permanently altering it. To toggle the brush preview from a dot to crosshairs for more precise placement, press Caps Lock.
Filters and Effects: Enhancing Your Images
Applying filters and effects can dramatically alter the look and feel of an image. These shortcuts speed up the application and modification of these creative tools.
To reapply the last used filter with its previous settings, press Command+F. For a common filter like Gaussian Blur, the shortcut is Command+Option+F. The powerful Liquify filter is accessed via Command+Shift+X. For perspective-based editing, Vanishing Point is Command+Option+V. To correct lens distortion and aberrations, Lens Correction is Command+Shift+R.
Window and Panel Management: Customizing Your Workspace
A clean and organized workspace is crucial for productivity. These shortcuts help you show, hide, and cycle through Photoshop's various panels and windows.
To bring the Layers Panel to the forefront or hide it, press F7. The Brush Panel is toggled with F5. The Color Panel is accessed with F6. The Channels Panel is Command+6. For managing vector paths, the Paths Panel is Command+7. To view and control automated tasks, the Actions Panel is Option+F9. The History Panel, which tracks your editing steps, is Command+Option+Y. To cycle through all open panels and windows, Command+Tab is used.
Miscellaneous and PC Conversion: A Comprehensive Toolkit
Beyond the core categories, several other shortcuts can enhance your workflow, and understanding the differences for PC users is also important.
To switch between multiple open documents, Command+` (Grave Accent) is the shortcut. Creating a Clipping Mask, which confines the effect of a layer to the content of the layer below it, is done with Command+Option+G.
For PC users, it's important to note the key differences in modifier keys. The Command (â) key on Mac is generally equivalent to the Ctrl key on Windows. The Option (â¥) key on Mac typically corresponds to the Alt key on Windows. The Control (â) key on Mac is used less frequently as a modifier in Photoshop shortcuts and doesn't have a direct, universal equivalent in Windows shortcuts. For instance, when working with the Brush Tool on a PC, adjusting brush size is often done by holding Alt, then clicking and dragging with the right mouse button.
Remember, like learning to touch type, the more you practice these shortcuts, the easier they become, and the less you have to think about where your fingers are. They might seem a bit fiddly at first, but the payoff in terms of speed and efficiency is immense.
Advanced Techniques and Workflow Enhancements
Beyond the basic and intermediate shortcuts, there are more advanced techniques and considerations that can further boost your productivity. Understanding how to leverage these can truly double or even quadruple your Photoshop workflow speed.
Precise Brush Control: When using the Brush Tool, tapping the Caps Lock key transforms the cursor into crosshairs. This allows for much more precise positioning of your brush, especially when working on fine details or intricate masks. This is also a handy shortcut to know if you ever need to undo an action, as it's often paired with the undo command in tutorials.
Master Brush Tool from Start to Finish - Photoshop for Beginners | Lesson 12
Brush Resizing: Frequently, you'll need to adjust the size of your brush on the fly. While not a direct shortcut for resizing, it's often mentioned in conjunction with tool shortcuts. For Mac users, bracket keys ] and [ are used to increase and decrease brush size respectively. This is a significant time-saver compared to clicking through menus or using a slider.
Foreground and Background Colors: The left-hand toolbar displays your foreground and background colors. The shortcut D resets these to their default black and white values. To quickly switch between your foreground and background colors, press X. This is incredibly useful when working with tools like the Brush or Clone Stamp, where you might frequently toggle between two colors.
Opacity Control with Number Keys: As mentioned earlier, pressing number keys (1-9) sets the layer or tool opacity in 10% increments. For example, pressing '5' sets it to 50%. Pressing '0' sets it to 100%, and '00' sets it to 0%. Holding Shift while pressing number keys adjusts the flow of the brush, allowing for more subtle build-up of paint or effects. For instance, Shift+5 would set the brush flow to 50%.
Working with Curves: When adjusting curves, you can place multiple points. If you need to select an existing point for adjustment, clicking it might accidentally move its position. While not a direct shortcut to select a point, understanding that you can then use the Up and Down arrow keys to fine-tune its position after selection is crucial.
Layer Duplication and Merging: Creating a new layer can be done with Command+Shift+N. To duplicate an active layer, Command+J is the shortcut. This is useful for creating backups, applying adjustments with increased intensity, or creating variations. Command+Shift+E merges all visible layers into a new layer, which is a convenient way to get a composite view without flattening the entire image. This is similar to copying the merged image to the clipboard (Command+Option+Shift+E) and then pasting it, but it directly creates a new layer in your stack.
Layer Grouping and Ungrouping: Organizing layers with groups is essential for complex projects. Command+G groups selected layers, and Command+Shift+G ungroups them. This keeps your Layers panel tidy and makes it easier to manage related elements.
Filling Layers and Masks: Command+Delete (Backspace) fills the selected layer or selection with the current foreground color. This is a quick way to apply solid color fills or create base layers. When working with masks, you may want to see the mask itself. Pressing Option (Alt) + Click on a layer mask thumbnail will display the mask as a grayscale image, allowing you to see exactly what areas are affected. This is incredibly useful for understanding and refining your masks.
Selection Manipulation: After making a selection, Command+Shift+I inverts it, allowing you to select everything but the original area. Command+D deselects everything. To restore the last active selection, Command+Shift+D is the shortcut.
The Menu Bar: A Reliable Reference Point
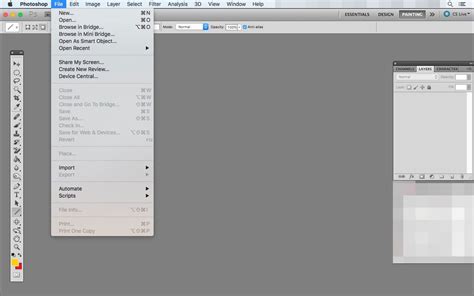
While keyboard shortcuts are incredibly powerful, it's also important to remember that every shortcut corresponds to a command found within Photoshop's menu bar. For instance, if you forget the shortcut for "Save As," you can navigate to File > Save As... and see the associated shortcut (Command+Shift+S) listed next to it. This practice of noting the menu location and its shortcut can significantly aid in memorization through repetitive use.
The Toolbar on the left side of the Photoshop interface also provides shortcuts for each tool. Tools with a small arrow in their lower-right corner indicate that additional related tools are nested within. Pressing the tool's shortcut key will cycle through these nested tools. However, by default, Photoshop requires you to press Shift along with the displayed shortcut key to cycle through these hidden tools. For example, pressing 'B' selects the Brush Tool, but pressing 'Shift+B' cycles through the Brush, Pencil, Color Replacement, and Mixer Brush tools. Long-pressing on a tool's icon will reveal a fly-out menu showing all nested tools and their respective shortcut keys.
Mastering these shortcuts, and knowing where to find them in the menus, will transform your Photoshop experience from a series of clicks and searches into a fluid and intuitive creative process.