Photoshop is a powerful tool offering endless creative possibilities, one of which is adding various types of textures to your digital art. The simple addition of a texture can make all the difference. Whether it's crumpled, grunge, or ripped, a paper texture overlay can transform your digital artwork by adding a touch of realism and tactility. Understanding resolution in terms of textures is crucial. A higher resolution texture will have more detail, leading to a more realistic outcome. This guide will walk you through creating and applying realistic paper textures in Adobe Photoshop, from generating custom textures from scratch to applying pre-made overlays.
Creating a Custom Paper Texture from Scratch
For those who wish to craft a unique paper look, Photoshop offers a robust set of filters and adjustments. This process allows for granular control over the final aesthetic, enabling the creation of anything from a subtle parchment effect to a heavily distressed grunge paper.
Initial Setup and Base Color:
Let’s start by creating a new document in Photoshop. Go to File > New to open the new document dialog box. For the purpose of this tutorial, we'll assume we are creating this paper texture to be the background of a pamphlet project. Make sure the width and height are set to be inches, and input “11.25” for the width and “8.75” for the height. This size includes the bleed for a basic, 8.5x11 pamphlet. The resolution should be set for 300 pixels/inch for print. Normally, CMYK color would be suggested for print, but not all Photoshop filters work in CMYK mode, so we will begin in RGB and convert later.
Step 1: The first step is to fill the background with a color for your texture. Usually, a light tan or beige color is best since you can easily tweak this color later if desired. Choose a foreground color by clicking the top square in the Color Picker tool at the bottom of the left-hand toolbar. Once the dialog box opens, pick a light tan color and click OK. (For this example, we'll use the CMYK color: C14, M18, Y41, K0, though in RGB, these values will differ).
Introducing Initial Texture with Clouds and Artistic Filters:
Step 2: Now, create a new layer above this background layer. Change the foreground and background colors to a slightly lighter and darker hue of your original color. You can change the background color by clicking the second square in the toolbar.
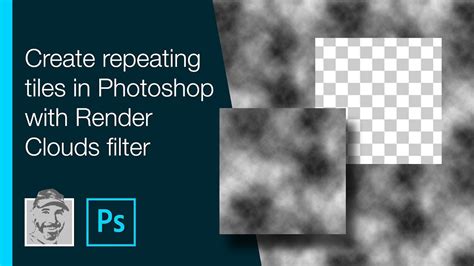
Step 3: Select the new layer if it is not automatically selected. Then, go to Filter > Render > Clouds. This will add a nice light texture to your paper, providing a subtle base for further manipulation.
Step 4: Now, navigate to Filter > Artistic > Palette Knife. Adjust the stroke size to 40, the stroke detail to 3, and the softness to 0. This filter can add a subtle, almost fibrous quality to the texture.
Step 5: Paper is usually not completely smooth. To introduce a more realistic imperfection, go to Filter > Noise > Add Noise and set the amount to 10%. Be sure to select “Uniform” for the distribution and “Monochromatic” to ensure the noise is black and white, preventing color shifts.
Layering and Iterative Refinement:
Step 7: We will now build upon the existing texture by re-applying some of the above steps with different color parameters. Remember to first create a new layer. For this iteration, use a darker set of foreground (CMYK: 20/16/35/0) and background (CMYK: 28/28/51/0) colors. Apply the Clouds filter again to this new layer. This layering of clouds with different color values adds depth and complexity.
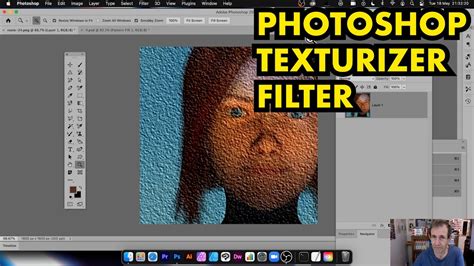
Step 8: To create a rougher paper look, you can utilize the "Texturizer" filter. Go to Filter > Texture > Texturizer. Experiment with the different settings for the look desired. For instance, selecting "Canvas" from the Texture dropdown and adjusting the Scaling and Relief can simulate the weave of fabric or the grain of paper.
Step 10: You can also easily modify the overall color of the paper at any stage by going to Image > Adjustments > Hue/Saturation. The hue and saturation sliders will adjust the color. To make the texture more or less pronounced, adjust the lightness slider. For this example, a hue of 40, saturation of 25, and a lightness of 0 can be a good starting point. Of course, many more changes can be made to your paper texture by using any of the effects within the “Filter” menu and Image > Adjustments.
Preparing for Print:
When you’re happy with your custom-generated texture, the final step is to convert your file to CMYK so that it is ready to use for print. Bear in mind that this step will flatten your file, so make sure you save a copy with the layers still intact for editing later! Go to Edit > Convert to Profile. If it’s available, choose "Coated GRACoL 2006" from the dropdown list. This color profile is widely used in the printing industry.
Applying Pre-made Paper Texture Overlays
For those seeking a quicker, yet equally effective, method, applying pre-made paper texture overlays is an excellent solution. This approach leverages existing high-quality textures, saving time while still allowing for creative adjustments.
Finding and Importing Textures:
To begin, you'll need to choose your paper texture. There are extensive arrays available online, featuring everything from old paper textures to folded paper textures, and grunge styles. Resources like Adobe Stock offer a selection of free, high-resolution texture images. Collections such as "Paper Vol. 1" provide a variety of high-resolution textures for exploration.
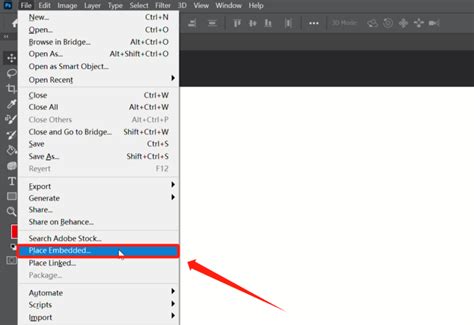
Once your texture is selected, open the image you want to modify in Photoshop, or start a new document. To apply the paper texture overlay, go to File > Place (or Place Embedded, depending on your Photoshop version), and select your preferred paper texture file.
Next, resize your texture to match your image dimensions. If the texture is larger or smaller than your canvas, use the transform tools (Ctrl/Cmd + T) to scale it appropriately.
Blending and Adjusting the Overlay:
Now, let's add some magic. The key to integrating a texture seamlessly is through blending modes. Adjust the blending mode of your paper texture layer to create a range of effects. Common and effective blending modes for paper textures include:
- Overlay: This mode blends the texture with the underlying image, enhancing contrast and color while retaining texture detail. It's a versatile choice for many paper effects.
- Soft Light/Hard Light: Similar to Overlay, but with softer or harsher results, respectively.
- Multiply: This mode darkens the underlying image, useful for creating a more aged or stained paper look.
- Screen: This mode lightens the underlying image, which can be useful for subtle texture additions.
- Hue/Color: These modes can be used to tint the underlying image with the color of the texture.
You can control the intensity of the texture by adjusting the opacity of the texture layer. Lowering the opacity will make the texture more subtle, while increasing it will make it more prominent.
Blending Modes - Photoshop for Beginners | Lesson 5
Once satisfied with your result, remember to save your work. For more unique effects, consider exploring resources like "Water Damaged Scans" for an aesthetic mimicking water-damaged old paper.
Advanced Techniques and Creative Applications
Beyond basic application, Photoshop offers advanced techniques to refine and customize your paper textures.
Creating Grunge and Vintage Effects:
Grunge texture overlay packs are an essential tool for creating vintage effects. Packs featuring dust and scratch textures can be handy for creating a faded or old look for your photos. For a more creative and unusual approach, consider packs with geometric and grunge elements. Some bundles offer multiple textures within a single PSD template, simplifying the selection process.
To make the grunge texture overlay more obvious, you can duplicate the texture layer and apply different blending modes or adjust opacity. For example, using a "Multiply" blend mode with a lower opacity can enhance the worn look.
Utilizing Filters for Specific Paper Types:
Different filters can simulate various paper types. For instance, the "Spatter" filter (Filter > Brush Strokes > Spatter) with adjusted spray radius and smoothness can create a textured, almost ink-splattered effect, useful for simulating artistic paper. The "Cutout" filter (Filter > Artistic > Cutout) can mimic stains or imperfections on aged paper.
Combining Custom Creation with Pre-made Assets:
A powerful workflow involves combining custom-generated textures with pre-made assets. You might create a base texture using filters and then overlay a scanned piece of real paper for added realism. This hybrid approach offers the best of both worlds: control and authenticity.
Using Textures in Other Software:
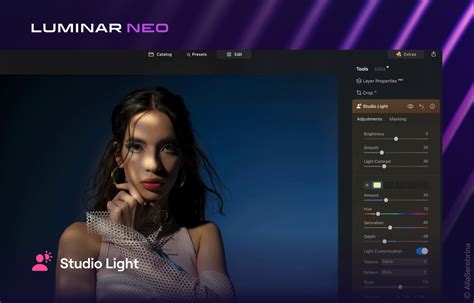
Once you've created a compelling paper texture in Photoshop, you can easily export it as a JPG or PNG file. This texture can then be applied to images in other editing software, such as Luminar Neo. In Luminar Neo, you would typically add the texture as a new layer above your original image. By reducing the opacity of the texture layer and experimenting with blend modes like Overlay, Hue, or Darken, you can effectively blend the texture into your image. This cross-software compatibility highlights the versatility of Photoshop-created assets.
Frequently Asked Questions About Paper Textures in Photoshop
Can I Use Other Colors Besides Beige or Yellow for the Background?
Yes, you can use colors other than beige or yellow for the background of an old paper texture in Photoshop. While beige and yellow options are often used to create an antique look, other colors such as tan, cream, or even gray can also work well. The key is to choose a light and muted hue, as this will help to enhance the aged and weathered look of the texture overlays. Experimentation with different base colors can lead to unique and unexpected results.
Can I Use Different Textures for the Paper?
Absolutely. Real paper often has a variety of structures and imperfections. Using multiple textures, or combining different filter effects, can help create a more realistic and authentic look. For example, you could layer a subtle canvas texture with a grunge overlay to simulate a textured painting surface.
Can I Use Vintage Paper Textures for Commercial Purposes?
This depends on the source of your texture. If you are choosing a texture pack that you created yourself or obtained from a free source that explicitly allows commercial use, then you can generally use it without any problems. Always check the licensing terms of any pre-made textures you download. Resources like Envato Elements or GraphicRiver offer professional texture packs with clear licensing for commercial projects.
Mastering the art of adding a paper texture in Photoshop can significantly elevate the impact of your digital artwork. Dive in and start experimenting with different techniques and resources. Whether you're aiming for a subtle enhancement or a dramatic transformation, paper textures offer a powerful way to add depth, realism, and character to your designs.