Photoshop's evolution continues with the introduction of Parametric Filters, a dynamic and interactive set of tools designed to revolutionize how users apply effects to their images. These filters represent a significant departure from traditional, static adjustments, offering a level of customization and non-destructive editing that unlocks a vast array of creative possibilities. Unlike many of Photoshop's older filters, which have remained largely unchanged for two decades and often provide minimal visual feedback, Parametric Filters are built with interactivity and adaptability at their core. This article will explore the nature of these filters, how they are accessed and utilized within Photoshop's beta environment, and crucially, how users can leverage external tools like Adobe Substance Designer to create their own sophisticated parametric effects.
Understanding Parametric Filters in Photoshop
Parametric Filters are a growing collection of tools currently available in the public beta version of Photoshop. Their defining characteristic is their interactivity and customizability. Each filter comes equipped with a range of controls, allowing users to precisely tailor the effect to their specific needs. While some of these filters may initially seem niche or in the very early stages of development, their potential for unique applications is undeniable.
The core principle behind these filters is their application as adjustment layers. This fundamental aspect ensures that all modifications are non-destructive. Users can revisit, readjust, or completely remove a filter at any point without permanently altering the original image data. This flexibility is paramount for iterative creative workflows and for maintaining the integrity of source material.
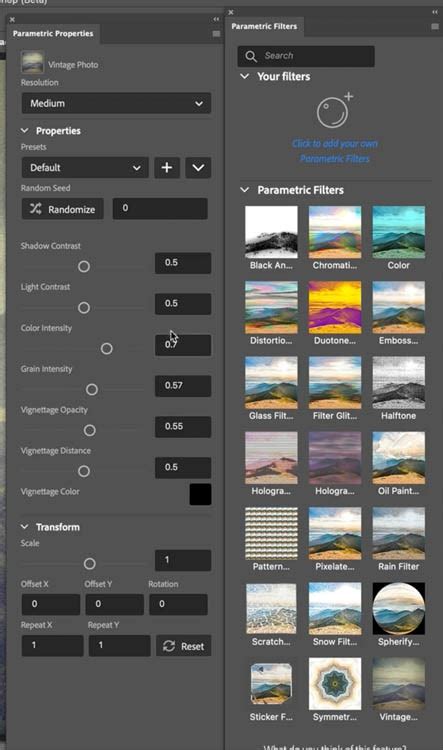
Accessing these filters is a straightforward process. Within Photoshop, navigate to the Filter > Parametric Filters menu. Here, a selection of available filters can be chosen and then customized through the dedicated Parametric Properties panel. This panel typically features slider bars, color swatches, and other intuitive controls that allow for fine-tuning various aspects of the selected filter's effect. Furthermore, the ability to create and save custom presets by adjusting parameters means that unique looks can be developed and reused across multiple projects, significantly streamlining workflow for recurring stylistic requirements.
Exploring the Capabilities of Existing Parametric Filters
The current iteration of Parametric Filters in Photoshop beta offers a glimpse into the future of image manipulation. While the collection is still expanding, several filters highlight the potential of this new feature set.
One such filter allows for the adjustment of distortion effects. Users can precisely set the distance and intensity of the distortion, along with controlling the balance of colors within the affected area. A curious limitation, however, is the inability to directly set the angle of the distortion effect, requiring users to achieve this indirectly through other means.
Another filter offers symmetry and reflection capabilities. It enables users to choose the angle of symmetry and the number of axes of reflection. Despite its visual potential, the current implementation is described as clumsy. The center of the effect is manipulated using "Horizontal Shift" and "Vertical Shift" sliders, a method that many users would find less intuitive than direct manipulation on the image canvas.
A simpler, yet effective, filter applies a two-color effect to an image. This filter is straightforward and lacks additional complex controls, making it an easily accessible tool for basic color stylization.
A more sophisticated filter simulates a textured, knitted fabric effect. This effect impressively follows the lighting of the original image, demonstrating a keen understanding of how light interacts with surfaces. While incredibly clever, its practical applications might be considered limited by some, though its potential for specific artistic endeavors is clear.
Finally, a filter that updates the functionality of the older "Spherize" filter provides much-needed control. Users can now adjust the size, inflation amount, and scale, bringing a classic effect into the modern, customizable era of Photoshop.
Integrating Adobe Substance Designer for Advanced Parametric Effects
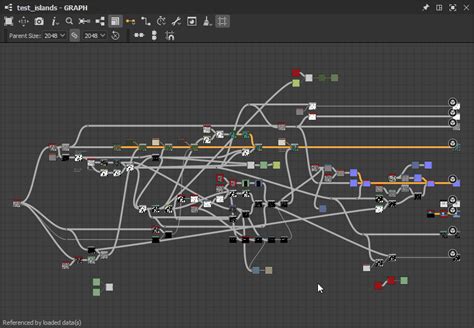
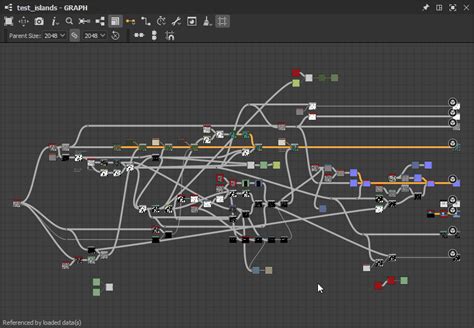
While Photoshop's built-in Parametric Filters are a powerful addition, the true frontier of parametric creation lies in external tools like Adobe Substance Designer. Substance Designer operates on a fundamentally different paradigm: a node-based system where each node represents an adjustment, effect, or generative process. This contrasts sharply with Photoshop's layer-based workflow.
Adobe Substance Designer is a versatile application purpose-built for creating parametric textures, materials, and filters. Its strength lies in its ability to generate not just static images, but entire workflows for textures and effects. These are known as parametric materials, offering a level of complexity and dynamism that can be harnessed within Photoshop.
To begin creating a parametric filter in Substance Designer, users first open the application via Creative Cloud. The fundamental building blocks are Input and Output nodes. An "Input Color" node is added by pressing the spacebar, typing "Input Color," and selecting it. Similarly, an "Output" node is added to define the final result of the graph.
Creating a Basic Parametric Filter in Substance Designer
A foundational workflow might involve importing an image. This is achieved by right-clicking within the "Explorer" panel, selecting "Import," and then choosing "Bitmap." To make the filter customizable within Photoshop, parameters must be "exposed." This is done by naming the graph (e.g., "PTC Retro" for a retro photo effect) in the "Attributes" tab of the Properties Panel. The graph's package is then selected, and the "Publish SPSAR" option is chosen to export the filter. The resulting .SPSAR file can then be selected within Photoshop's Parametric Filters.
Building a Complex Retro Photo Effect Filter
To illustrate the power of Substance Designer, let's consider the creation of a more complex filter designed to produce a retro photo effect with customizable dust, stains, and scratches.
- Start New Graph: Create a new substance graph, selecting the empty template and naming it "PTC Retro." Save the
.spsfile. - Input and Output Nodes: Add "Input Color" and "Output" nodes. Drag the imported image into the input node.
- Blur Effect: Add a "Blur HQ Color" node. Adjust its "Intensity" to
0.25. Crucially, expose this setting by selecting "Expose as New Graph Input" from the flyout menu. This allows the blur intensity to be controlled in Photoshop. - Color Adjustment: Introduce an "HSL" node to control Hue, Saturation, and Lightness. Set the Hue to
0.52and Saturation to0.4, leaving Lightness at its default. - Simulating Grain: A "Blue Noise Fast" node generates a simple noise pattern for grain. Since its output is grayscale, it needs to be converted to color. This is achieved using an "RGBA Merge" node. A "Uniform Color" node set to pure white (
255) is used for the alpha channel. This colored noise is then blended with the image using a "Blend" node, set to "Soft Light" mode with an opacity of0.25. - Adding Stains: The "Grunge Rust Fine" node is employed for stains. A "Gradient Map" node recolors these stains, with bright areas being set to red. This effect is then blended with the previous layers using another "Blend" node, set to "Screen" mode.
- Introducing Scratches: The "Grunge Scratches Fine" node adds scratches. Its properties can be adjusted, including "Balance" (
0.5), "Contrast" (0.3), "Scratch Amount" (0.3), "Sharpen" (3), and "Value Bias" (0.4). - Exposing Parameters: After all nodes are set up, double-click anywhere on the graph to expand the input parameters. Expose the desired controls (like blur intensity, scratch properties, etc.) as graph inputs.
- Publishing the Filter: Once satisfied, click on the package, then the export icon, and choose "Publish SPSAR." This
.spsarfile can now be imported into Photoshop.
Applying and Combining Parametric Filters in Photoshop
Once a .spsar file is created and published, it appears within Photoshop's Parametric Filters menu. Users can then select it and adjust the exposed parameters in the Parametric Properties panel. The ability to remove a filter is indicated by a trash icon appearing next to it.
A particularly exciting aspect of Photoshop's Parametric Filters is their interaction when multiple filters are applied to the same layer. They do not simply stack on top of each other; they combine. This synergistic behavior opens up an expansive world of creative possibilities, allowing for complex and unique visual outcomes that would be difficult or impossible to achieve with traditional methods.
To stack or combine filters, users hold down the Alt (or Option on Mac) key as they click on a different filter. This action allows for the layering and merging of multiple parametric effects, leading to progressively intricate results. For instance, holding Alt/Option and clicking a third filter can create even more layered and complex combinations.
The Parametric Properties panel also features a resolution dropdown, defaulting to "Medium." Users can select different resolutions, which may affect the preview and rendering quality.
How to Use the NEW Powerful Parametric Filters in Photoshop Beta 25.2
The Future of Parametric Editing
Parametric filters represent a significant leap forward in non-destructive image editing within Photoshop. Their interactive nature, combined with the ability to create custom effects using powerful tools like Substance Designer, empowers users to achieve highly stylized and unique results. While the current performance of these filters in the beta version might still be subject to improvement before their official release, their introduction signals a promising direction for Photoshop's development. The capacity to create, customize, and combine these dynamic effects ensures that Photoshop remains at the forefront of digital art and design.
For those looking to deepen their understanding of image manipulation techniques, particularly in selections and masking, comprehensive courses are available. These often include step-by-step lessons, downloadable practice files, and custom resources, providing a structured path to mastering advanced Photoshop skills. Jesús Ramirez, a recognized digital graphics expert and educator, founder of the popular Photoshop Training Channel on YouTube, exemplifies the kind of expertise available in this field. His work, like the Photoshop Training Channel, offers invaluable insights into the evolving landscape of Photoshop capabilities.
tags: #parametric #filter #photoshop