Photopea, a powerful and free online image editor, offers a robust suite of tools that rival many desktop applications. For Mac users looking to refine their photo editing and graphic design workflow, understanding fundamental features like rulers and guides is paramount. These tools, often overlooked in favor of automated selection tools, provide the precision and control necessary for creating well-composed and professional-looking visuals. This tutorial delves into the intricacies of using rulers and guides within Photopea on a Mac, alongside other essential editing techniques that will elevate your projects.
The Indispensable Role of Rulers and Guides in Photo Editing
Picture editing rulers are a must-have feature for any photo editing program. They are not merely decorative elements but foundational tools that enable users to achieve precise alignments and accurate measurements. The photo editing rulers allow for dragging guides onto the picture to ensure precise selections of objects. While more modern photo editing software contains tools such as object selection tools, these are not always accurate and often do not function as well as we want them to work. The photo editing ruler guides provide an exact alignment for other objects, such as text.
The easier question to answer would be when would I not use picture editing rulers. Picture editing rulers are a fundamental part of graphic design and picture editing. Anytime we desire to align a layered object within our project, we use the rulers and the guides. When we want to measure our object for size, we use the ruler. For instance, consider a banner image that gets uploaded and is subsequently cropped on the top, bottom, and sides. If we choose not to use the picture editing rulers, we are essentially guessing at where the image will be cropped, leading to potential misalignments or unwanted cuts. Picture editing rulers are an essential tool used to enhance our projects, make our lives easier, align and position elements on the canvas within our project, and act as a visual guide. Without the pictured editing rulers, we would not have the well-designed image compositions that we have today.
One of many benefits of picture editing rulers is that it allows for the easy creation of a template image. Typically, we want portions of these images to be lined up and stay the same, such as a company name. We can use the picture editing ruler guides to line up the areas in the image we desire to be static. Resizing objects is another significant benefit of the rulers. We can use a combination of the photo editing rulers and keyboard shortcuts to ensure the object within the image layer is properly proportioned after resizing is completed.
Displaying and Customizing Rulers in Photopea
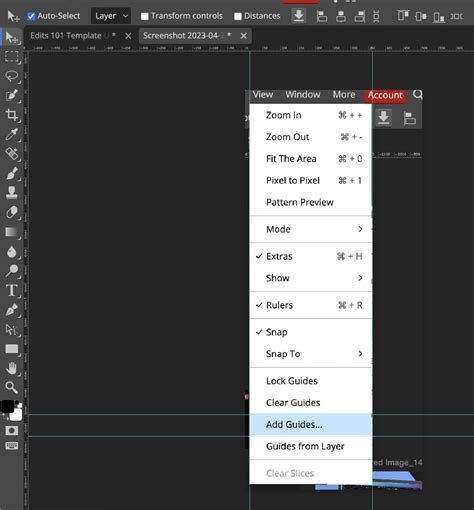
There are several methods in which to show the rulers on the canvas in Photopea. To display the rulers, navigate to and click the "View" menu header. A dropdown menu will appear, offering various viewing options. Within this menu, you will find an option to toggle the visibility of the rulers.
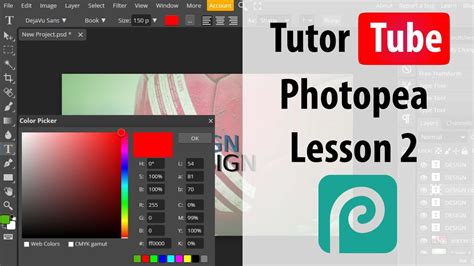
Understanding and Changing Ruler Units
A unit is a mathematical measurement between two points. In non-technical terms, this means that we can change what units the ruler displays to us. If we want to see the image in pixels, inches, centimeters, millimeters, or percent, we can easily adjust this setting. To change the units shown on the ruler, right-click directly on the ruler itself. A context menu will appear, presenting a list of available units. Simply click the unit that you desire to be shown. This flexibility allows users to work in units that are most relevant to their project, whether it's for web design (pixels) or print media (inches or centimeters).
Creating and Utilizing Guides for Precision
We have talked about photo editing ruler guides and their benefits quite a bit already. After an image has been opened in Photopea, creating a guide is a straightforward process. Click and hold the left mouse button down on top of the ruler (either the horizontal or vertical one). Now, drag the mouse either down or to the right, depending on whether the top or left ruler was clicked. As you drag, a guide line will appear. You can then drop this guide on the desired location on the image.
Enhancing Precision with Zoom and Snapping
To achieve even greater accuracy, especially when working with fine details, it's highly recommended to zoom in. A useful tip is to get the ruler in the general area and then hold down the CTRL key (or CMD for Mac) and press the '+' key to zoom in until you can see the individual pixels of the image. This level of magnification allows for pixel-perfect placement of guides.
Furthermore, Photopea's "Snap to Guides" feature is invaluable for maintaining alignment. This feature works both when moving an object in its own layer towards the guides or when moving the guides towards that object. This is incredibly helpful when precision is an absolute must, ensuring that elements align seamlessly without manual guesswork.
Essential Navigation and History Tools in Photopea
Beyond rulers and guides, efficient navigation and understanding the history of your edits are crucial for a smooth workflow. We already know how to open and save files in Photopea.
Navigating Your Canvas: Zoom and Hand Tools
To navigate your image effectively, Photopea offers intuitive tools. The Zoom tool allows you to magnify or reduce the view of your image. There is a quick mode for the Zoom tool, where you can add or release the Alt key to switch between zooming in and zooming out. The Hand tool allows you to move the view to different parts of the image without changing the zoom level. There is also a quick mode for the Hand tool: press the Spacebar to switch temporarily to the Hand tool. Additionally, a Rotate View tool, found right under the Hand tool, allows you to rotate the view of a document. You can click and drag the document to rotate it around the center of the screen. Zooming and scrolling is also possible with a mouse wheel, offering a fluid way to explore your canvas.
The Power of the History Panel
Your work in Photopea is represented as a sequence of actions that are applied to a document. This list of actions is shown in the History panel. Photopea allows you to withdraw your editing and return to previous states. Clicking the name of an action in the History panel will take you back to that previous state, providing a powerful safety net and allowing for experimentation without fear of irreversible changes.
Advanced Editing Concepts: Smart Objects and Tonal Range
As you progress in your photo editing journey, understanding concepts like Smart Objects and the tonal range of an image becomes increasingly important for non-destructive and impactful edits.
Understanding and Utilizing Smart Objects
The concept of Smart Objects can initially be a bit challenging to grasp, but they are a cornerstone of modern, non-destructive editing. Smart objects are non-destructive layers. Creating smart objects allows for editing a layer and being able to go back to the original layer. We can apply smart filters, and the source of the image is stored differently than the filters, allowing us to uncheck the filters to see our original layer prior to editing. Prior to the creation of smart layers, a digital editor or artist would need to duplicate the layer and then hide it or duplicate the entire image.
There are two main benefits to using smart objects. The first is that when a smart object is created, any filters or edits apply only to that smart object and not to the image, and they show up in the layers panel. For example, a Gaussian blur effect cannot be seen in the layers panel typically, but on a smart object, it can be seen. The next benefit is the duplication of the same object. When using layers, a layer must be duplicated and edited independently, whereas a smart object can be duplicated. Any updates to that smart object will be reflected in all duplications at the same time. This second benefit can be a double-edged sword. While this sounds really nice, we must consider whether we want all duplicated objects to look exactly the same, such as multiple instances of the same element in a design. While those objects can be resized, any direct edits will be placed across the entire image to all duplicated objects, including shadows, colors, and other destructive edits.
With a Smart Object, filters, transformations (like resizing), and other effects to the "container" can be applied without damaging the original image inside. This is ideal for anything that is desired to have the effect on all duplicated objects at once, such as shadow effects on multiple identical items.
Smart objects are easy to create. Right-click on the layer in the Layers panel and choose "Convert to Smart Object." The layer will then be converted into a new PSD file that is embedded within your main project. The main thing that confuses people about smart objects is the inability to directly use tools like the Brush, Eraser, or Clone Stamp on a Smart Object layer. This is not a limitation but a feature designed for non-destructive editing. Think of a Smart Object as a locked, protective container holding your original image. The primary purpose is to protect your original image from being permanently changed. Before Smart Objects, if a filter was applied or an image was painted on and saved, those changes were permanent with no easy way to undo them.
To edit the contents of a Smart Object, double-click on its thumbnail icon in the Layers panel. Photopea will open the contents of the Smart Object in a brand new tab, usually with a .psd extension in its name. Once you've made your edits, simply save the Smart Object tab, and the changes will be reflected in your main project.
Mastering the Tonal Range: Shadows, Highlights, and Midtones
A basic yet crucial image editing trick is to ensure your image is straight. This is an important step in ensuring your viewer is not discouraged. As basic as this may seem, cropping an image is one of the key image tricks to providing a better composition for a digital image. When cropping an image, we can change the focus of that photo.
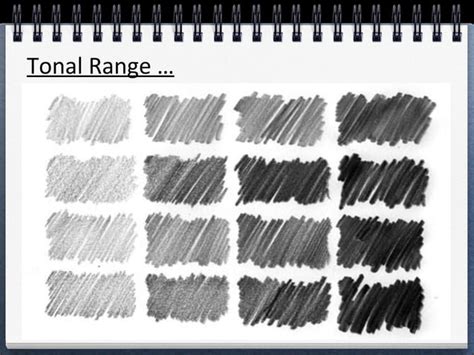
Adjusting the shadows, highlights, and midtones is another major photo editing trick, especially when dealing with particularly dark or contrasty images. The tonal range can be described as a spectrum from pure black to pure white. At the extremes, black and white have no discernible detail within the image.
- Shadows: Shadows are the dark areas of an image. While dark, they still contain details that can be made visible. You can use tools like the Curves adjustment to enhance shadows.
- Highlights: Highlights are the light areas of a digital image. These are the areas where light is most intense. Tools like the Dodge tool can be used to lighten these areas, drawing attention to them.
- Midtones: These are the areas within the image that fall between shadows and highlights, representing a middle ground for luminance.
The dynamic range of an image is the ratio between the purest black and the brightest white. Even the best digital cameras often cannot capture the full dynamic range that the human eye can perceive.
The Dodge and Burn Tools: Precision Lightening and Darkening
The Dodge tool is used for lightening specific parts of an image, effectively bringing out details in shadow areas or subtle highlights. Conversely, the Burn tool darkens areas within the image, creating deeper shadows and increasing contrast. Using the Burn tool properly, such as enhancing the texture of rocks by the water or the detail of a beach, can significantly enhance the visual appeal of your images. Learning to use these tools effectively is a key photo editing skill that professionals often master.
Refining Your Images: Object Removal and Color Adjustments
Beyond foundational tools, Photopea offers powerful features for refining your images by removing distractions and fine-tuning colors.
Removing Unwanted Objects for Better Focus
We have gone over how to remove objects within an image in Photopea. Now, it is time to focus on removing unwanted or unnecessary objects from the image. By removing distractions, you can make the image less busy and guide your viewer's attention to the intended subject. Image editing is all about focus and design, and by removing unnecessary objects, you reduce distractions, making the focus of the image pop even more.
Understanding Hue, Saturation, and Luminance (HSL)
Understanding Hue, Saturation, and Luminance (HSL) and how they affect a digital image is extremely important for any digital editor. These concepts are fundamental to creating flawless composites.
- Hue: Hue refers to the shade of a specific color. For example, there are countless variations of red, blue, and other colors in the world. Hue helps define these specific color variations.
- Saturation: Saturation refers to the intensity or purity of a color. At 100% saturation, a color is vivid and bright with no gray mixed in. At 0% saturation, the color becomes a shade of gray. The technical definition describes saturation as "the 'colorfulness of an area judged in proportion to its brightness,' which in effect is the perceived freedom from whitishness of the light coming from the area."
- Luminance: Luminance refers to the intensity of light emitted from a surface per unit area in a given direction. In simpler terms, it's the brightness of a color. In the real world, luminance means the amount of light that is emitted from, passed through, or reflected off an object. In digital applications, it directly impacts how bright or dark a color appears.
By mastering these HSL adjustments, you gain precise control over the color and brightness of your images, enabling you to achieve specific artistic effects and correct color imbalances.