Designing custom clothing for your Roblox avatar is a fantastic way to express your individuality and stand out on the platform. While Roblox offers some in-game design capabilities, for truly unique and professional-looking apparel, external tools become essential. This tutorial will guide you through the process of creating custom shirts for your Roblox avatar using Photopea, a powerful and completely free online image editor that mirrors many of the functionalities of Adobe Photoshop.
Understanding the Basics of Roblox Shirt Creation
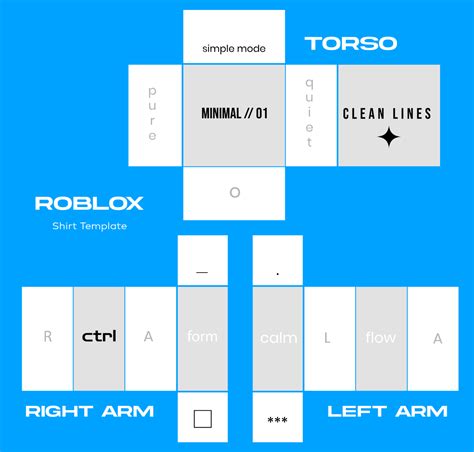
Before diving into Photopea, it's crucial to understand the fundamental requirements for creating and uploading custom shirts to Roblox. To access these features, users typically need a premium membership or a Roblox account that meets specific criteria for asset creation. This ensures a certain level of commitment and helps maintain the integrity of the platform's marketplace. The core idea behind custom shirts is to provide a template that you can then modify with your own designs, colors, and textures.
Getting Started with Photopea: Your Free Photoshop Alternative
Photopea is a versatile online image editing platform that offers features similar to Adobe Photoshop, making it a popular choice for both casual users and professionals. The best part is that it is completely free, removing any financial barriers to entry for aspiring Roblox designers. Its web-based nature means you can access it from any device with an internet connection, without the need for software installation.
To begin designing your shirt, the first step is to search for a 'Roblox shirt template' along with the term 'transparent' to find the right image. This template serves as the blueprint for your custom shirt, outlining the areas where your design will appear on the avatar. It's important to find a template that is specifically designed for Roblox shirts to ensure proper fit and rendering on the platform.
Once you have selected your desired shirt template, copy the image and paste it into Photopea. You will now have the template open on your Photopea canvas, ready for customization.
Laying the Foundation: Choosing Your Shirt's Base Color
After pasting the template into Photopea, you'll want to establish a base color for your shirt. Use the rectangle tool to create a new shape on the canvas, placing it beneath the background layer of the template. This new shape will serve as the primary canvas for your shirt's color.
You can fill this shape with a color of your choice, such as dark yellow, and adjust it as needed. Experiment with different hues and saturation levels until you achieve the desired base color. This initial color choice will significantly influence the overall aesthetic of your final design. Remember, you can always adjust this later if your vision evolves during the design process.
Adding Your Personal Touch: Incorporating Logos and Graphics
To personalize your shirt further and give it a branded or distinctive look, you can add a brand logo or other graphics. Search for a logo you wish to use, ensuring it has a transparent background. This is crucial; a logo with a transparent background will seamlessly integrate into your shirt design without a distracting white or colored box around it.
Once you find the logo, copy and paste it onto your Photopea canvas. You can then resize and position the logo as desired. For this example, a Stussy logo is used, but you can choose any logo you prefer, whether it's a well-known brand, a custom graphic, or even a piece of artwork you've created. The ability to freely incorporate these elements is what makes custom shirt design so engaging.
How to make a logo transparent in Photopea
Enhancing Realism: Adding Textures and Shading
To elevate your shirt design from a flat image to something more visually appealing and realistic, you can add shading and textures. Search for "Roblox shirt shading images" and paste them onto your canvas. These pre-made shading elements can add depth and dimension to your design, mimicking how light would fall on a physical garment.
Adjust the transparency of these shading layers to achieve the desired effect. You don't want the shading to overpower your base color or logo, but rather to subtly enhance the form. Additionally, you can look for "ribbed material textures" or other fabric-like images to add more detail and a tactile quality to your shirt. Again, adjust the opacity and blend modes of these texture layers to make them integrate smoothly with your design. This step is where your shirt design truly begins to come to life.
Finalizing Your Masterpiece: Exporting and Saving
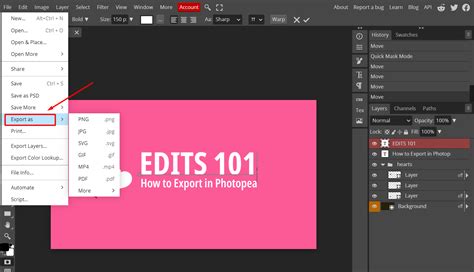
Once you are satisfied with your shirt design, it's time to prepare it for upload to Roblox. Export your design as a PNG file, ensuring the quality is set to 100%. The PNG format is ideal because it supports transparency, which is essential for Roblox clothing. Setting the quality to 100% ensures that no detail is lost during the export process.
It's also highly advisable to save a PSD version of your work. PSD is the native file format for Adobe Photoshop and is also supported by Photopea. Saving in this format allows you to return to your design for future edits, making adjustments, or creating variations without starting from scratch. Think of it as a master file from which all future iterations can be born.
Uploading Your Custom Shirt to Roblox
With your PNG file ready, navigate to the Creator tab on the Roblox website. From the left-hand menu, select "Creations." Under the "Avatar items" section, choose "Classic shirts" (or "Classic T-shirts" if you designed a simpler tee).
You will then see an option to upload the asset you just created. Click on this option and select the PNG file of your shirt design. You will be prompted to name your shirt. Choose a descriptive and appealing name that reflects your design. Finally, click "upload."
Navigating Roblox's Content Guidelines
It's important to remember that Roblox has strict guidelines for uploading assets to maintain a safe and enjoyable environment for its users. All uploaded content must adhere to community standards. This prohibits any discriminatory, sexually explicit, excessively violent, or otherwise inappropriate material. Familiarize yourself with these guidelines before uploading to avoid any issues with your creations being rejected. This ensures that the Roblox platform remains a positive space for everyone.
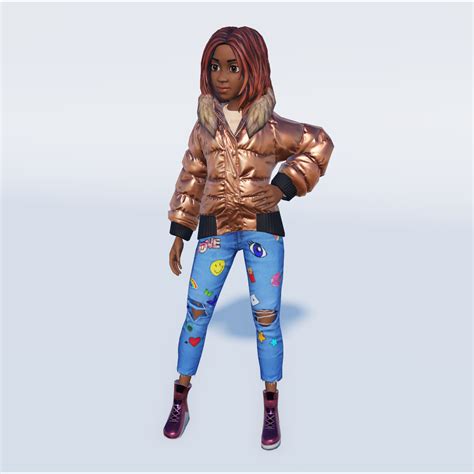
Creating your own shirt in Roblox is a fun and creative process that allows for personal expression within the game. By leveraging the power of free online tools like Photopea, you can design truly unique and eye-catching apparel for your avatar, making your presence on Roblox even more distinctive. The journey from a blank template to a fully realized custom shirt is a rewarding one, offering endless possibilities for digital fashion.