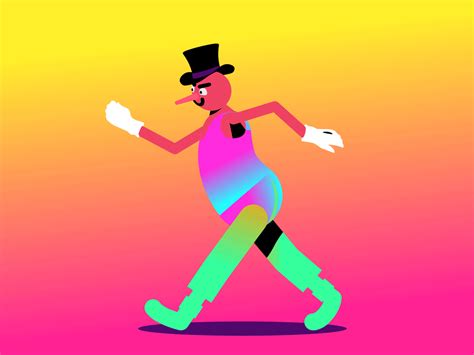
The Graphics Interchange Format, or GIF, has transcended its origins as a simple image file type to become a ubiquitous element of digital communication. From expressing nuanced emotions in online conversations to serving as dynamic elements in web design and advertising, animated GIFs are an integral part of our online culture. Adobe Photoshop, a powerhouse for image manipulation, offers robust tools for creating and exporting these engaging animations. This guide will walk you through the process of saving your animated creations from Photoshop, ensuring optimal quality and file size for web use.
Understanding the GIF Format: A Digital Dinosaur Reborn
GIF is a bitmap image format introduced by CompuServe in 1987. While its 8-bit nature limits it to displaying only 256 colors, which can make photographs appear grainy, this limitation has paradoxically contributed to its enduring popularity, particularly for animation. Unlike static image formats like JPG or PNG, a GIF can store multiple images within a single file, enabling the illusion of movement. This ability to hold more than one image at a time is the key to its animation capabilities.
It's crucial to understand that a GIF is not a video. It lacks audio, and its color limitations mean it cannot achieve the photographic fidelity of formats like JPG, which supports millions of colors and is ideal for digital photos and some printed artwork. PNGs, designed as a successor to GIF, offer lossless compression, transparency, and a much wider color palette, making them suitable for graphics requiring sharp detail and transparency. TIFFs, on the other hand, are the standard for high-resolution printing, preserving exceptional photographic quality for professional applications.
Despite its technical limitations, the GIF format's simplicity, small file size, and portability make it exceptionally well-suited for web images and, most notably, for short, looping animations. This is why, even in an era of advanced video codecs, the GIF format remains incredibly popular for memes, reaction images, and simple animated graphics. Memes themselves, often static images with captions, share with GIFs the characteristic of being a quick visual medium for conveying a joke, idea, or emotion, explaining their parallel rise in popularity.
The evolution of the animated GIF is a fascinating story. Early animated GIFs were rudimentary, but as internet speeds increased and broadband became widespread, their potential began to be fully realized. Technical quality improved, creation became more accessible, and social media platforms began to embrace them. Designers and artists explored their creative possibilities, leading to dedicated platforms for sharing and discovering them. Today, GIFs are an inescapable part of the digital landscape, appearing in everything from casual online interactions to sophisticated advertising campaigns.
Preparing Your Animation Frames in Photoshop
The foundation of any animated GIF in Photoshop is a series of individual frames, each representing a distinct stage of the animation. These frames can be sourced from various places: you might have a sequence of images created in another program, such as Adobe Illustrator, or you might be working with frames extracted from a video clip.
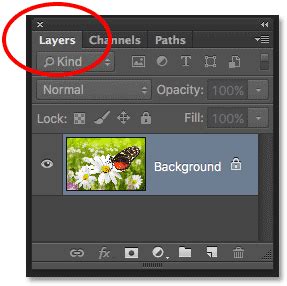
If you have prepared your frames externally, you can import them into Photoshop by navigating to File > Import > Load Layers. Each imported image will typically be placed on its own layer. Alternatively, if you are creating your animation directly within Photoshop, ensure that each element or stage of your animation resides on its own distinct layer. The order of these layers in the Layers panel is critical, as it dictates the sequence of the animation.
Assembling Your Animation with the Timeline Panel
Once your individual frames are organized as layers within your Photoshop document, the next step is to bring them to life using the Timeline panel. If the Timeline panel is not visible, you can access it by going to Window > Timeline.
Within the Timeline panel, you will find an option to Create Video Timeline. Upon selecting this, Photoshop will generate a timeline for your animation. To incorporate your image layers into this timeline, click on the Add Media icon, which often resembles a filmstrip. This will allow you to navigate to and select your image frames, which will then be added as distinct clips on the timeline.
After adding your media, you may notice an initial empty layer or a default layer that can be utilized for elements like a title for your GIF. You can then adjust the duration for which each frame is displayed on the screen. This is achieved by selecting individual clips on the timeline and setting their display time. Crucially, you can also determine how many times the animation will loop. The most common setting for endlessly repeating animations is Forever.
The Timeline panel also offers the ability to reorder your frames. You can simply drag and drop the clips on the timeline to change their sequence, allowing you to fine-tune the flow of your animation. To preview your work as you go, you can press the Play button within the Timeline panel or use your computer's spacebar. This immediate feedback is invaluable for making adjustments to timing and frame order.
For those who prefer a more direct approach to frame-based animation, instead of Create Video Timeline, you can select Create Frame Animation. This will open up a series of frames in the Timeline panel, and you can then select Make Frames From Layers from the menu in the right corner of the Timeline panel. This option directly converts each layer into a separate frame.
Optimizing and Exporting Your Animated GIF: The "Save for Web" Method
When you are satisfied with the appearance and timing of your animated GIF, the next crucial step is to export it in a format that is optimized for web use. Photoshop provides a dedicated tool for this purpose: Save for Web (Legacy). To access this, navigate to File > Export > Save for Web (Legacy).
Understanding Save for Web Dialog Basics in Photoshop
This dialog box presents a wealth of options for controlling the quality and file size of your GIF. From the dropdown preset menu, select GIF 128 Dithered. Dithering is a technique that simulates additional colors by strategically arranging existing pixels, which can help to mitigate the color limitations of the GIF format and produce a more visually appealing result, especially for gradients and subtle color transitions.
The Looping Options dropdown is essential for animated GIFs. If you want your animation to repeat continuously, select Forever. Other options include Once (plays the animation only one time) and Other, where you can specify a custom number of repetitions.
Before finalizing, the Save for Web dialog allows you to preview your GIF. This is an indispensable feature, as it lets you see exactly how your animation will appear and play before you commit to saving. You can check the speed at which your files are being displayed by hovering over certain elements in the preview window; this often indicates the "download speed" setting. Choosing a faster speed at the bottom of the list generally results in a snappier animation.
The Save for Web dialog is designed to provide the best possible compressed file for using on the web. It intelligently balances image quality with file size, ensuring that your animated GIF loads quickly without significant degradation in appearance. Once you have configured your settings and are happy with the preview, click Save... to export your animated GIF.
It is important to note that if you encounter issues with your animated GIF not playing correctly after exporting, the problem might lie in how the file was constructed rather than the export method itself. An animated GIF created in Photoshop must have a distinct layer for each frame, and these layers must be arranged in the correct order of the animation. Ensuring proper layer management and timeline construction is paramount for a successful export.
By following these steps, you can effectively transform your creative visions into engaging animated GIFs, ready to be shared and enjoyed across the digital realm. Whether you're crafting a funny picture, a reaction meme, or a simple animated graphic, Photoshop's tools provide a powerful and accessible pathway to bringing your ideas to life.