In the realm of digital imaging, the ability to manipulate backgrounds is paramount. Whether you're a product photographer aiming to make your items pop, a graphic designer crafting compelling visuals, or a marketer looking to enhance brand identity, understanding how to achieve clean, professional backgrounds is a critical skill. Adobe Photoshop, a powerhouse in image editing, offers a suite of tools and techniques to transform ordinary images into versatile assets. This guide delves into the intricacies of creating transparent and solid white backgrounds in Photoshop, leveraging both traditional methods and the advancements brought by artificial intelligence.
The Importance of Background Manipulation
The background of an image often plays a supporting role, but its impact on the overall message and aesthetic is profound. A cluttered or distracting background can detract from the main subject, diluting its impact and confusing the viewer. Conversely, a clean, well-defined background can elevate a subject, drawing the eye precisely where it needs to be.
Enhancing Focus and Subject Prominence
"Get rid of the things you don’t want in your backgrounds so your subjects can really shine," is a sentiment echoed by many creative professionals. By removing distracting elements or replacing an undesirable background, the subject of the image is allowed to take center stage. This is particularly crucial in product photography, where the product itself is the sole focus, and in graphic design, where a clear subject is essential for conveying a message.
Boosting Brand Identity and Versatility
Transparent backgrounds are a cornerstone of modern digital asset management. They offer unparalleled versatility, allowing a single product image or logo to be seamlessly integrated into a multitude of contexts - from websites and social media to print materials and advertisements. "Showcase your style and boost brand identity by using transparent backgrounds," highlights the strategic advantage of this capability. A consistent use of transparent backgrounds across all visual assets reinforces brand recognition and professionalism.
Optimizing for E-commerce and Web Use
In the world of e-commerce, standardized product imagery is often a requirement. Many online marketplaces mandate white backgrounds for product listings to ensure a clean and consistent browsing experience. "eCommerce Optimization: Many online marketplaces require product images to have white backgrounds," underscores this industry standard. Furthermore, images optimized for the web with appropriate file formats and dimensions load faster, improving user experience and search engine rankings.
Leveraging Photoshop's Tools for Background Removal
Photoshop offers a dynamic array of tools, from AI-powered assistants to precise manual selection instruments, for tackling background removal. The choice of method often depends on the complexity of the image and the desired outcome.
The Power of AI: Adobe Sensei and Automated Background Removal
Recent advancements in Adobe Photoshop have integrated artificial intelligence, primarily through Adobe Sensei, to streamline the background removal process. "Detect backgrounds and subjects with a little help from artificial intelligence," signifies a major leap in efficiency.
The "Remove Background" Feature
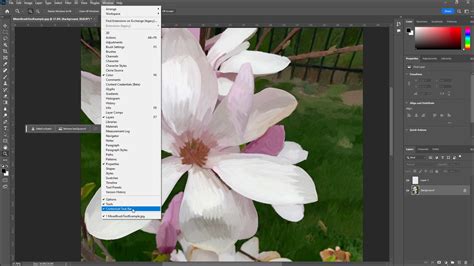
For many images, especially those with clear subject-background separation, Photoshop's "Remove Background" feature, powered by Adobe Sensei, can achieve remarkable results with a single click. "Photoshop 2024 now has a “Remove Background” feature which allows you to make a transparent background with the click of a button," making it an accessible option even for novice users.
To access this tool, navigate to Window > Contextual Task Bar. Once the task bar appears, simply click the "Remove background" button. Photoshop analyzes the image, identifies the subject, and automatically generates a layer mask to conceal the background. The underlying pixels are not deleted but rather hidden, preserving the original image data.
Subject Select Tool and Object Selection Tool
Beyond the direct "Remove Background" button, AI also powers more granular selection tools. The "Select Subject" tool automatically identifies the primary subject in an image. For images with multiple objects, the "Object Selection Tool" allows users to draw a rectangle or lasso around the desired object, and Photoshop's AI will refine the selection. These tools are invaluable for isolating specific elements within a complex scene.
Traditional Selection Tools for Precision
While AI has made significant strides, there are still many instances where manual selection tools offer superior control and precision, especially for intricate details or challenging backgrounds.
The Magic Wand Tool
The Magic Wand tool is ideal for selecting areas of similar color. "Make a solid color background transparent with one click of this wand. Just click on any part of an image and all other pixels of the same color in the image will be selected." This tool is particularly effective for images with uniform backgrounds, such as a solid color studio backdrop.
Lasso Tools (Lasso, Polygonal Lasso, Magnetic Lasso)
For more complex or irregular shapes, the Lasso tools provide manual control. The standard Lasso tool allows for freehand drawing of selections. The Polygonal Lasso tool creates selections with straight-line segments, perfect for objects with geometric edges. The Magnetic Lasso tool "sticks" to the edges of an object as you move your cursor, making it easier to trace outlines. "Use your mouse or stylus to make selection borders with a freehand drawing" describes the fundamental action of these tools.
Quick Selection Tool
The Quick Selection tool is a hybrid, allowing users to "paint" a selection. As you drag the brush over an area, Photoshop intelligently expands the selection to similar pixels. "Simply click the Quick Selection Tool (W) in the left toolbar. Then, click and drag your cursor to select your subject" outlines its intuitive usage.
Refining Selections: The Masking Workflow
Once a selection is made, the concept of non-destructive editing with layer masks becomes paramount. Instead of permanently deleting pixels, masks hide them.
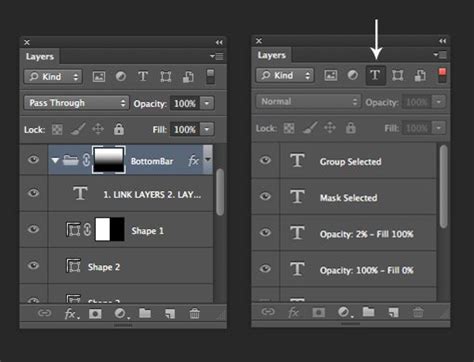
Understanding Layer Masks
In the Layers panel, a mask is represented by a black and white thumbnail next to the image thumbnail. White areas on the mask reveal the layer's content, while black areas conceal it. Grays create semi-transparency. "Use mask layers to hide and reveal selected portions of your background - nondestructively."
Refining Edges with the Brush and Eraser Tools
"Select the mask within your Layers panel… use the Brush tool to “paint” parts of your image back if necessary. You can also use the Eraser tool to erase more portions of the background." By selecting the mask and painting with black or white, users can precisely refine the boundaries of their selection. White paint adds to the mask (revealing the image), and black paint subtracts from it (hiding the image).
The Refine Edge/Select and Mask Workspace
For advanced edge refinement, Photoshop offers the "Refine Edge" tool, now integrated into the "Select and Mask" workspace. "Use Refine Edge to fine-tune rough or smooth edges of selections you made with the various selection tools." This workspace provides tools specifically designed to handle complex edges like hair or fur, allowing for detailed adjustments to softness, feathering, and contrast.
How to Select Subjects and Refine Edges in Photoshop
Creating Solid White Backgrounds
While transparent backgrounds offer flexibility, a clean white background is often desired for specific applications. This process involves isolating the subject and then filling the remaining area with white.
Method 1: Using Levels Adjustment for Simple Backgrounds
For images with relatively uniform backgrounds, the Levels Adjustment tool can be highly effective.
- Open and Duplicate Layer: Open your image in Photoshop and duplicate the background layer (
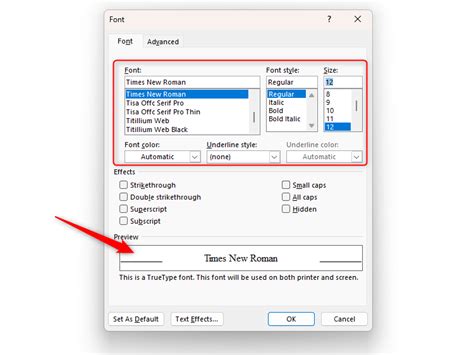
Ctrl+JorCmd+J). - Add Levels Adjustment: Go to
Layer > New Adjustment Layer > Levels.... - Adjust Sliders: In the Properties panel for the Levels adjustment, manipulate the sliders. For brightening a background, you'll typically move the white point slider (the rightmost triangle) to the left. The goal is to make the background pure white while keeping the subject intact.
- Refine with Layer Mask: If the Levels adjustment affects the subject too much, you can use a layer mask on the Levels adjustment layer. Paint with black on the mask to hide the adjustment from the subject, or paint with white to reveal it.
Method 2: Isolating the Subject and Filling with White
This method is more robust and works well for a wider range of images.
- Isolate Your Subject: Use any of the selection tools (AI-powered or manual) to create a precise selection of your subject.
- Create a Layer Mask: With the subject selected, click the "Add layer mask" icon at the bottom of the Layers panel. This will hide everything outside your selection.
- Create a New White Layer: Create a new layer by clicking the "Create a new layer" icon at the bottom of the Layers panel.
- Fill with White: Select the new layer, choose the Paint Bucket tool (
G), set the foreground color to white, and click on the canvas to fill the layer with white. - Arrange Layers: Ensure the white fill layer is positioned below your subject layer in the Layers panel.
Method 3: Blend Modes for Intricate Details
For subjects with fine details like hair or fur, blend modes can be a powerful ally.
- Duplicate Layer: Duplicate your original image layer.
- Add Levels Adjustment: Add a Levels Adjustment layer. Move the white point slider to the left to brighten and essentially "wash out" the background.
- Change Blend Mode: Change the blend mode of the duplicated image layer (the one above the Levels adjustment) to "Multiply." This blend mode darkens the image while allowing lighter areas to show through, effectively making a white background transparent.
- Refine: Further refine using layer masks and edge-detailing tools as needed.
Saving Your Work: Preserving Transparency
The file format you choose for saving is critical when working with transparent backgrounds.
The Importance of PNG-24
"This format allows for multiple layers of transparency, meaning your image will never have a pixelated “halo” when placed on a different color background." PNG-24 is the recommended format for images requiring transparency. Unlike older formats like GIF or PNG-8, PNG-24 supports full alpha transparency, preventing the undesirable "halo" effect.
Exporting as PNG-24
To save your image with transparency:
- Go to Export: Navigate to
File > Export > Export As...or use the shortcutSHIFT+ALT+CTRL+W(Windows) /SHIFT+OPTION+COMMAND+W(Mac). - Set Format to PNG: In the export dialog box, ensure the "Format" is set to "PNG."
- Check Transparency: Crucially, make sure the "Transparency" checkbox is enabled.
- Avoid 8-bit: Do not select options like "Smaller File (8-bit)" as this converts the file to PNG-8, which does not support full transparency.
- Optimize Size: Pay attention to the predicted file size. For web use, aiming for around 200 KB or smaller is a good practice. Adjust image dimensions if necessary to balance quality and file size.
- Export: Click "Export" and choose a save location.
Saving for Web (Older Versions)
If you are using an older version of Photoshop without the "Export As…" option, use File > Save for Web.... Select "PNG-24" from the preset dropdown and ensure "Transparency" is checked.
Batch Processing for Efficiency
For workflows involving numerous images, manual background removal can be time-consuming. Photoshop offers solutions for batch processing.
Using Photoshop Scripts
"Yes, you can use a script in Photoshop to make backgrounds transparent in bulk." You can create or obtain a script that automates the background removal and saving process for a set of images. To run a script, go to File > Scripts > Browse... and select your script file.
Actions Panel
The Actions panel in Photoshop allows you to record a series of steps and then replay them on multiple files. You can record the process of removing a background and saving as a PNG, then apply this action to a folder of images.
Troubleshooting Common Issues
Even with advanced tools, challenges can arise.
Dealing with Imperfect Selections
If the automated "Remove Background" tool or manual selections aren't perfect, the key lies in refining the layer mask. "Select the mask within your Layers panel… use the Brush tool to “paint” parts of your image back if necessary." Zooming in closely and using a small, hard-edged brush allows for precise adjustments.
White Backgrounds Appearing Gray
Sometimes, a white background might render as gray due to lighting or camera settings. The "Levels Adjustment" tool, as described in the white background section, is excellent for correcting this. You can also use a "Threshold Adjustment Layer" to check the purity of white.
Avoiding Pixelated Halos
As mentioned, this is primarily avoided by saving in the PNG-24 format. Using older formats like GIF or PNG-8, or saving as a JPEG (which does not support transparency), will result in unwanted artifacts when placed on different backgrounds.
Conclusion: Empowering Your Visuals
Mastering the art of background manipulation in Photoshop unlocks a new level of creative control and professional polish. Whether you're aiming for the clean versatility of a transparent background or the classic appeal of a solid white one, Photoshop provides the tools to achieve stunning results. By understanding the nuances of selection, masking, and file formats, you can ensure your subjects truly shine and your visual assets serve your brand and projects effectively.
How to Select Subjects and Refine Edges in Photoshop
tags: #photoshop #blank #background