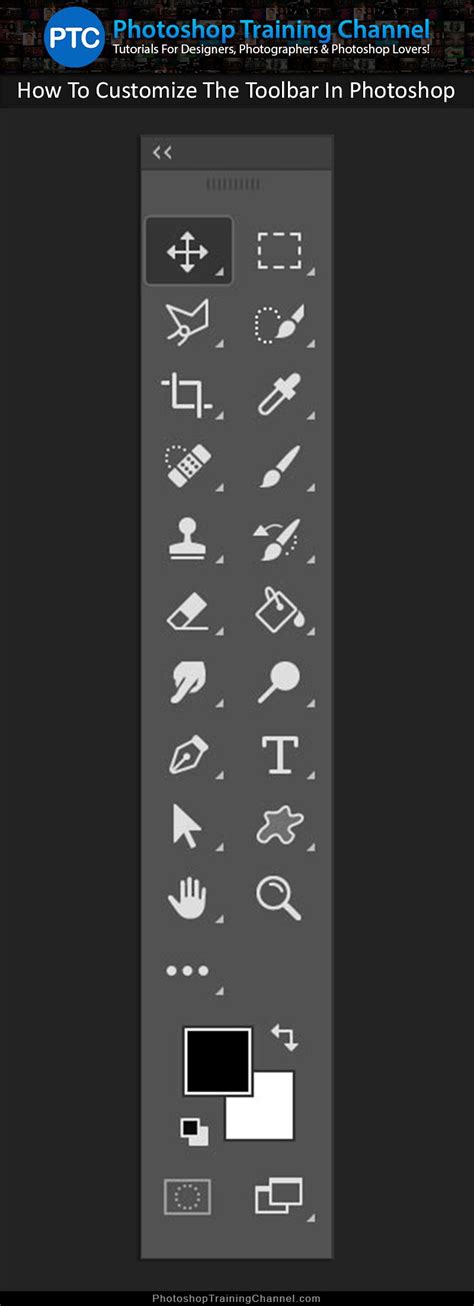
Making precise selections of objects is a cornerstone of effective image editing in Photoshop. These selections act as digital boundaries, ensuring that modifications applied only affect the intended areas, thereby preserving the integrity of the rest of your work. Adobe has developed a diverse array of tools, each with unique strengths, to cater to the spectrum of selection needs, from broad strokes to intricate details. Understanding and mastering these tools is fundamental to achieving seamless edits, creating compelling masks, refining fills, performing accurate crops, and executing precise adjustments.
The Foundation: Basic Geometric Selections
For many general selection tasks, Photoshop offers fundamental tools that are intuitive and efficient. These are often the starting point for many editing workflows.
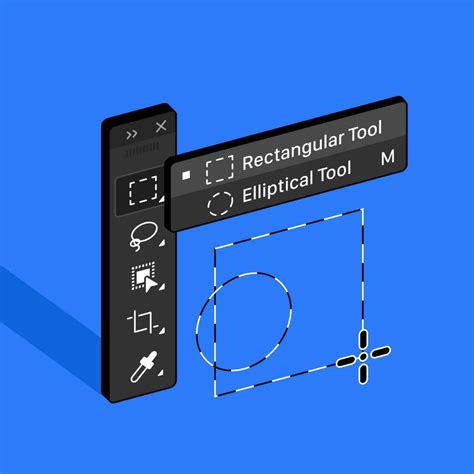
The Rectangular Marquee Tool
The Rectangular Marquee Tool is a standard selection utility found in most graphical software. It is ideal for selecting large, rectilinear portions of an image. Its simplicity makes it a go-to for quickly isolating square or rectangular areas.
The Elliptical Marquee Tool
Closely related to its rectangular counterpart, the Elliptical Marquee Tool performs the same function but creates selections in an elliptical or circular shape. By holding down the Shift key while dragging, users can constrain the shape to a perfect circle. A useful shortcut to remember is Option/Alt (on Mac OS) to draw a selection from a central point, rather than from a corner.
Freeform and Precise Tracing: The Lasso Family
When organic shapes or more free-form selections are required, the Lasso tool and its variations come into play. These tools empower users to trace around objects with varying degrees of control.
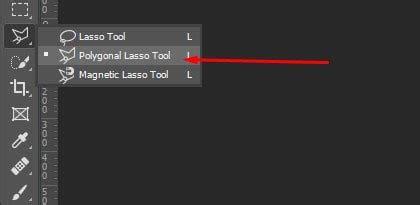
The Lasso Tool
The basic Lasso Tool requires you to trace the outline of your desired selection freehand with your mouse. While it offers the most flexibility for irregular shapes, it can be challenging to achieve high precision with a shaky hand. It's a quick tool for selecting organic, rounder shapes that are difficult to capture with the marquee tools.
The Polygonal Lasso Tool
The Polygonal Lasso Tool offers a more controlled approach to tracing. Instead of a continuous freehand stroke, you click to create anchor points, forming a series of straight lines that define your selection. This method is particularly useful for selecting objects with predominantly straight edges or geometric shapes. If you accidentally create a vertex, pressing the DELETE key will remove the last point. This tool was one of Photoshop's earliest features and enables the creation of complex selections with a series of clicks. It's a more steady outline of your object compared to the freehand lasso.
The Magnetic Lasso Tool
While not explicitly detailed in the provided information, it's worth noting that the Magnetic Lasso Tool, often found in this group, attempts to "snap" to edges of contrasting color and tone as you move your mouse cursor near them. This can be a helpful hybrid for tracing objects where edges are well-defined.
Intelligent Selections: Magic Wand and Quick Selection
Photoshop's more advanced selection tools leverage algorithms to intelligently identify and select areas based on color and texture, significantly speeding up the selection process for many common scenarios.
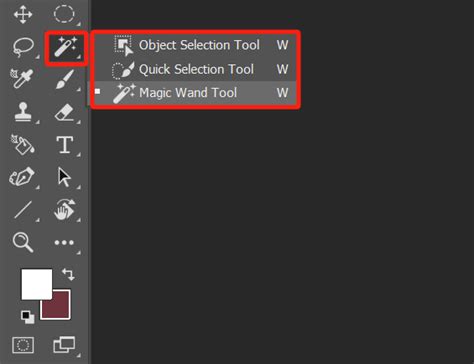
The Magic Wand Tool
The Magic Wand Tool is aptly named for its ability to automatically select pixels of similar colors within a defined tolerance. By clicking on a color, the Magic Wand selects contiguous areas of that color, making it excellent for isolating solid-colored backgrounds or uniform objects. For instance, if you want to give an object or logo a transparent background, you can use the Magic Wand to select the surrounding white space and then press DELETE. Anti-aliasing is a crucial setting available for the Magic Wand, which modifies the edge pixels to create cleaner selections.
The Quick Selection Tool
The Quick Selection Tool uses a brush-like interface to "paint" selections. As you drag the brush over an area, the tool intelligently senses edges and selects contiguous pixels that share similar color and texture characteristics. This tool is often the most frequently used due to its speed and intuitive nature. It uses a brush to paint out selected regions, and the regions you select are almost "Magic-Wand-tooled" because Quick Selection Tool also senses edges, creating more knowledgeable selections.
Advanced Object Recognition: The Object Selection Tool
Photoshop continues to evolve, with tools designed to automate complex selections even further.
The Object Selection Tool
The Object Selection Tool is a powerful asset for automatically selecting common subjects like people, cars, pets, skies, water, buildings, plants, and mountains. You can define the subject by drawing a rough rectangle or lasso around it, and Photoshop's AI-powered engine will then refine the selection to precisely fit the object's edges. It also utilizes the "Object Finder" command. When you hover your mouse pointer over an object or region in your image, selectable areas will be highlighted with an overlay color, allowing for a single-click selection of recognized subjects.
Selections - Photoshop for Beginners | Lesson 6
Refining Your Selections: Essential Techniques
Once an initial selection is made, the process of refining it is crucial for achieving professional results. Photoshop provides several ways to add to, subtract from, or modify existing selections.
Adding to and Subtracting from Selections
Don't stress about making a perfectly precise selection the first time around. Instead, create a general selection and use SHIFT to add smaller chunks you might have missed. Conversely, if a selection tool accidentally includes an area it shouldn't have, use OPTION/ALT to subtract from your selection. This iterative process of adding and subtracting allows for meticulous fine-tuning. Once you make an initial selection, the tool often switches to "Add to Selection" mode, and holding OPTION/ALT will engage "Subtract from Selection."
Intersecting Selections
Taking the intersection of your selection with another area can be useful for isolating very specific overlapping regions. This is less commonly used for general object selection but is a powerful option for complex mask creation.
Enhancing Selection Edges: Feathering and Anti-aliasing
The quality of a selection is often determined by the nature of its edges. Photoshop offers tools to ensure these edges blend seamlessly with the rest of the image.
Feathering
Feathering softens the edge of your selection, creating a gradual transition between the selected area and the surrounding pixels. This is invaluable when applying adjustments or effects, as it prevents harsh, abrupt lines and results in a more natural integration of your edits into the final image.
Anti-aliasing
Anti-aliasing is a subtle yet important feature that smooths the jagged edges of selections by blending the edge pixels with neighboring colors. This setting, found on tools like the Magic Wand, Elliptical Marquee, and all tools in the Lasso family, makes it clearer to Photoshop where edges begin and end without altering the image's details, leading to cleaner, more refined selections.
Advanced Selection Manipulation and Movement
Beyond simply creating selections, Photoshop offers robust features for manipulating and moving selected content.
Inverting Selections
Sometimes, it's easier to select the background than the foreground object. In such cases, inverting your selection is a critical step. The shortcut SHIFT + F7 will invert your current selection, allowing you to easily select the desired object if the background was initially easier to isolate. This is particularly helpful when the object you want to select takes up most of the picture but is difficult to precisely outline.
The Move Tool and Selection Movement
The Move Tool is fundamental for repositioning selected areas. When a selection is active, you can activate the Move Tool (or hold Ctrl / Command on Mac OS when another tool is selected) to drag the selected pixels to a new location within the same image or to another open document.
When moving selections between documents with different resolutions, the pasted data retains its original pixel dimensions. This can lead to the pasted portion appearing disproportionately sized relative to the new image.
Precise movement can be achieved using arrow keys. Holding OPTION/ALT and an arrow key will move the selection one pixel at a time, while OPTION/ALT + SHIFT and an arrow key will move it in larger increments (typically 10 pixels).
Paste Into Selection
The Paste Into Selection command offers a sophisticated way to integrate copied content. When you copy an area and then use Paste Into Selection while a target selection is active, the copied content is pasted within that selection boundary. This command is excellent for utilizing elements within the selected area and preventing the pasted image from looking flat or unnatural. For example, you might use a specific blending mode, like Hard Light at 85% opacity, to retain the reflection in a pair of sunglasses when pasting them into a new context.
Organizing and Aligning Layers with Selections
Selections also play a role in managing multiple layers within a document, particularly when using the Move Tool.
Bounding Box and Layer Selection
When a selection is active, a bounding box appears around it, indicating the area that can be manipulated. If there is no active selection, the bounding box will appear around the currently selected layer. Clicking on a highlighted layer in the Layers panel allows you to select and move that specific layer.
Layer Alignment and Distribution
Photoshop provides powerful tools for aligning and distributing selected layers. Options include aligning to the Bottom Edges, Left Edges, Horizontal Centers, and Right Edges. Multiple layers can be aligned simultaneously. Similarly, layers can be spaced equally apart using options like Top Edges, Vertical Centers, Bottom Edges, Left Edges, Horizontal Centers, and Right Edges. For layer distribution to be enabled, a minimum of three selected layers is required.
Conclusion: The Power of Choice
Ultimately, the selection of the appropriate toolâor combination of toolsâdepends entirely on the specific requirements of your project. Each tool offers unique capabilities, and mastering their nuances provides greater flexibility and control over your image editing workflow. The ability to create high-quality selections is a foundational skill that directly impacts the success of masks, fills, crops, and adjustments, empowering you to harness the full potential of Photoshop's complex and powerful features.