The Pen tool, a cornerstone of vector graphics manipulation, is an indispensable asset for designers working with Adobe InDesign, Illustrator, and Photoshop. While its initial learning curve can be steep, as evidenced by early struggles with its functionality, a solid understanding of its capabilities unlocks precise control over lines, curves, and shapes. This guide delves into the intricacies of the InDesign Pen tool, drawing parallels with its counterparts in other Adobe applications, and offers practical insights for users of all skill levels.
The Core Components of the Pen Tool
At its heart, the Pen tool in InDesign, Illustrator, and Photoshop comprises four fundamental aspects, all designed to work in concert for sophisticated path creation and editing.
The Pen Tool Itself
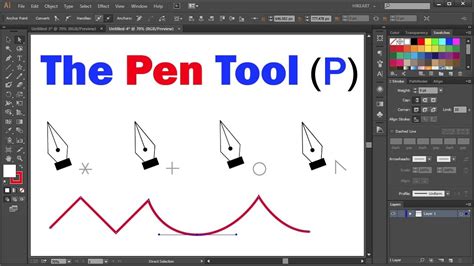
This is the primary instrument for drawing paths. By strategically clicking and dragging, users can generate both straight line segments and smooth, flowing curves. The initial interaction with the Pen tool often involves a degree of trial and error. For instance, attempting to create a curve by simply dragging in the desired direction might initially result in an unexpected straight line. This is because the tool relies on the manipulation of anchor points and their associated Bezier handles to define curves.
Add Anchor Point Tool
This tool, accessible via the shortcut = in InDesign and Illustrator, allows for the addition of new anchor points to an existing path segment. Clicking on a line segment with this tool will introduce a new point, providing further control over the path's shape. This is particularly useful when a pre-existing path needs refinement or modification, allowing for the introduction of more complex curves or angles.
Delete Anchor Point Tool
Conversely, the Delete Anchor Point tool, triggered by the - key in InDesign and Illustrator, serves to remove anchor points. Hovering over an existing anchor point with this tool and clicking will delete it, effectively simplifying the path by allowing the software to draw the shortest possible line between the remaining adjacent points. This is invaluable for cleaning up paths or removing unnecessary points that might be distorting a desired shape.
Convert Direction Point Tool (InDesign) / Anchor Point Tool (Illustrator) / Convert Point Tool (Photoshop)
This set of tools, accessed in InDesign by pressing Shift-C, is crucial for transforming the nature of anchor points and the segments they control.
In InDesign and Illustrator: The Convert Direction Point tool (or Anchor Point tool in Illustrator) functions identically.
- Clicking on a smooth curve point: This converts it into a corner point, resulting in straight line segments emanating from that point.
- Dragging on an existing point: This action allows for the manipulation of the Bezier handles, effectively reshaping the curve.
- Dragging a Bezier handle: This converts a curve point into a corner point with associated curves, offering fine-tuned control over the transition between segments.
In Photoshop: The Convert Point tool performs similar actions, with a slight variation in how it handles the conversion of curve points to corner points.
Photoshop also offers a unique Freeform Pen tool, which allows for a more intuitive, freehand drawing experience, akin to drawing with a stylus. This tool features a "rubber band" effect, visually showing the path as the mouse is dragged, which can be particularly helpful for users less familiar with precise vector drawing.
Keyboard Shortcuts for Efficiency
Mastering keyboard shortcuts can significantly expedite the workflow when using the Pen tool and its related functions.
- Pen Tool:
P - Add Anchor Point Tool:
=(InDesign, Illustrator) - Delete Anchor Point Tool:
-(InDesign, Illustrator) - Convert Direction Point Tool / Anchor Point Tool:
Shift-C(InDesign, Illustrator)
It's important to note that Photoshop's shortcut assignments differ, and it does not offer direct keystrokes for the Add, Delete, or Convert Point tools, nor does it allow for custom assignments of these specific shortcuts using letters A-Z.
Understanding Anchor Points and Bezier Curves
The power of the Pen tool lies in its ability to precisely define paths using anchor points and Bezier curves.
Anchor Points
Anchor points are the fundamental building blocks of any vector path. They are the points where line segments meet.
- Creating Anchor Points: Each click of the Pen tool creates a new anchor point.
- Types of Anchor Points:
- Corner Points: These create sharp, angular transitions between line segments.
- Smooth Points: These create continuous, flowing curves. They are characterized by the presence of Bezier handles.
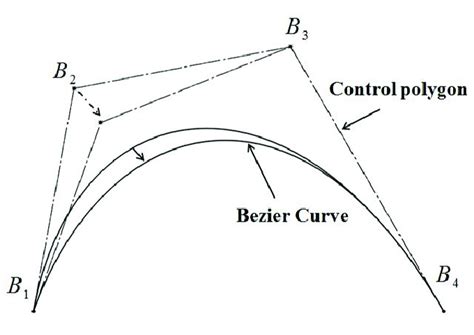
Bezier Handles (Direction Lines)
When a smooth anchor point is created, or when a corner point is converted to a smooth point, Bezier handles (also referred to as direction lines) appear. These handles extend from the anchor point and control the shape and direction of the curve.
- Manipulating Handles: Dragging a Bezier handle changes the curvature of the path. The length of the handle influences the extent of the curve, while its angle dictates the direction.
- Creating Curves:
- C-shaped curves: Dragging in a direction opposite to the previous direction line creates a C-shaped curve.
- S-shaped curves: Dragging in the same direction as the previous direction line creates an S-shaped curve.
Strategic Placement of Anchor Points
A key principle in effective Pen tool usage is to create paths using as few anchor points as possible. Overuse of anchor points can lead to:
- Unwanted Bumps: Excessive points can introduce irregularities and "bumps" into a curve that are difficult to control.
- Complexity: A path with too many points becomes unnecessarily complex and harder to edit.
By carefully considering the desired shape and placing anchor points strategically, users can achieve clean, precise vector paths.
Advanced Techniques and Workflow
Beyond the fundamental operations, several advanced techniques and considerations enhance the Pen tool workflow.
Closing Paths
To create a closed shape, the path must be completed by connecting the last anchor point back to the first. This is achieved by positioning the Pen tool over the initial anchor point. A small circle will appear next to the Pen tool pointer, indicating that clicking will close the path. If you wish to leave a path open, you can select a different tool or use a deselect command (Select > Deselect in Illustrator, Edit > Deselect All in InDesign).
The Rubber Band Effect and Freeform Drawing
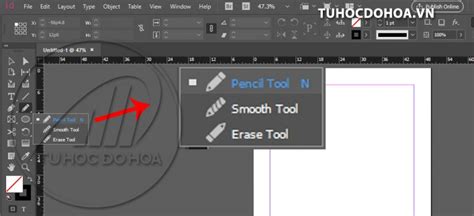
While InDesign and Illustrator don't have a direct equivalent to Photoshop's Freeform Pen tool, their Pencil tools offer a similar freehand drawing experience. The Pencil tool allows users to draw paths as if sketching with a pencil on paper. Anchor points are automatically generated as you draw, and their number is influenced by the path's complexity and tolerance settings found in the Pencil Tool Preferences.
Photoshop's Freeform Pen tool, however, goes a step further with an optional magnetic option, which can help the tool "snap" to edges within an image, further simplifying freehand drawing.
Using the Direct Selection Tool for Precision Editing
The Direct Selection Tool is indispensable for refining paths created with the Pen tool. It allows you to select and manipulate individual anchor points and their Bezier handles.
- Accessing Path Components: When a path is selected with the Direct Selection Tool, all its anchor points and segments become visible.
- Moving Anchor Points: Clicking and dragging an anchor point allows you to reposition it.
- Manipulating Bezier Handles: Once an anchor point is selected, its Bezier handles become accessible. Dragging these handles alters the curve's shape and flow.
- Converting Points: The Direct Selection Tool, in conjunction with the Convert Direction Point Tool, allows for seamless conversion between smooth and corner points, offering dynamic control over path transitions.
It's important to be mindful when using the Direct Selection Tool. Sometimes, simply clicking and dragging might move the entire object rather than an individual point. To avoid this, it's often beneficial to click off the path to deselect everything, then re-select the specific anchor point you wish to manipulate.
Adding and Deleting Anchor Points with the Pen Tool
A highly efficient feature is the ability to add and delete anchor points directly using the Pen tool itself, eliminating the need to constantly switch between tools.
- Adding Points: When the Pen tool is positioned over a path segment (but not directly over an existing anchor point), a small plus (+) icon appears, indicating that clicking will add a new anchor point.
- Deleting Points: When the Pen tool is positioned over an existing anchor point, it transforms into a minus (-) icon, signifying that clicking will delete that point.
This integrated functionality streamlines the process of refining paths, allowing for quick adjustments without interrupting the creative flow. However, in scenarios with many closely spaced anchor points, it can be beneficial to revert to the dedicated Add and Delete Anchor Point tools to ensure precise selection.
Transforming Shapes
Even shapes created with dedicated tools like the Rectangle Tool or Ellipse Tool are, at their core, composed of anchor points and segments. This means they can be further manipulated using the Pen tool and Direct Selection tool. For example, a square can be transformed into a shape with a notch by adding anchor points and then adjusting them. Similarly, a circle can be reshaped into a wedge by manipulating its anchor points.
Video Tutorial - Advanced Pen Tool Technique
Common Pitfalls and Best Practices
- Holding Shift for Straight Lines: When drawing straight line segments, holding down the
Shiftkey constrains the angle to 45-degree increments, ensuring perfectly straight lines. This is crucial for technical drawings or when precise geometric shapes are required. - Understanding the Bounding Box: When an object is selected with the Selection Tool, a bounding box appears. This box defines the overall dimensions of the object, even if parts of the object are not visible within that box. The bounding box itself can be manipulated for scaling, rotating, and other transformations.
- Fidelity and Smoothness in the Pencil Tool: When using the Pencil tool, the "Fidelity" setting controls how closely the drawn path adheres to the mouse movements (higher fidelity means more closely). The "Smoothness" setting determines how much the software simplifies the path, reducing the number of anchor points for a smoother result. Experimenting with these settings allows for fine-tuning the character of hand-drawn paths.
- Avoiding Over-Complication: As mentioned, using the fewest anchor points necessary is a fundamental principle. This not only makes paths easier to edit but also results in more efficient file sizes.
- Practice Makes Perfect: The initial learning curve for the Pen tool can be challenging. Consistent practice with various shapes and scenarios is the most effective way to build proficiency and intuition. Start with simple shapes, then gradually progress to more complex curves and illustrations.
By internalizing these principles and actively practicing, users can transform the Pen tool from a daunting obstacle into a powerful ally in their InDesign design workflow, enabling the creation of highly precise and visually appealing vector graphics.