Encapsulated PostScript (EPS) is a vector graphics file format that has long been a cornerstone of professional printing and graphic design workflows. While newer formats have emerged, EPS retains its significance, particularly for tasks involving high-quality output, large-format printing, and seamless integration with PostScript printers. This article delves into the nuances of exporting EPS files from Adobe Photoshop, exploring the options available, their implications, and best practices for achieving optimal print results.
Understanding the EPS Format: Origins and Capabilities
The EPS format, an acronym for "Encapsulated PostScript," was conceived as a method for embedding PostScript language descriptions of graphics into a document. Its primary purpose was to enable the use of these graphics with PostScript printers, which were the standard for professional printing. Traditionally, EPS was the go-to format for saving silhouetted images that utilized a clipping path, as well as for preserving multitone images like duotones, tritones, or quadtones.
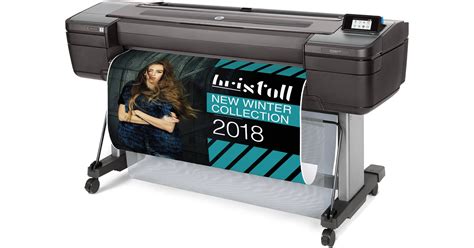
A key advantage of the EPS format is its ability to store vector data. This means that elements like type or vector shape layers created within Photoshop can be preserved with sharp edges, ensuring they are sent to a PostScript printer with unparalleled crispness. This vector-based nature is crucial for scalability; unlike raster formats like JPEG, which have a fixed resolution and lose quality when enlarged, EPS documents retain their image quality regardless of how large they are scaled. This makes EPS an ideal choice for applications such as printing large signs and banners, where print shops frequently request EPS versions of project files.
Photoshop's EPS Export Options: A Detailed Breakdown
When you choose to save a file as an EPS in Photoshop, you are presented with a dialog box that offers several critical options, each impacting the final output.
1. Preview: This setting determines how a low-resolution preview of your EPS file is generated. This preview is primarily used for viewing or printing on non-PostScript printers, as these devices may not be able to interpret the full PostScript data. You have several choices for the preview:
- None: No preview is generated, resulting in the smallest file size. However, this can make it difficult to view the EPS content in applications that do not support PostScript previews.
- 1-bit Preview: This creates a black and white preview with a jagged appearance. It offers a basic representation of the image but lacks detail and color information.
- TIFF Preview: This option generates a higher-quality preview by saving a TIFF (Tagged Image File Format) version of the image. You can specify the color depth (e.g., grayscale or color) and whether the preview is organized by plane or interleaved by channel. Saving a TIFF preview creates a larger file size than a 1-bit preview but provides a more accurate visual representation. For 32-bit TIFF files, you can specify that the file be saved with predictor compression, but JPEG compression is not an option.
- Screen-Resolution Preview: This option creates a preview at a resolution suitable for screen display. While useful for on-screen viewing, it is not ideal for print.
2. Encoding: This crucial option dictates how the image data is delivered to the PostScript printer. The choices here significantly affect compatibility and file size:
- ASCII: This is the least efficient encoding method, resulting in larger file sizes. It converts all image data into American Standard Code for Information Interchange (ASCII) characters. While it offers the broadest compatibility, it is generally not recommended for large files due to its inefficiency.
- Binary: This encoding method transmits image data in its raw binary form, resulting in significantly smaller file sizes compared to ASCII. It is more efficient but may have compatibility issues with some older systems or applications.
- JPEG: This option allows for JPEG compression of the image data within the EPS file. JPEG is a lossy compression method that selectively discards data to reduce file size. It supports only 8-bit images and can significantly reduce file size, especially for photographic content. However, it's important to note that some applications may not be able to read a CMYK file saved in JPEG format. When using JPEG compression, you can control the image quality from "JPEG Maximum Quality" (little compression) to "JPEG Low Quality" (a lot of compression). The "Baseline ("Standard")" format is recognized by most web browsers, "Baseline Optimized" creates a file with optimized color and a slightly smaller file size, and "Progressive" displays increasingly detailed versions of the image as it downloads.
3. Compatibility: This setting determines the platform on which the EPS file can be read or opened. You can choose between:
- IBM PC (Windows) Byte Order: This option ensures the file can be opened correctly on Windows systems.
- Macintosh Byte Order: This option is for compatibility with Mac OS systems.
- Both: Selecting this option creates a file that can be read on both Windows and Macintosh platforms, though it may result in a slightly larger file size.
4. Color Management: For CMYK images, the EPS export options include settings related to color management:
- Convert File Data to the Printer’s Color Space: This option converts the image data to the target printer's color space, aiming to ensure accurate color reproduction. It's important to be aware that only PostScript Level 3 printers support PostScript Color Management for CMYK images.
- Preserve Photoshop Editing Labels: This option can be useful if you intend to re-edit the EPS file in Photoshop later, as it retains certain editing information.
5. Other Options:
- Include Vector Data: When saving vector data like type or shape layers, this option ensures that this information is embedded in the EPS file, allowing for sharp, scalable output.
- Save Layer Data: While many applications cannot read layer data within an EPS file and will simply skip over it, Photoshop can read layer data in TIFF files. Saving layer data in EPS can eliminate the need to maintain a separate PSD file for holding layer information, although it will result in larger file sizes.
- Retain Spot Color Channels: This option is essential if your design utilizes spot colors. It ensures that these custom color channels are preserved in the EPS file for accurate printing.
- Single-File Option: This option saves disk space by embedding all necessary components into a single EPS file.
- Header Parameter: You can specify a Header parameter, which can be relevant for certain printing workflows.
- Order: You can choose between interleaved or non-interleaved order for channel data.
- Kodak Cineon Film System: An option exists for saving files in a format compatible with the Kodak Cineon Film System.
- Targa (TGA) Format: While not an EPS option, the Targa format is mentioned as being designed for systems using the Truevision® video board and is commonly supported by MS-DOS color applications. Targa supports 16-bit, 24-bit, and 32-bit RGB images, as well as indexed-color and grayscale images.

Best Practices for Photoshop EPS Export
To achieve the best results when exporting EPS files from Photoshop, consider the following best practices:
- Document Setup is Key: Before you even begin designing, it's crucial to set up your Photoshop document correctly for print. For any new Photoshop file intended for printing, it is best practice to create the canvas size at the actual size it will be printed for the job. Many designers opt to make the canvas size about a half an inch larger on all sides than the artwork itself to provide a bleed area.
- Resolution Matters: To achieve nice, crisp edges for fonts, typing, and other elements created directly in Photoshop, the document resolution is paramount. A resolution of 300 Pixels Per Inch (PPI) will generally yield crisp, un-pixelated artwork for the final output. Some designers opt for 400 PPI to allow for minor enlarging and scaling in the future, though this does increase file size.
- Color Mode Alignment: Understanding the printing method for the final output is critical for setting up your initial document. If your design will be printed using offset printing, which typically employs CMYK (four-color process), you should create your new Photoshop document in CMYK color mode from the outset. Creating a document in RGB and then converting it to CMYK for print can lead to color shifts, especially for colors that fall outside the CMYK gamut.
- Leveraging Illustrator for Vector Elements: While Photoshop can handle vector data within EPS files, it's often more efficient and yields better results to create pure vector elements in Adobe Illustrator. A common workflow involves creating raster-based elements (like photographs) in Photoshop, saving them as TIFF files (which preserve transparency and layers), and then placing these TIFF files into an Illustrator document. You can then add vector artwork, text, and other elements in Illustrator. Using the "link" option when placing the TIFF file in Illustrator ensures that any edits made to the TIFF in Photoshop are automatically reflected in the Illustrator file.
- Spot Channels and DCS 2.0: If you are creating new spot channels in Photoshop that will be printed as separate colors, it is advisable to save the Photoshop document as a DCS 2.0 (Document Color Separation 2.0) file format. This format is specifically designed to handle multiple spot color channels effectively.
- When to Export EPS: While EPS is a powerful format, it's not always the default choice for everyday use. For web graphics or general image sharing, formats like JPEG, GIF, or PNG are often more suitable due to their smaller file sizes and broader compatibility. EPS files are best reserved for specific print applications where their vector capabilities and PostScript compatibility are essential. Therefore, it's often recommended to keep your primary project files in their default formats and export EPS versions only when they are specifically needed for print production.
Workflow: Photoshop to Illustrator
The Role of EPS in Modern Workflows
Despite the evolution of digital imaging formats, EPS files continue to play a vital role in professional printing. Their ability to encapsulate both raster and vector data, coupled with their compatibility with PostScript printers, makes them indispensable for a wide range of applications, from business cards and brochures to large-format signage and apparel. By understanding the intricacies of Photoshop's EPS export options and adhering to best practices, designers can ensure their graphics are prepared for high-quality, accurate, and scalable output, meeting the demands of professional print production. The process of exporting your project as an EPS file in Photoshop is a straightforward procedure once you understand the available options and their implications for your final printed product.