Winter scenes, with their crisp air and blanket of white, possess a unique charm. However, capturing the magic of falling snow with a camera can be an elusive endeavor. Fortunately, for photographers and designers alike, Adobe Photoshop offers a powerful suite of tools to digitally conjure a convincing snow effect, transforming any image into a winter wonderland. This tutorial delves into the intricate process, guiding you from the initial setup to the final touches that imbue your photographs with a realistic, dynamic snowfall. We will explore techniques that not only add falling snow but also create depth and variation, making your digital snow indistinguishable from the real thing.
The Foundation: Preparing Your Canvas for Snow
Before embarking on the creative journey of adding snow, it's crucial to prepare your Photoshop workspace. This involves opening your chosen image and setting up the necessary layers that will host the snowfall. The process begins with a fresh canvas, essentially a blank slate upon which we will meticulously build our winter scene.
Open your selected image in Photoshop. The goal is to have your original photograph as the base layer, often referred to as the "Background" layer. Upon this, we will introduce new layers dedicated solely to the snow effect. This layered approach is fundamental to non-destructive editing in Photoshop, allowing for adjustments and refinements without permanently altering the original image data.
To begin, create a new layer directly above your background image. This is achieved by clicking the "Create a new layer" icon, typically found at the bottom of the Layers panel. This new layer will initially appear blank and transparent. For organizational purposes, it's advisable to rename this layer. A descriptive name like "Snow 1" is fitting, as it will house the first layer of our snowfall.
Now, the crucial step is to fill this newly created layer with black. This might seem counterintuitive when aiming for a white snowfall, but this black canvas is the essential starting point for generating the noise that will later transform into snowflakes. You can fill the layer with black using the Paint Bucket tool or by navigating to Edit > Fill and selecting black as the content. Once filled, this black layer will completely obscure your original image, creating a dark void. This is precisely what we want at this stage.
Generating the Snowflakes: The Art of Noise and Blur
With the black canvas in place, the next phase involves transforming this uniform darkness into the scattered specks that will eventually become our snowflakes. This is achieved through the strategic application of Photoshop's noise and blur filters.
Navigate to Filter > Noise > Add Noise. This filter introduces random pixels, or "noise," to your layer. In the dialog box that appears, you'll find an "Amount" slider. For this effect, we need a significant amount of noise. Dragging the slider to a value around 150% is a good starting point. It's important to select the "Gaussian" and "Monochromatic" options at the bottom of the dialog box. "Gaussian" ensures the noise is distributed according to a bell curve, creating a more natural distribution of speckles, while "Monochromatic" guarantees the noise is in shades of gray and white, essential for our later blend mode.
At this point, your layer will be filled with a dense field of tiny white and gray dots. This is the raw material for our snowflakes. However, these dots are too sharp and uniform. To make them appear more organic and to begin simulating the varied sizes and shapes of real snowflakes, we need to apply some blur.
While the Filter > Blur > Blur command offers a quick way to soften the noise, it lacks control. A more precise and recommended approach is to use Filter > Blur > Gaussian Blur. Apply a very small amount of blur; a radius of around 0.7 pixels is often sufficient. This subtle blurring will begin to clump the noise particles together, creating a more varied appearance.
The combination of adding noise and then applying a gentle blur is a foundational technique that can be adapted for various effects, such as creating rain or a starry night sky. Understanding this core principle empowers you to experiment and create a multitude of visual outcomes.
Refining the Snow: Levels and Blend Modes for Realism
The noise and blur have begun to shape our snowflakes, but the image still appears as a dense, almost solid field of specks. To sculpt this into a convincing snowfall, we need to control the density and visibility of these specks. This is where the Levels command and blend modes become indispensable.
The "Levels" command allows for precise control over the tonal range of an image. Access it by going to Image > Adjustments > Levels. In the Levels dialog box, you'll see a histogram representing the distribution of pixels by brightness. Below the histogram are three sliders: black, gray, and white.
To refine our snow, we will primarily use the black and white sliders. Click and drag the white slider to the left. This action brightens the existing noise, making the lighter specks more prominent. Subsequently, click and drag the black slider to the right. This is where the magic happens for density control. Continue dragging the black slider towards the right until a significant portion of the noise is eliminated, leaving behind only the brightest, most distinct specks. What remains should resemble scattered snowflakes against a dark background. The goal is to reduce the noise to a point where it looks less like static and more like individual, albeit tiny, snowflakes.
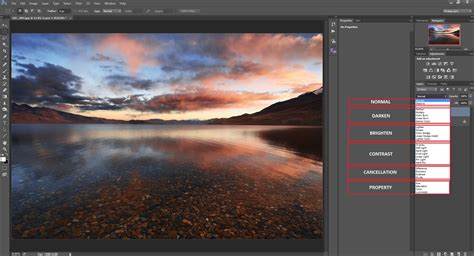
Once you are satisfied with the density and appearance of the specks, it's time to make them visible against your original image. This is achieved through Photoshop's powerful blend modes. With the snow layer still selected in the Layers panel, locate the "Blend Mode" dropdown menu, which is typically set to "Normal" by default. Change this blend mode to "Screen." The "Screen" blend mode works by screening out all black pixels, effectively making them transparent. It then brightens the remaining pixels, allowing the white specks-our snowflakes-to appear on top of your background image. This instantly reveals your original photograph, now adorned with a delicate dusting of snow.
Adding Depth and Dimension: Multiple Snow Layers
A single layer of snow, while a good start, can sometimes appear flat and uniform. To introduce a sense of depth and realism, we will create multiple layers of snow, each with slightly different characteristics. This mimics the natural phenomenon where snowflakes at varying distances appear to fall at different speeds and have different sizes.
To create a second layer of snow, duplicate your existing "Snow 1" layer. You can do this by right-clicking on the "Snow 1" layer in the Layers panel and selecting "Duplicate Layer," or by using the keyboard shortcut Ctrl+J (Windows) or Command+J (Mac). Rename this new layer to "Snow 2."
The key to creating depth is to vary the appearance of the snowflakes on this new layer. One effective way to achieve this is by applying a "Motion Blur" filter. Go to Filter > Blur > Motion Blur. This filter simulates the effect of movement. For falling snow, you'll want to set the "Angle" to a negative value, such as -65 degrees, to indicate a downward motion. The "Distance" parameter controls the length of the blur trail. For this second layer, which we intend to represent slightly larger or closer snowflakes, a "Distance" of around 20-25 pixels is a suitable starting point. Experiment with these values to achieve the desired effect. The motion blur will elongate the existing specks, giving them a sense of falling.

To further differentiate this second layer and make the snowflakes appear larger (simulating snow closer to the viewer), you can use the "Crystallize" filter. Navigate to Filter > Stylize > Crystallize. This filter breaks the image into cells. Adjusting the "Cell Size" will alter the size of these cells. A cell size between 10 and 20 typically works well for creating larger snowflake shapes. After applying Crystallize, you might want to reapply the Motion Blur to ensure the larger snowflakes also have a sense of movement.
By layering these distinct snow effects, you create a more convincing and dynamic snowfall. The smaller, sharper specks on the lower layers can represent distant snow, while the larger, blurred specks on the upper layers appear closer to the viewer.
Enhancing Realism: Brush Creation and Advanced Techniques
For those seeking an even more refined and customizable snow effect, creating a dedicated snow brush offers a higher degree of control. This method moves away from the noise-and-filter approach and allows for organic brush strokes that mimic natural snowfall.
To begin this process, you'll need to create a custom brush. Start by opening a new document in Photoshop, preferably a square canvas with a black background. On a new layer above the black background, create a few white dots of varying sizes and opacities. These dots will serve as the individual elements of your snow brush. You can use a hard-edged round brush for this.
Once you have a few scattered white specks, go to Edit > Define Brush Preset. Name your new brush something descriptive, like "Falling Snow."
Now, return to your main image. Create a new layer for your snow and select the Brush Tool. In the Brush Preset Picker, find your newly created "Falling Snow" brush. To make this brush behave like falling snow, you'll need to adjust its settings in the Brush Settings panel (Window > Brush Settings).
Within the Brush Settings panel, focus on these key tabs:
- Brush Tip Shape: Adjust the "Spacing" to a very high value, around 900%. This ensures that the individual brush marks (your white specks) are spread far apart, preventing them from forming continuous lines.
- Shape Dynamics: This is crucial for creating randomness. Set "Size Jitter" to around 80%, "Min Diameter" to about 7%, "Angle Jitter" to 38%, "Roundness Jitter" to 70%, and "Min Roundness" to 40%. These settings will ensure that each brush stroke produces snowflakes of varying sizes, orientations, and shapes.
- Scattering: Tick the "Scattering" box and set the value to 1000%. This will distribute the snowflakes randomly across your brush stroke.
- Transfer: Adjust the "Opacity Jitter" to 10%. This will create subtle variations in the density of the snow as you paint.
With your custom brush configured, set your Foreground color to white. Select your snow layer and begin painting randomly across your image. You'll notice that the brush now lays down individual specks of snow with natural variation.
How to Create a Snowflake Brush in Photoshop
After applying the snow with your custom brush, you can still employ the "Diffuse" filter (Filter > Stylize > Diffuse) to soften the individual flakes and the "Gaussian Blur" to add a gentle overall blur. For added realism, you can also apply a "Motion Blur" to simulate falling snow, adjusting the angle and distance as needed.
Fine-Tuning and Optional Refinements
Once the primary snow effect is in place, there are optional steps you can take to further enhance its realism and integrate it seamlessly with your image.
Erasing Unwanted Snow: In some instances, the generated snow might obscure important parts of your subject. To address this, you can use the Eraser Tool. Select the Eraser Tool, choose an appropriate brush size and hardness, and carefully erase any snow that falls over your main subject, such as a person's face or a crucial detail in the landscape. This step is entirely optional and depends on the specific needs of your image. You can remove as much or as little snow as you desire to maintain the focus on your subject.
Adjusting Opacity: If you find that your snow effect is too intense or too bright, you can easily reduce its overall impact by adjusting the opacity of the snow layer(s). In the Layers panel, locate the "Opacity" slider, which is positioned near the "Blend Mode" dropdown. Lowering this slider will make the snow more translucent, integrating it more subtly with the background image. This is particularly useful when you have multiple snow layers and want to fine-tune their collective intensity.
Smart Objects for Non-Destructive Editing: For advanced users and for maintaining maximum flexibility, converting your snow layers to Smart Objects before applying filters is highly recommended. To do this, right-click on the snow layer and select "Convert to Smart Object." This allows you to re-edit any applied filter (like Gaussian Blur or Motion Blur) at any time by simply double-clicking on the filter name in the Layers panel. This non-destructive workflow is invaluable for experimentation and ensuring you can always go back and tweak settings without redoing entire steps.
By combining these techniques-from the fundamental noise and blur to advanced custom brushes and precise adjustments-you can create a stunningly realistic falling snow effect in Photoshop. This process not only enhances winter photography but also opens up a world of creative possibilities for any image that could benefit from a touch of winter magic. The ability to master these techniques allows you to go beyond simply adding snow and instead craft an entirely new atmosphere, transforming ordinary photographs into captivating winter scenes.