The frustration of encountering a greyed-out filter in Adobe Photoshop is a common experience for many users. Whether you're a seasoned professional or a beginner, finding essential tools inaccessible can halt creative workflows and lead to significant annoyance. While the reasons can sometimes seem obscure, understanding the underlying causes often reveals straightforward solutions. This article delves into the various scenarios that lead to Photoshop's filter gallery and individual filters being greyed out, offering practical steps to regain access and ensure smooth image manipulation.
The Bit Depth Dilemma: 8-bit vs. 16-bit Images
One of the most frequent culprits behind greyed-out filters is the image's bit depth. Photoshop filters are a diverse collection, with many originating from older versions of the software. These legacy filters were often designed with the limitations of 8-bit images in mind. When you're working with a file that is set to 16 bits per channel, clearly indicated as "RGB/16" in the image's caption bar, a significant number of these older filters will become unavailable.
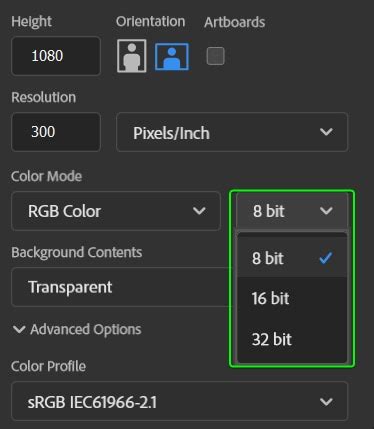
This limitation stems from the fact that 16-bit images offer a far greater range of colors than their 8-bit counterparts. An 8-bit image provides 256 shades of color in each of the three primary channels (Red, Green, Blue), resulting in approximately 16.7 million possible colors. In stark contrast, a 16-bit image offers 65,536 shades of color per channel, leading to an astronomical number of possible colors. While this expanded palette is invaluable for precise editing and preserving subtle gradients, it can be incompatible with filters that were not designed to handle such a vast amount of data.
The consequence of this incompatibility is that filters designed for 8-bit workflows will be greyed out when applied to a 16-bit image. This can be particularly noticeable in areas with subtle color transitions, such as skies, skin tones, or fabric textures, where the loss of color information in an 8-bit conversion might be apparent.
Resolving the Bit Depth Conflict
Fortunately, addressing the bit depth issue is typically a simple process. The most common solution involves converting your image to 8 bits per channel. However, it's crucial to approach this conversion strategically to avoid compromising your original image quality.
A recommended workflow is to first create a duplicate of your document. This ensures that you retain an unedited, high-bit-depth version of your work. Once you have your copy, you can then proceed with the conversion:
- Duplicate Your Document: Go to
File > Save Asand save a copy of your current project. - Convert to 8 Bits/Channel: Navigate to
Image > Mode > 8 Bits/Channel.
Alternatively, if you are working with multiple layers and wish to apply filters to specific ones while maintaining the 16-bit depth for others, you can convert critical layers to Smart Objects before changing the overall bit depth.
- Select Layers: In the Layers panel, select the layer or layers you wish to convert.
- Convert to Smart Object: Go to
Layer > Smart Objects > Convert to Smart Object. - Change Bit Depth: Proceed to
Image > Mode > 8 Bits/Channel.
By converting to 8-bit only for the specific steps requiring older filters, you can minimize potential degradation of subtle gradients. It's important to remember that while 8-bit has fewer colors, it still offers more colors than the human eye can perceive, making it perfectly adequate for many final output scenarios.
Layer Selectivity and Filter Compatibility
Beyond bit depth, the selection of the active layer in your Photoshop document plays a pivotal role in determining filter availability. Even when your image is set to 8 bits per channel and RGB mode, certain filters can remain greyed out if the currently selected layer is not compatible with them.
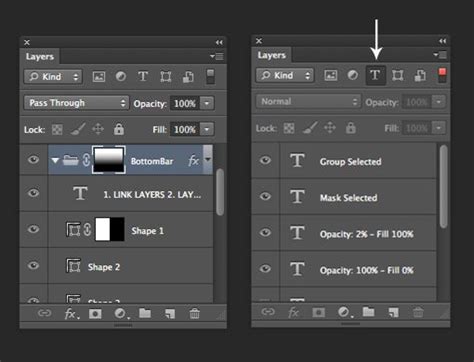
This often occurs when an adjustment layer, such as a Curves or Levels adjustment, is active and selected in the Layers panel. While these adjustment layers are essential for non-destructive editing, they can prevent the application of certain filters, particularly blur or artistic filters, to other layers. This is because Photoshop prioritizes the active layer for filter application, and an adjustment layer itself might not be a suitable target for these specific operations.
Furthermore, some filters, particularly those in the "Distort" or "Stylize" categories, are known to have stricter compatibility requirements. These filters might be designed to work exclusively with rasterized pixel layers and may not function with vector-based elements or certain types of adjustment layers. The reason for this can be multifaceted: the calculations involved might be extremely complex, or the filters themselves may be so old that they haven't been updated to accommodate newer Photoshop features and layer types.
Ensuring Layer Compatibility
To overcome this, ensure that you have a rasterized pixel layer selected in the Layers panel before attempting to apply a greyed-out filter. If you have adjustment layers active, consider collapsing them or converting the target layer into a Smart Object, as previously mentioned.
A common and effective strategy is to plan your workflow so that filters are applied as one of the final steps. This allows you to perform all your critical 16-bit adjustments first, and then, as a last action before outputting your image, convert to 8-bit and apply the necessary filters. This approach preserves the integrity of your image data throughout the most intensive editing phases.
For those who rely heavily on filters that are not readily available in 16-bit, exploring third-party plugins designed for filter building can be a valuable alternative. These plugins often offer expanded compatibility and advanced functionalities, bridging the gap left by Photoshop's legacy filter set.
Color Mode and Grayscale Issues
Another factor that can lead to filters being greyed out is the image's color mode. While most users work in RGB, some filters are not compatible with Grayscale images. If you find that your filters are unexpectedly disabled, it's worth checking your image's color mode.
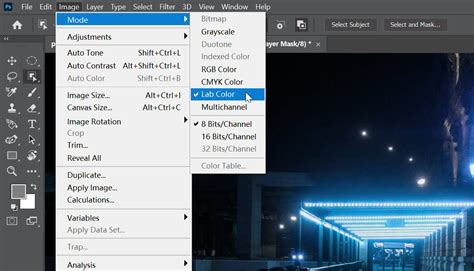
To do this, navigate to Image > Mode. If your image is set to "Grayscale," you will need to convert it to RGB to enable most filters. The conversion process is straightforward:
- Navigate to Mode Settings: Go to
Image > Mode. - Select RGB Color: Choose
RGB Color.
This conversion will restore the color information to your image and should make the previously unavailable filters accessible again. It's important to note that this conversion might not be suitable for all workflows, particularly those specifically intended for grayscale output. However, for general image editing where filter access is paramount, switching to RGB is a common and effective solution.
Legacy Filters and 32-bit Compatibility
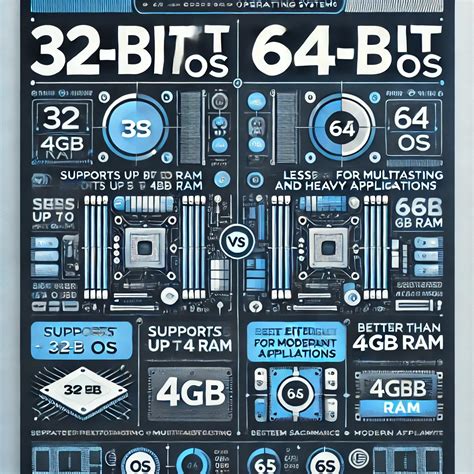
Photoshop's extensive history means it incorporates a vast array of filters, some of which are quite old. As software evolves, especially with the transition to 64-bit operating systems and architectures, older 32-bit plugins and filters can become incompatible. Adobe, like many software developers, prioritizes updating the most commonly used and popular features, meaning older, less frequently used filters might not be rewritten for modern systems.
In some cases, these older filters might be available on the original Photoshop installation discs but were not included in the default installation due to their legacy status or lack of 64-bit compatibility. For users who absolutely require these specific filters, it might be possible to install them manually. However, this often comes with a significant caveat: to run these older 32-bit plugins, you may need to start Photoshop in 32-bit mode. This, in turn, can limit the amount of system memory that Photoshop can access, potentially impacting overall performance, especially on systems with ample RAM.
The decision to deprecate or not update older filters is a pragmatic one for software developers. Rewriting millions of lines of code for every single feature is an immense undertaking. The focus is typically on modernizing features that are actively used by the majority of the user base, while newer techniques and more advanced third-party filters have often superseded the functionality of these older tools. Many users who relied on filters like those found in the "Artistic" or "Brush Strokes" categories in the 1990s have since moved on to more sophisticated methods, utilizing features like advanced blending modes, custom brushes, or specialized third-party extensions.
Unexpected Filter Disappearance: A Deeper Dive
Occasionally, users report that filters that were previously accessible suddenly become greyed out, even when working with 8-bit RGB images with rasterized layers. This can be particularly perplexing if the image itself hasn't undergone significant changes. While the exact cause can be elusive, several factors might contribute:
- Corrupted Preferences: Photoshop's preference files can sometimes become corrupted, leading to unexpected behavior, including filter access issues. Resetting Photoshop's preferences can often resolve such problems.
- Plugin Conflicts: If you have recently installed new third-party plugins or filters, they might be conflicting with Photoshop's core functionality or other plugins, leading to filters being disabled.
- Software Glitches: While less common, temporary software glitches can occur. Simply closing and reopening Photoshop, or even restarting your computer, can sometimes resolve these transient issues.
- Specific Layer Properties: While generally rasterized layers are compatible, very specific or unusual layer properties, or even a "locked" state on a layer (though usually indicated visually), could theoretically cause issues.
- Work Path Interference: Although not a direct cause for filters to be greyed out, the presence of an active work path can sometimes interfere with certain selection-based operations, and while less directly related to filter grey-outs, it's a factor to consider in complex scenarios.
If you find yourself in this situation, systematically working through the previously mentioned solutions is advisable: check bit depth and color mode, ensure a compatible layer is selected, and restart Photoshop. If the problem persists, consider resetting your Photoshop preferences. This is typically done by holding down Ctrl+Alt+Shift (Windows) or Cmd+Option+Shift (Mac) immediately after launching Photoshop.
How to Fix Camera Raw Filters in Photoshop (Not Opening)
In conclusion, while the greyed-out filter phenomenon in Photoshop can be a source of frustration, it is most often rooted in specific technical requirements of the filters themselves, primarily related to image bit depth, color mode, and active layer selection. By understanding these underlying principles and employing the outlined troubleshooting steps, users can effectively diagnose and resolve these issues, ensuring uninterrupted creative workflows and the full utilization of Photoshop's powerful toolset.