In the realm of digital photography, the journey from capturing an image to presenting a polished final product often involves the indispensable tool of Adobe Photoshop. While the thought of its extensive capabilities can seem daunting to newcomers, understanding the fundamental principles and tools can unlock a world of creative possibilities, transforming raw captures into compelling visual narratives. Photoshop offers a vast array of functionalities, catering to everything from subtle retouching to ambitious artistic metamorphoses, allowing photographers to refine their vision and elevate their work beyond the initial capture. This guide aims to demystify the foundational aspects of photo editing in Photoshop, providing a clear pathway for beginners to navigate its powerful features.
Importing and Initial Preparations
The first crucial step in any Photoshop editing workflow is to bring your image into the software. This can be achieved by simply dragging and dropping your photo file into the Photoshop window, or by navigating through the "File > Open" menu. Once your image is open, you'll notice a tab at the top displaying the file name. If you're working with multiple images, each will appear as a separate tab, allowing for easy switching between them.
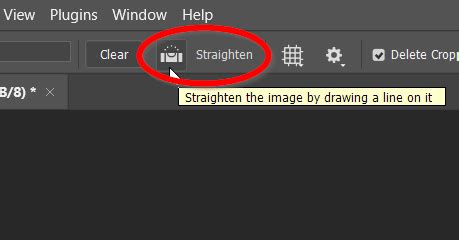
Before diving into more complex adjustments, it's essential to address the foundational aspects of your image's composition and integrity. A common oversight for beginners is a slightly tilted horizon or a subtly crooked image. Photoshop provides a straightforward solution with the Straightening tool, often found within the Crop tool's options. This allows you to visually align a line in your image (like the horizon) and have Photoshop automatically correct the tilt.
Following straightening, the Crop tool becomes invaluable for refining the composition. This tool enables you to trim away distracting elements from the edges of your image or to recompose the scene for a more impactful aesthetic. A critical setting to be aware of within the Crop tool's menu is "Delete Cropped Pixels." For maximum flexibility, it's advisable to keep this option turned off. This ensures that the areas you crop away are not permanently removed from the image data, allowing you to revisit and adjust the crop later if needed.
The Power of Layers and Nondestructive Editing
One of the most significant advantages of Photoshop lies in its sophisticated layer system. Layers can be conceptualized as transparent sheets stacked upon one another, each containing a specific element or adjustment. This layered approach is the cornerstone of nondestructive editing, a workflow that allows you to make changes without permanently altering the original image data.
To harness this power, it's a good practice to duplicate your image upon importing it. This can be done by navigating to "Image > Duplicate" in the menu. Each duplicate can then serve as the foundation for a new layer. By placing each edit on its own layer, you gain granular control over every adjustment. This not only simplifies the process of undoing or modifying specific changes at any point in your workflow but also allows you to isolate and focus on particular elements within your image. For instance, if you wish to adjust the brightness of the sky independently of the foreground, you can create a separate layer for the sky and apply adjustments only to that specific area.
Layer masks further enhance this control. By creating a layer mask with fast selection tools, you can define which parts of a layer are visible or affected by adjustments. This is particularly useful for targeted edits, such as applying a blur effect to the background while keeping the subject sharp.
Essential Tools for Image Enhancement
Photoshop offers a comprehensive suite of tools, each designed for specific editing tasks. While some tools apply permanent effects to pixels, using them on duplicate layers or within the nondestructive framework of layers and masks ensures that your original image remains safe.
Retouching Imperfections
For addressing minor blemishes, dust spots, or other irregularities, tools like the Spot Healing Brush are remarkably effective. This tool allows you to simply paint over an imperfection, and Photoshop intelligently samples surrounding pixels to blend and conceal the blemish seamlessly.
The Clone Stamp tool serves a similar purpose but offers more direct control. It allows you to sample a specific area of your image and then paint that sampled area onto another part of the image. This is particularly useful for removing larger distracting elements from the background or for meticulously reconstructing areas of an image.
Color and Tone Adjustments
Adjustment Layers are fundamental for controlling the color and tone of your images. While they might initially be thought of as filters, their true power lies in their flexibility and non-destructive nature. Tonal adjustments encompass modifications to aspects like hue, contrast, vibrance, and saturation, influencing the overall mood and visual impact of your photograph. Color adjustments provide precise control over the specific hues and their intensity within your image.
When an image is almost perfect but requires a slight tweak to its color balance, Adjustment Layers offer a refined solution. For example, you might want to make a sunset photo appear warmer or cooler. The Temperature slider within adjustment layers allows for precise control over this aspect. Furthermore, tools like HSL (Hue, Saturation, Luminance) adjustments allow you to target and modify specific color ranges, making elements like the sunset or water "pop" with increased intensity. While it's possible to overdo these adjustments, leading to an unnatural look, they are powerful tools for enhancing the visual appeal of your photographs.
The RAW Advantage and Camera Raw Filter
For photographers who shoot in RAW format, a significant advantage is the wealth of data captured by the camera sensor. RAW files are essentially unprocessed sensor data, offering much greater latitude for editing compared to JPEGs. When you open a RAW file in Photoshop, it is automatically processed through the Camera Raw filter (ACR). This specialized tool is Adobe's engine for interpreting and editing RAW files, and its interface bears a strong resemblance to Adobe Lightroom.
Within Camera Raw, you can perform essential initial adjustments such as exposure, white balance, contrast, and sharpening. A particularly important function of ACR is its Lens Correction capabilities. ACR contains built-in profiles for various camera lenses that can automatically correct common lens-induced distortions, chromatic aberration (color fringing), and vignetting (darkening of the corners).
After making initial adjustments in Camera Raw, you can then click "Open Image" to bring the processed RAW file into the main Photoshop workspace. This ensures that you are working with the most data-rich version of your image from the outset.
Workflow: A Step-by-Step Approach
A structured workflow can significantly streamline the editing process. While individual preferences may vary, a common and effective approach can be broken down into distinct phases:
Phase 1: Composition and Initial Cleanup
This phase focuses on the structural integrity and aesthetic framing of your image. It encompasses:
- Lens Correction: Utilizing tools like the Camera Raw filter to correct any optical imperfections from your lens.
- Straightening: Ensuring that horizons and vertical lines are perfectly aligned.
- Cropping: Refining the composition to remove distractions, improve balance, or prepare for specific aspect ratios (e.g., for social media).
- Retouching: Addressing any minor blemishes or unwanted elements using tools like the Spot Healing Brush or Clone Stamp.
Phase 2: Tone and Light
This phase is dedicated to establishing the overall brightness and contrast of your image.
- Exposure and Contrast Adjustments: Using tools like Brightness/Contrast, Exposure, or Levels to ensure the image is neither too dark nor too bright, and that there is a pleasing range between the darkest and lightest areas. The histogram, a graphical representation of the tonal distribution in your image, is an invaluable tool here for making precise adjustments.
- Dodge and Burn: This technique, originating from darkroom printing, allows for localized lightening (dodging) and darkening (burning) of specific areas. In Photoshop, this can be achieved by creating a new gray layer, setting its blend mode to "Overlay" or "Soft Light," and then painting with white (for dodging) or black (for burning) using a soft brush at a low opacity. This allows for subtle, targeted control over light and shadow.
Phase 3: Color and Global Adjustments
Once the tonal foundation is established, the focus shifts to color and broader adjustments.
- White Balance: Correcting any unwanted color casts (e.g., a blue or yellow tinge) to ensure colors appear natural.
- Color Adjustments (Vibrance and Saturation): Fine-tuning the intensity and richness of colors. Vibrance subtly boosts less saturated colors, while saturation increases the intensity of all colors across the image.
- HSL Adjustments: Making targeted modifications to specific color ranges for greater impact.
- Smart Objects: Wrapping up Dodge and Burn layers (or other grouped adjustments) into a Smart Object provides the flexibility to revisit and re-edit these adjustments later without losing quality. This is achieved by selecting the relevant layers, right-clicking, and choosing "Convert to Smart Object."
Phase 4: Finishing Touches and Sharpening
The final phase involves adding subtle enhancements and ensuring the image has the desired level of crispness.
- Vignette: A subtle darkening of the image edges can help draw the viewer's eye towards the center of the frame.
- Sharpening: Applying a final sharpening pass to enhance detail and definition. It's crucial to apply sharpening judiciously, as over-sharpening can lead to an unnatural, haloed effect. The amount of sharpening needed often depends on where the image will be displayed â more for prints, less for web use. Tools like "Clarity" or "Structure" can also add punch by emphasizing edges.
Saving Your Masterpiece
The way you save your edited image significantly impacts its quality and usability. For archival purposes and further editing, saving in Photoshop's native PSD format or as a TIFF file is recommended. Both formats preserve the maximum amount of image data, including layers. TIFF files are more universally compatible with other software.
For web use, saving as a JPEG is standard. When saving as a JPEG, utilize the "Save for Web (Legacy)" option (File > Export > Save for Web) to control compression levels and file size. Ensure "Convert to sRGB" is checked for consistent color representation across different devices. Remember that JPEGs are "lossy" formats, meaning some data is discarded during compression.
Beyond the Basics: Continuous Learning
The journey of mastering Photoshop is ongoing. The software continuously evolves with new features and updates, such as those found in the Creative Cloud subscription model, which seamlessly integrates with other Adobe applications like Lightroom. While this guide covers foundational elements, exploring resources like tutorials, courses, and experimentation with different tools and techniques will further enhance your photographic editing skills. The ability to transform an image from a mere capture to a powerful artistic statement lies within your reach, with Photoshop serving as your primary creative ally.
tags: #photography #editing #in #photoshop