The allure of the perfect photograph often pushes creators to the limits of their imagination, and in this pursuit, powerful photo editing software like Photoshop becomes an indispensable tool. However, the question arises: what happens when the quest for perfection becomes a breeding ground for the uncanny, the unsettling, and ultimately, the horrifying? This is the realm of the "Photoshop Horror Movie," where digital manipulation blurs the lines between reality and nightmare, transforming mundane images into visceral experiences of dread.
The Genesis of Digital Dread: Beyond the Perfect Pose
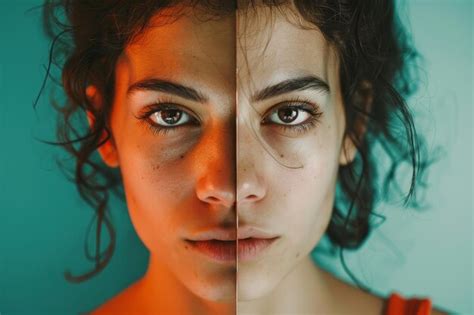
Photographers, in their relentless search for that "perfect pose," can sometimes become overly ambitious. This ambition, amplified by the capabilities of sophisticated photo editors, can indeed "work miracles." Yet, the unsettling truth emerges when there's "nothing to change" in the original subject matter. Can an image, stripped of its natural imperfections and meticulously refined, still evoke a sense of unease? The answer lies in the subversion of expectation, in the subtle or overt manipulation that injects an element of the unnatural into the familiar. This can range from the subtly disturbing to the outright grotesque, exploring the psychological impact of digital alteration on our perception of reality.
The concept of "Photoshop horror" can manifest in various ways. It’s not just about creating jump scares or gore, though those elements are certainly present in some interpretations. More often, it delves into the psychological, exploiting our innate fears and anxieties through carefully crafted visual distortions. This can include the uncanny valley effect, where near-human figures are rendered so that they appear subtly "off," triggering a sense of revulsion. It can also involve the distortion of familiar environments into nightmarish landscapes or the transformation of innocent subjects into monstrous entities. The power of Photoshop lies in its ability to take something recognizable and twist it into something deeply disturbing, playing on our understanding of what is real and what is fabricated.
Crafting Nightmares: Tutorials and Techniques in Photoshop Horror
The creation of "Photoshop horror" often involves detailed tutorials and specific techniques that leverage the software's advanced features. For instance, the creation of an "old school style horror movie poster" can be a prime example. This process often begins with selecting a suitable source photo - perhaps an image of a "scary looking infected zombie fellow" - and then employing a range of tools to enhance its terrifying qualities.
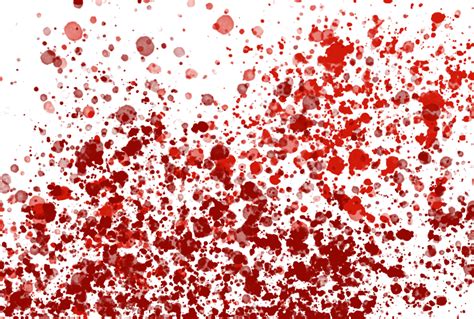
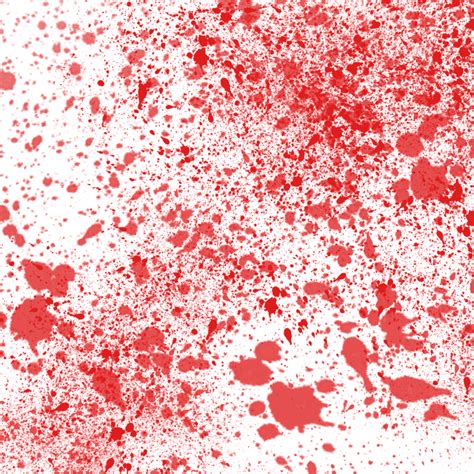
One common approach involves the manipulation of colors and textures. For a zombie poster, one might "fill the poster design document with a black fill then double click the zombie layer and add a red Color Overlay." This simple step immediately imbues the subject with a sense of menace and decay. To amplify the horror, instead of a clean outline, the artist might "add a few gory blood splatters" using "a range of spraypaint brushes to add various splatters on a new layer." This deliberate introduction of visceral imagery, even in a stylized manner, contributes significantly to the horror aesthetic.
The typography itself can also be a source of horror. Rather than relying on pre-made fonts that might appear too polished, a more effective technique for an "old school B movie theme" is to "Create a new document and set up a new brush. Use this new brush to roughly sketch out the title of the movie. Creating the text by hand helps avoid any duplicated letters that can result from using decorative fonts." This handmade approach lends a raw, imperfect quality that can enhance the overall unsettling atmosphere. The title is then "move[d] into a prominent position in the poster document."
Further elements can be added to enhance the grimy, aged feel. "Use the spraypaint brushes once again to paint away the lower portion of the character using black on a new layer." This deliberate obscuring of parts of the image can create suspense and imply something even more horrifying lurking beneath. To achieve the look of an "old poster that has been folded up in a back pocket for decades," a "folded paper texture is perfect." This texture is then "paste[d] on the top of the layer stack, desaturate[d] and invert[ed] then change[d] the blending mode to Screen." Finally, "to give the design a slightly more retro and aged appearance, add a new layer filled with a very dark blue," completing the "gory horror movie poster design."
The Art of Photomanipulation: Building a Horror Scene
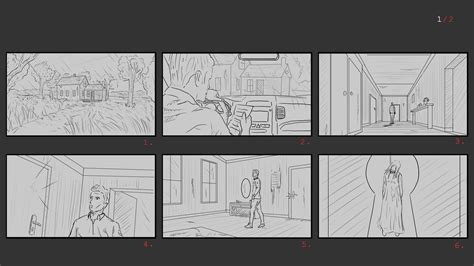
Beyond posters, Photoshop is used to construct entire horror-themed photo compositions. This involves a more complex layering and blending of multiple images to create a cohesive and terrifying narrative. The process often begins with establishing a base environment, such as a room, which requires careful perspective correction. Tools like the "Adaptive Wide Angle" filter can be crucial for "mak[ing] the perspective lines straight and perpendicular to each other," especially when dealing with "fish eyed photos" or correcting distorted perspectives.
The introduction of characters into this environment is a critical step. A subject, like a "girl stock photo," needs to be meticulously cut out from its background. The "Pen Tool (P)" is often the preferred method for this, requiring precision in tracing the subject's edges. For intricate details like hair, the "Refine Edge" window and specific brush techniques become essential. Once isolated, the subject must be seamlessly integrated into the new environment, considering factors like "appropriate light balance, use of midtones, depth of field, blending, and more."
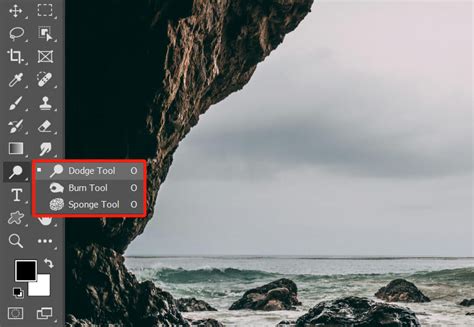
Achieving realism in these composite images relies heavily on lighting and shadow. Techniques like duplicating layers and using the "Burn Tool (O)" to darken specific areas, or employing the "Gradient Tool (G)" with a "Soft Light" blending mode, help establish a believable light source. Creating shadows for the subjects, using the "Brush Tool (B)" on separate layers, is crucial for grounding them within the scene. The "girl shadow" layer, for example, would be painted with a larger brush further from the origin, with decreasing opacity and flow to mimic natural shadow fall-off.
Depth of field is another key element that enhances the three-dimensional feel of a horror composition. Tools like "Lens Blur" can simulate the effect of a camera lens, allowing artists to selectively blur parts of the image to draw focus to the main subject. Layer masks are indispensable here, enabling artists to precisely control which areas are blurred and which remain sharp. Further depth can be added by strategically layering blurred versions of the background, creating a sense of receding space.
Atmospheric elements are often introduced to enhance the mood. "Fog" can be painted using custom brushes on new layers, with varying opacity and flow to create a sense of mystery and foreboding. The placement of fog is critical; it should add to the atmosphere without obscuring the focal point. The "dark blue" fill with a "Soft Light" blending mode can cool down the scene, while a layer set to "Difference" with a low opacity can subtly tint the darkest and brightest tones, mimicking the color grading often seen in film.
The Visceral Touch: Blood and Gore in Digital Art
No discussion of horror is complete without addressing the element of blood and gore. In Photoshop horror, this is not merely about gratuitous violence but about using these visceral elements to enhance the narrative and psychological impact. Blood can be added subtly or overtly, depending on the desired effect.
When adding blood, the placement and integration are crucial. A "New Layer" named "blood girl" can be created above fog layers to ensure visibility. The "Blending Mode" is often set to "Multiply" to allow the blood to blend realistically with the underlying lighting and color tones. The artist has creative freedom in deciding where to place the blood - "over her thighs," on small items like a "drum stick on the floor," or even creating a "slight trail" from a "baby carriage" to suggest movement and past events. These details add realism and credibility to the horrifying scene.
The key is to avoid overdoing it, which can detract from the horror and make the image appear cartoonish. Instead, strategic touches of blood can heighten the sense of danger and violence without overwhelming the viewer. The goal is to evoke a reaction, to make the viewer feel the impact of the depicted events, even if they are entirely digitally constructed.
Building the Scene: Objects and Composition in Horror
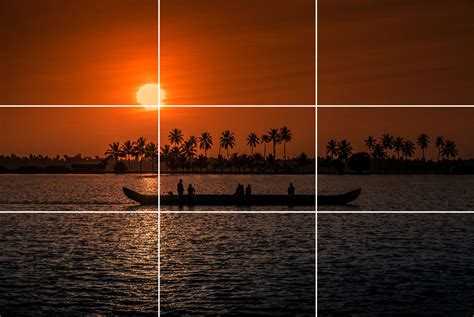
The composition of a horror scene in Photoshop often involves strategically placing objects to enhance the narrative and create a sense of unease. The "rule of thirds" can be a guiding principle, dividing the canvas into nine equal sections to help artists place key elements for maximum visual impact.
Introducing elements like an "armchair" or a "baby carriage" can serve to populate the scene and add layers of meaning. These objects, like the subjects, require careful selection, cutting out, and perspective correction. The "Distort" tool and manual adjustments are often needed to make these objects fit seamlessly into the scene. Lighting and shadows are again paramount; an "armchair shadow" painted with a soft brush helps anchor the object to the ground.
The "baby carriage" itself presents unique challenges and opportunities. Its selection might be easier with tools like the "Magic Wand (W)," but refining the edges and ensuring accurate detail is still important. Adjusting its lighting and adding shadows, particularly those cast by its wheels, contributes to its believability. Painting blood "over the trolley" and creating a trail can suggest a narrative of escape or pursuit.
The inclusion of a doll within the baby carriage can add another layer of creepiness. If the doll "isn't doing any good" for the horror aesthetic, its removal using tools like the "Patch Tool (J)" with "Content-Aware" mode becomes another step in refining the scene.
The Unsettling Atmosphere: Color, Tone, and Post-Work
The final touches in creating a Photoshop horror piece often involve atmospheric post-work, focusing on color grading, tone adjustment, and the subtle infusion of unsettling elements. These techniques are crucial for transforming a technically sound composite into an emotionally resonant horror experience.
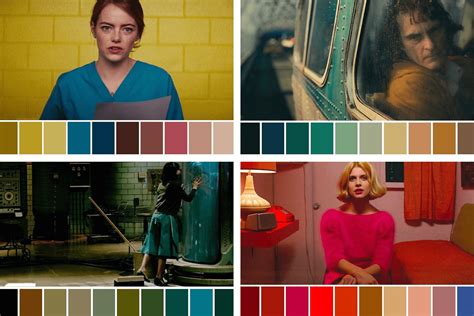
Color plays a profound role in setting the mood. As mentioned, a "dark blue" fill with a "Soft Light" blending mode can imbue the scene with a cold, eerie quality. The "Difference" blending mode, used subtly, can alter the darkest and brightest tones, preventing pure blacks and adding a nuanced, almost sickly hue to the image. This is a technique often employed in film to create a distinctive visual style that can enhance the feeling of dread.
Adjustment layers are invaluable for fine-tuning the overall color and tone. "Curves" can be used to make "hard adjustments" that, when applied with a lower opacity, provide a controlled yet impactful alteration of the image's luminosity. A "Gradient Map" adjustment layer, particularly with a "Black, White" preset and reversed, can "raise a bit the overall contrast while preserving most of the scene in midtones." This technique helps to maintain detail while adding a dramatic, often somber, feel to the image.
The use of custom brushes, particularly those designed for creating atmospheric effects like "clouds or fog," is essential for adding that final layer of mystery and depth. These brushes can be used to paint wisps of fog that seem to emanate from objects, or to create subtle atmospheric hazes that obscure details and heighten suspense. The key is to apply these effects with restraint, ensuring they enhance the mood rather than dominate the scene.
Even seemingly minor details, like adjusting the "girl's lighting" by decreasing highlights, can contribute to the overall horror. This subtle manipulation can make the subject appear more vulnerable, more exposed to the unseen threats within the scene. Ultimately, the creation of a compelling Photoshop horror piece is a meticulous process of layering, blending, and refining, where every pixel contributes to the intended feeling of dread and unease. It’s a testament to the power of digital tools to not only replicate reality but to distort it into something profoundly, and terrifyingly, new.