Drawing perfectly straight lines in digital art software can sometimes feel like a battle against wobbly imperfections. Whether you're a seasoned graphic designer or a beginner exploring Photoshop's capabilities, the desire for crisp, clean lines is universal. Thankfully, Adobe Photoshop offers a variety of intuitive tools and clever shortcuts to ensure your lines are always pin-straight, regardless of the angle or purpose. This guide will delve into the primary methods for achieving this, from simple keyboard shortcuts to more advanced tool manipulations, ensuring you can confidently create precise lines for any project.
The Brush Tool and the Power of the Shift Key
One of the most accessible and frequently used methods for drawing straight lines in Photoshop involves the versatile Brush Tool combined with a simple keyboard modifier: the Shift key. This technique is particularly useful for quick, freehand-style straight lines that integrate seamlessly with other brushwork.
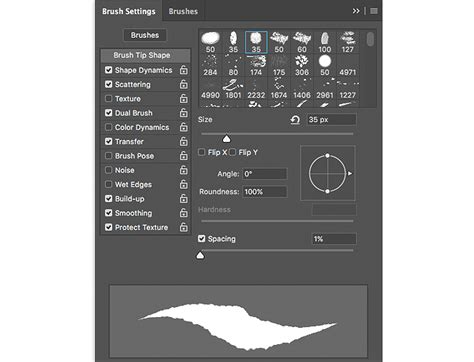
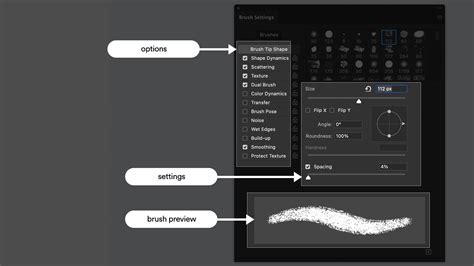
To begin, open your desired document in Photoshop, which can be a blank canvas or an existing image you wish to modify. Next, select the Brush Tool from the toolbar. The toolbar in Adobe Photoshop contains several tools for drawing straight lines, and the Brush Tool is a prime example of its versatility. You can change your brush, brush size, opacity, and other essential settings using the options bar at the top of the screen. The color of your line can be adjusted using the color picker, typically located on the right side of the interface.
Once your brush is configured to your liking - perhaps you've chosen a specific brush tip, adjusted its size for the desired thickness, and set the opacity to 100% for a solid line - you're ready to draw. Click once on your canvas at the exact point where you want your straight line to begin. This establishes your starting anchor point.
The crucial step for drawing a straight line is to then hold down the Shift key on your keyboard. With the Shift key depressed, click at the point where you want the line to end. Photoshop will automatically draw a perfectly straight line connecting the initial click point to this second click point.
This method is incredibly effective for creating any kind of straight line, be it horizontal, vertical, or diagonal. For horizontal or vertical lines, you can simply hold Shift and drag in the desired direction after your initial click. To create angled lines, you'll click the starting point, hold Shift, and then click the endpoint. This technique works for any angle, not just horizontal or vertical lines.
Furthermore, the Shift key's functionality extends to drawing a series of connected straight lines. You can continue to hold the Shift key and click elsewhere on your document to draw more straight lines connected to your first one. This is a great way to draw shapes freehand, creating geometric forms or custom paths with ease. Remember, you can adjust the brush settings between strokes to vary line thickness or color within the same design, adding dynamic elements to your straight line creations.
Free Transform and the Shift Key in Photoshop
Precision with the Line Tool
For situations where you require a dedicated tool designed specifically for creating straight lines, Photoshop's Line Tool is an excellent choice. This tool offers a quick and precise method for creating straight lines and provides options for further customization.
To access the Line Tool, locate it in Photoshop's toolbar. It's typically grouped with other shape tools like the Rectangle Tool. You may need to click and hold on their respective icons or use keyboard shortcuts. The Line Tool can be activated by pressing "U" (which often cycles through shape tools).
When using the Line Tool, you have two primary modes to consider: Shape mode and Pixel mode. For editable lines, Shape mode is highly recommended. This allows you to modify the line's properties later if needed, making it ideal for dynamic designs or projects that might undergo revisions.
To draw a straight line using the Line Tool in Shape mode, simply click on the canvas where you want the line to start. Then, drag your cursor to where you want the line to end and release the mouse button. Photoshop will render a vector-based line.
After creating your line, you can fine-tune its appearance using various options. In the Properties panel (accessible via the Window menu), you'll find settings for stroke width, color, and style. You can change the stroke color by clicking the color swatch next to "Color." For more advanced control, you can access additional stroke options by double-clicking the line layer in the Layers panel or by looking at the options bar at the top of the screen when the Line Tool is active. You can also add arrowheads to your lines, which is perfect for creating diagrams, flowcharts, or technical illustrations.
The options bar at the top of the screen provides further customization. Here, you can set the dash length and gap size to create dashed or dotted lines. To achieve this, you can also design a brush tip shape that matches your desired dash or dot pattern and apply it.
Advanced Control with the Pen Tool
When absolute precision and complex path creation are paramount, the Pen Tool becomes indispensable. While it has a steeper learning curve than the Brush Tool or Line Tool, it offers unparalleled control for creating straight lines, curves, and intricate shapes.
To draw straight lines with the Pen Tool, start by selecting it from the toolbar. Click once on the canvas to create an Anchor Point. Then, click again where you want the line to end. Photoshop will draw a perfectly straight segment between these two anchor points.
You can create multiple connected straight lines by continuing to click new Anchor Points. To finish an open path, press Enter or Return. For closed shapes, you can click back on the initial anchor point to complete the path.
The Pen Tool's true power lies in its ability to create curves by clicking and dragging to form smooth curves between anchor points. However, for straight lines, you simply click without dragging.
Once you've created a path with the Pen Tool, you have several options. You can convert paths to selections, which can then be filled or stroked. Alternatively, you can directly stroke the path with color using a selected brush. For more complex shapes, you can combine the Pen Tool with the Shape Tool for sophisticated designs.
A key advantage of using the Pen Tool in conjunction with Shape mode is that it creates vector shapes. Vector shapes allow for easy editing of line properties, such as stroke weight, color, and style, without any loss of quality. This means you can scale and resize your lines and shapes infinitely.
Smoothing Brushstrokes for Stability
While the aforementioned methods focus on creating perfectly straight lines, there are times when you might want to draw freehand lines that are more stable and less prone to natural hand tremors, without necessarily aiming for absolute straightness. For this purpose, Photoshop offers a smoothing feature for the Brush Tool.
To utilize this, select the Brush Tool as described earlier. In the options bar at the top of the screen, you will find a "Smoothing" option. Adjust the percentage of smoothing to smooth out any brushstrokes you make. A higher percentage will result in smoother, more controlled lines, effectively reducing shake and helping lines appear more stable. This is particularly helpful for illustrators and artists who want a more refined, polished look to their hand-drawn elements.
Managing and Editing Your Lines
Once you've drawn a straight line in Photoshop, whether with the Brush Tool, Line Tool, or Pen Tool, you can customize and edit its appearance in various ways.
Deleting Lines: If you draw a straight line and change your mind, you can easily delete it. For undoing the last action, click Ctrl+Z (on Windows) or Cmd+Z (on Mac) once to remove the line. If you used the Brush Tool method, a second press of Ctrl+Z/Cmd+Z will delete the initial dot. Alternatively, you can use the Marquee Tool to select your line and then press Ctrl+T/Cmd+T to enter Free Transform mode. This allows you to move the line, adjust its size, length, width, or positioning.
Customizing Appearance: Select the line layer in the Layers panel. If you used the Line Tool in Shape mode, you can easily change the stroke color by clicking the color swatch next to "Color" in the Options bar or Properties panel. For lines drawn with the Brush Tool, you would typically change the foreground color before drawing or use techniques like layer styles to modify their appearance after creation.
Organizing Your Work: For complex projects involving multiple lines and shapes, it's crucial to maintain an organized workflow. Remember to work on separate layers for each component or group related elements together. For editable files, use Photoshop's native .psd format. This preserves all layers and editing capabilities. To maintain transparency, consider saving as a .png file. When collaborating with others or preparing files for print, .pdf files are often a good choice. Remember to use descriptive filenames and organize your saved files in clearly labeled folders.
Saving for Different Outputs: Photoshop offers features to optimize your files for various uses. Use the "Save for Web" (Legacy) feature to compress images effectively for online use. Adjust compression levels to find the sweet spot between file size and visual quality. For print, maintain a higher resolution, typically 300 PPI (pixels per inch). It is generally recommended to create separate versions optimized for each medium rather than using a single file for all purposes.
By understanding and utilizing these various tools and techniques, you can confidently draw any straight line imaginable in Adobe Photoshop, from the simplest horizontal stroke to the most intricate geometric construction. The combination of the intuitive Shift key shortcut with the Brush Tool, the dedicated Line Tool, and the precise Pen Tool ensures that Photoshop remains a powerful and flexible environment for all your digital drawing needs.