Photoshop, a cornerstone of digital image manipulation, offers a sophisticated layer system that empowers users to build complex and editable compositions. At its core, the layer system functions like a stack of transparent sheets, each containing a distinct element of the image. This allows for non-destructive editing, where changes to one element do not irrevocably affect others. However, a common point of confusion and frustration for both new and experienced users alike arises when a layer becomes locked. This article delves into the intricacies of locked layers in Photoshop, explaining why they occur, how to unlock them, and the implications for sharing and distributing Photoshop files.
The Purpose and Mechanics of Layer Locking
In Photoshop, layers are akin to separate transparent sheets that allow you to add to and edit photos and artwork on different levels. Locking a layer serves as a protective measure, safeguarding specific aspects of that layer from unintended modifications. When a layer is locked, you cannot edit it, delete it, or paint on it. This feature is invaluable for preserving the integrity of certain elements within an image, especially when collaborating with others or when working on intricate designs where accidental alterations could be detrimental.

The primary indicator of a locked layer is a padlock symbol displayed next to the layer's name in the Layers panel. If your layer is locked or partially locked, the most straightforward method to unlock it is to click the small lock icon to the right of the layer name. To perform this action, it is essential to first ensure that your Layers panel is visible. If it is not, you can access it by navigating to Window > Layers from the top menu bar.
Types of Layer Locks and Their Implications
Photoshop offers granular control over layer locking, allowing users to protect not just the entire layer but also specific properties. Understanding these different lock types is crucial for effective layer management:
Full Layer Lock: This is indicated by a solid padlock icon. When a layer is fully locked, all editing, moving, and deleting are prohibited. Clicking this padlock icon will unlock all the layer’s properties.
Partial Locking: You can partially lock a layer in order to protect certain properties, such as its colored pixels, transparent pixels, or position on the canvas.
- Lock Transparent Pixels: This lock is represented by a tiny checkerboard icon. When activated, it ensures that transparent areas of the layer remain transparent. Any paint strokes or other shapes you add to the layer will only affect the opaque areas. This is useful for preventing accidental filling of transparent spaces.
- Lock Image Pixels: This lock is depicted by a paintbrush icon. This lock is the opposite of the Lock Transparent Pixels lock. It prevents any modifications to the existing pixels on the layer, including painting, filling, or transformations that would alter pixel data.
- Lock Position: When this lock is activated, it prevents any movement of the objects on a layer. This is helpful when you have an element perfectly positioned and want to avoid accidentally nudging it while working on other parts of the image.
To unlock a partially locked layer, you would follow the same procedure as unlocking a fully locked layer: click the padlock icon next to the layer name. The specific icon for the partial lock will be visible if only certain properties are locked.
The Enigmatic "Background Layer"
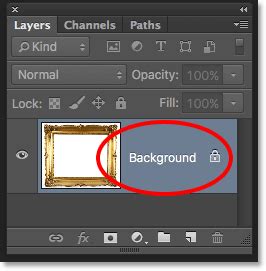
A common scenario where layers are locked by default is with the "Background" layer. When you create artwork in Photoshop with an opaque background-a solid color, texture, or image-the bottom layer automatically becomes the background layer. This layer is partially locked, preventing you from altering its opacity or its position in your stacking order. It's essentially treated as the base of your composition.
If you find yourself needing to edit the default Background layer, you can easily convert it into a regular, unlocked layer. Select the Background layer in the Layers panel. Then, navigate to Layer > Layer from Background. This action will replace the locked Background layer with a new, unlocked layer that you can freely edit, move, or adjust.
Alternatively, a quick way to unlock the default Background layer is to select it and then press Ctrl + J (Windows) or Cmd + J (macOS). This shortcut creates a duplicate of the Background layer above the original, and this new layer will be unlocked and fully editable. You can then delete the original locked Background layer if desired.
Troubleshooting and Unlocking Issues
In some instances, users might encounter a layer that appears locked, but the standard padlock icon is not present. This can sometimes occur with files imported from other applications or saved in specific formats.
One user reported an issue where an image from a client was a single, locked layer, and they were unable to unlock it or add a new layer above it. While the immediate solution might be to re-save the image in a Photoshop-compatible format to enable layer functionality, understanding the root cause is also important.
Some file formats, specifically "Indexed Color" images, aren’t fully compatible with Photoshop's advanced layer features. When Photoshop opens such an image, it might flatten it into a single, locked layer to maintain compatibility. To resolve this, you would typically go to Image > Mode and change the color mode to RGB Color. This conversion process often unlocks the layer or makes it convertible into a standard layer.
For a locked layer, even if the padlock isn't immediately obvious, looking within the Layers panel is key. Go to your Layers panel and select the layer you’d like to unlock. If it’s locked, you’ll see a padlock symbol next to the name of the layer. Click the padlock icon next to the layer to unlock all the layer’s properties. If you are in a situation where you see a layer that appears locked but doesn't present the usual unlock icon, it's worth checking the layer's properties and the file's color mode.
Unlock the Background Layer in Photoshop
Sharing and Distributing Locked Layers
A common use case for locking layers is when building a package of images to sell. Some creators might lock layers to protect particular aspects of their images from being altered by new users of Photoshop, ensuring that the original artistic intent or proprietary elements remain untouched.
However, a crucial consideration arises when selling such assets: if you lock all layers, will buyers be able to unlock them? The answer is generally yes, provided the file format supports layers and the buyer has a compatible version of Photoshop or similar software. As demonstrated, unlocking layers is a straightforward process.
The question then becomes whether you must leave all layers unlocked. This is a strategic decision based on your goals. If your primary aim is to protect specific elements from accidental modification by the end-user, locking them is a valid approach. However, it’s important to balance this with the usability for your customers. If a buyer intends to make minor adjustments or integrate your assets into their own work, they will need to be able to unlock and manipulate those layers.
For instance, if you've meticulously crafted a complex design with multiple protected elements, you might choose to lock them to prevent accidental deletion or major alterations. Yet, for elements that are intended to be customizable, such as text placeholders or color-adjustable components, leaving them unlocked or providing clear instructions on how to unlock them would be beneficial.
A common practice is to lock layers that contain your core artwork or proprietary elements, while leaving other layers unlocked for user customization. When selling assets, it's also good practice to include a readme file that explains the layer structure, which layers are locked and why, and how to unlock them if the user wishes to do so. This transparency can greatly enhance the customer experience.
Ultimately, the decision to lock layers when distributing images for sale depends on the intended use and the level of protection you wish to afford your work. While Photoshop provides the tools to lock layers for preservation, it also offers simple mechanisms for unlocking them, empowering both the creator and the consumer.
Advanced Layer Management Techniques
Beyond simply locking and unlocking, Photoshop offers further control over layers that can enhance workflow and protect creative assets:
Layer Comps: For complex projects with numerous variations, Layer Comps can be a lifesaver. They allow you to save different states of your layer visibility, position, and appearance. This is useful for showcasing different design options without having to manually toggle layers on and off each time. While not a locking mechanism, it can help manage complex layer visibility for presentation purposes.
Smart Objects: Converting a layer or a group of layers into a Smart Object offers a powerful way to preserve the original data of an embedded or placed image. When you transform a Smart Object (scale, rotate, distort), the original pixel data is not degraded, allowing for non-destructive editing. While not a direct lock, it protects the integrity of the embedded content from destructive transformations. You can still edit the contents of a Smart Object by double-clicking its thumbnail, which opens it in a separate tab, much like editing a regular layer.
Layer Styles: Effects applied via Layer Styles (drop shadows, glows, bevels) are inherently non-destructive. However, if you want to "bake" these styles into the pixels of a layer, you can right-click the layer and choose "Rasterize Layer Style." Be aware that this is a destructive process and cannot be undone by simply unlocking the layer; it permanently alters the pixels.
File Format Considerations: As mentioned, the file format plays a significant role. PSD (Photoshop Document) is the native format and preserves all layer information, including lock states. When saving to formats like JPEG or PNG, all layers are flattened into a single image, and any lock states are irrelevant as the layer structure is lost. If you intend for your recipients to work with layers, always save and distribute your files in PSD format.
Understanding the nuances of layer locking in Photoshop is essential for efficient workflow, asset protection, and effective collaboration. By mastering these tools, users can ensure their work remains intact while also providing flexibility for others.