The allure of a sunset is undeniable, a fleeting spectacle of light and color that transforms the sky into a breathtaking canvas. For photographers, capturing this ephemeral beauty is a rewarding challenge. However, the raw files often fall short of replicating the magic witnessed with the naked eye, appearing flat and lacking the vibrancy that made the moment so special. Fortunately, Adobe Lightroom offers a powerful suite of tools to resurrect that lost magic, bringing your sunset photographs to life and making them truly "pop" off the screen. This guide delves into the intricacies of editing sunset images in Lightroom, focusing on techniques that accentuate "tension" in both light and color, creating more dramatic and compelling visuals.

Understanding Light and Color Tension in Sunset Photography
The core philosophy behind editing stunning sunset images in Lightroom revolves around the concept of "tension." This refers to the deliberate accentuation of both light and color to create a more impactful and visually engaging photograph.
Light Tension: The Power of Contrast
Light tension is achieved by ensuring sufficient contrast within your image. This doesn't mean simply blowing out highlights or crushing shadows, but rather a nuanced control over these elements to create a dynamic range that makes the image "pop." While the Basic panel in Lightroom provides fundamental tools for this, the strategic use of masks can further refine and enhance light tension by allowing for localized adjustments to specific areas of the image. This careful balancing of highlights and shadows is crucial for an image that looks good and conveys the dramatic feel of a sunset.
Color Tension: The Dance of Warm and Cool Hues
Color tension, on the other hand, focuses on the interplay between warm and cool colors. Positioned opposite each other on the color wheel, these hues are inherently complementary, meaning they enhance each other when placed in proximity. By subtly pushing both warm and cool tones in your sunset edit, you can create a more compelling and vibrant image. This is achieved through a combination of masking, which allows for precise color application, and dedicated color grading tools such as the Color Grading panel, the Color Mixer, and the Calibration panel.
Importing and Initial Adjustments in Lightroom
The journey to a stunning sunset edit begins with importing your photographs into Lightroom.
Importing Your Sunset Photos
To import your photos, navigate to the Library module and click the "Import" button located in the lower left-hand corner of the screen. In the Source panel, under "Files," select the folder containing your desired images and then click "Import."
Leveraging Color Profiles
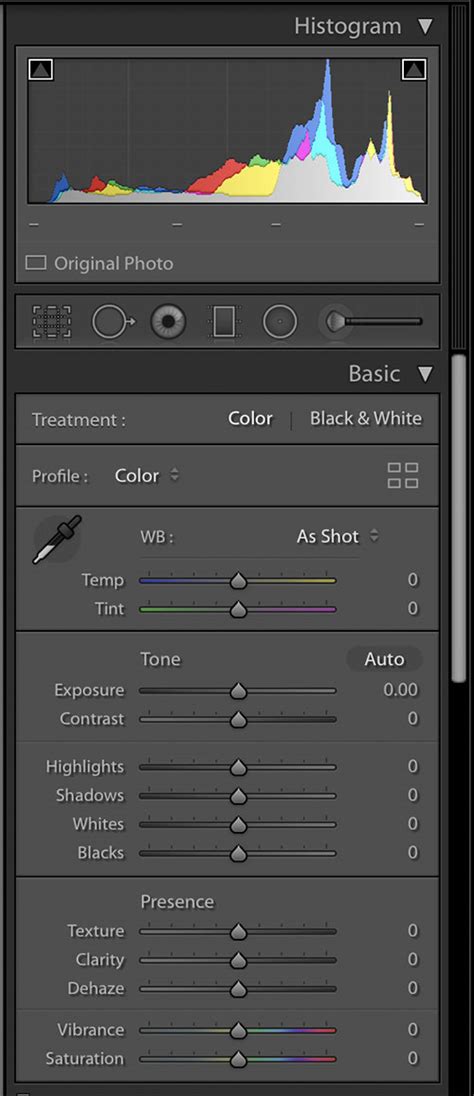
Lightroom offers a variety of built-in color profiles that can serve as an excellent starting point for enhancing your sunset images. Once your photos are imported, switch to the Develop module and select the Basic panel. At the top of this panel, you'll find a "Profile" dropdown menu. Experimenting with the profiles under the "Modern" sub-category can yield particularly pleasing results for sunset photography, offering a range of options to subtly alter the overall color cast of your image.
Fine-Tuning Exposure and Tonal Range
Correcting exposure and refining the tonal range are critical steps in bringing out the best in your sunset shots.
The Art of Exposure Correction
If your image appears underexposed with muted tones, or conversely, flat and overexposed, adjusting the exposure is paramount. While Lightroom's "Auto" button in the Basic panel can offer a quick fix, it may not always yield the desired artistic outcome for sunset photos. The preferred method is manual adjustment. Locate the "Exposure" slider under the "Tone" section in the Basic panel. Moving the slider to the right will increase the image's exposure, while moving it to the left will decrease it. This allows for precise control over the overall brightness of your image.
Mastering Highlights, Shadows, and Vibrance
Once the overall exposure is satisfactory, it's time to refine specific tonal areas. The "Highlight" slider is instrumental in recovering detail in the brightest parts of your image, such as the sun or bright clouds. Conversely, the "Shadow" slider helps to darken, lighten, or bring back detail in the darker regions of the photograph, preventing them from becoming completely black voids. To add a vibrant "pop" to your sunset colors, the "Vibrance" slider can be used to increase or decrease the saturation of specific colors, particularly those found in skin tones or the warm hues of a sunset.
Advanced Editing Techniques for Sunset Enhancement
Beyond the basic adjustments, more advanced tools in Lightroom can elevate your sunset edits to a professional level.
The Graduated Filter: Targeted Adjustments
The Graduated Filter, also known as the Gradient Filter tool, is an invaluable asset for sunset editing. This tool allows you to apply edits over a specific area of your image with a smooth, even gradient, without affecting other parts of the photograph. Access this tool in the Develop module by clicking the Graduated Filter icon located beneath the Histogram. The keyboard shortcut "M" can also be used. Once the adjustment panel is displayed, you can define the area of effect by clicking on the image and dragging the bottom line. It's important to note that this tool is exclusively available in the desktop version of Lightroom.
My Lightroom Graduated Filter Trick
Split Toning for Creative Color Casts
Split Toning is a powerful technique for imparting specific color casts to the highlights and shadows of your image, a crucial element in recreating the magical hues of a sunset. For instance, a common approach to simulating a golden sunset involves applying a warm, yellowish tint to the highlights and a cooler, bluish tint to the shadows. This method, particularly effective when combined with White Balance adjustments, can significantly enhance the natural look and feel of your sunset photograph.
White Balance: Achieving the Perfect Hue
The White Balance settings play a pivotal role in capturing the true essence of a sunset. Auto White Balance (AWB) in cameras can often misinterpret the warm, golden hues, reducing the yellow tint and failing to do justice to the scene. In Lightroom, you can manually adjust the "Temperature" and "Tint" sliders to achieve the desired color balance. For a classic sunset look, increasing the temperature towards yellow and adjusting the tint towards magenta can create a more natural and appealing result.
Color Grading and HSL Adjustments
The Color Grading and Hue, Saturation, Luminance (HSL) panels offer granular control over the colors within your image. The Color Grading panel allows you to assign specific colors to the highlights, midtones, and shadows, further refining the color tension. The HSL panel, particularly when using the Targeted Adjustment Tool, enables precise manipulation of the hue, saturation, and luminance of individual color ranges. This is incredibly useful for boosting the saturation of oranges and reds while subtly shifting blues towards purple, for example. Subtle changes here are key, so frequently toggle the effect on and off to observe the impact of your adjustments.
Beyond Lightroom: Capturing Better Sunset Photos
While Lightroom is a powerful editing tool, the quality of your final image is also heavily influenced by how you capture the scene.
Essential In-Camera Techniques
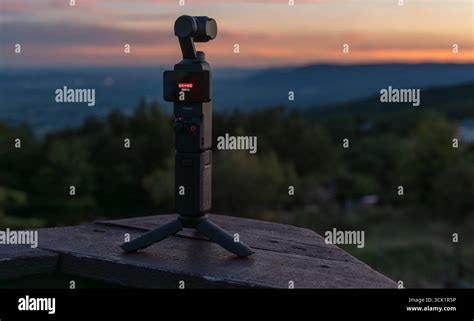
- Use a Tripod: The light during a sunset fades rapidly, leaving a narrow window for capturing photographs. A tripod ensures sharp images even with slower shutter speeds.
- Employ a Graduated Neutral Density (GND) Filter: When shooting sunsets, the sky is often much brighter than the foreground. A GND filter helps to balance the exposure between these two areas, preventing the sky from being overexposed.
- Manual Mode is Your Friend: As the light changes minute by minute during dusk, relying on automatic camera settings can lead to inconsistent results. Manual mode gives you full control over aperture, shutter speed, and ISO.
- Master Composition: To make your sunset photos stand out from the crowd, pay close attention to composition. Consider leading lines, rule of thirds, and framing to create a more dynamic and engaging image.
- Experiment with Silhouettes: Silhouettes are a dramatic way to utilize the backlight of a sunset. By placing your subject in front of the bright sky and underexposing the image, you can create striking silhouette shots.
Creating and Using Lightroom Presets for Sunsets
One of the significant advantages of using Adobe Lightroom is the ability to save your editing settings as a preset. This allows you to apply a consistent look to multiple images or quickly experiment with different styles.
Saving Your Custom Sunset Preset
After applying your desired edits to a sunset photograph, navigate to the Presets panel. Click on the three-dot icon at the top right of the panel and select "Create Preset." In the "Create Preset" window, assign a specific name to your preset and choose a group to organize it. You can then select which categories of settings you wish to include in the preset before saving.
Utilizing and Adapting Presets
Many photographers offer free or paid sunset presets. While these can be a great starting point, remember that every photograph is unique, and editing is an artistic process. Your device, the lighting conditions, and the specific scene will all influence the outcome. Therefore, it's essential to adapt and fine-tune the settings of any preset to best suit your individual photographs. If you download a preset, consider it a foundation upon which you can build, adjusting sliders for exposure, color, and contrast to achieve your desired look.

Conclusion: Unleash Your Creative Vision
Editing sunset photos in Lightroom is a rewarding process that allows you to transform ordinary shots into extraordinary works of art. By understanding and applying the principles of light and color tension, utilizing Lightroom's powerful tools, and mastering in-camera techniques, you can consistently capture and create breathtaking sunset images that truly reflect the magic of the moment. Don't be afraid to experiment, develop your own unique style, and most importantly, enjoy the creative journey.