Navigating and manipulating images within Adobe Photoshop is a fundamental skill for any digital artist or editor. The ability to zoom in for intricate detail or zoom out to grasp the overall composition directly impacts workflow efficiency and the final quality of the artwork. This guide delves deep into the various methods of zooming and panning within Photoshop, exploring its legacy features, customizable shortcuts, and advanced techniques to ensure a seamless and productive editing experience.
Understanding Photoshop's Zoom Functionality
At its core, Photoshop provides numerous ways to alter the magnification of your document. The most basic interaction involves the dedicated Zoom Tool, identifiable by its magnifying glass icon in the Tools panel. Selecting this tool allows for direct manipulation of the view. When the Zoom Tool is active, clicking on an image will zoom in, and repeated clicks will progressively increase magnification. To reverse this, holding down the "Alt" key (or "Option" key on a Mac) while clicking will zoom out.

Beyond simple clicks, the Zoom Tool offers more dynamic interactions. You can click and drag over a specific area of your image to zoom directly into that selected region. This is particularly useful for quickly focusing on a particular detail without needing multiple clicks. Furthermore, the "Continuous Zoom" feature, when enabled, allows you to click and hold the mouse button on an area and then drag to zoom in or out continuously. This provides a fluid zooming experience.
A highly efficient and often preferred method is "Scrubby Zoom." When active, this feature allows you to simply click on an image and drag left or right to zoom out or in, respectively. It's crucial to initiate the drag action immediately after clicking to ensure Scrubby Zoom is engaged, as a delay might trigger Continuous Zoom.
The status bar at the bottom of the Photoshop window also provides vital information about your current zoom level. It displays the magnification percentage, allowing you to precisely control your view. You can directly input a specific zoom percentage here or utilize predefined buttons.
Key Zoom Levels for Accuracy
Photoshop offers specific zoom percentages that are crucial for accurate pixel-level viewing and editing. These include:
- 100% Zoom: This is the "Actual Pixels" view, where each image pixel corresponds to a single pixel on your screen. Viewing at 100% is essential for critically assessing detail, sharpness, and making precise adjustments. When an image is not viewed at 100%, you are not seeing all of its pixels, which can lead to misinterpretations of sharpness and detail. For instance, an image zoomed to an odd value like 51.25% might appear softer than when zoomed to the preset 50%.
- Fit Screen: This command resizes the entire Photoshop document to fit within the available screen area. It's useful for getting an overview of the entire image composition.
- Print Size: This attempts to display the image at a size that would correspond to its physical dimensions when printed, based on its resolution.

Keyboard Shortcuts and Modifier Keys for Efficient Zooming
While the Zoom Tool is versatile, keyboard shortcuts and modifier keys significantly accelerate the zooming process, especially for those accustomed to similar functionalities in other software.
The default behavior in Photoshop for zooming with the mouse wheel can differ from other applications. Often, users are accustomed to "Ctrl + Mouse Scroll" for zooming. However, Photoshop's default can be "Alt + Mouse Scroll" for zooming. This discrepancy can disrupt established workflows.
Fortunately, Photoshop offers extensive customization for these shortcuts. You can reconfigure modifier keys to align with your preferences.
Essential Zoom Keyboard Shortcuts:
- Zoom In:
Ctrl + +(Windows) orCommand + +(Mac). Repeatedly pressing this shortcut will cycle through preset zoom levels, including 50%, 66.7%, and 100%, which are designed to provide the most accurate views. - Zoom Out:
Ctrl + -(Windows) orCommand + -(Mac). Similar to zooming in, this cycles through preset zoom levels in reverse. - Actual Pixels (100%):
Ctrl + 1(Windows) orCommand + 1(Mac). A quick way to jump to the most accurate view. - Fit Screen:
Ctrl + 0(Windows) orCommand + 0(Mac). Returns the entire image to fit within the screen.
Accessing Zoom Temporarily:
Even when using other tools, you can temporarily access the Zoom Tool:
- Zoom In (Temporary): Hold
Ctrl + Spacebar(Windows) orCommand + Spacebar(Mac) and click. - Zoom Out (Temporary): Hold
Ctrl + Alt + Spacebar(Windows) orCommand + Option + Spacebar(Mac) and click.
Holding these keys down grants access to the Zoom Tool's current setting (either Zoom In or Zoom Out) for as long as the keys are pressed.
Panning and Navigation: Moving Around Your Image
Once you're zoomed in, the ability to pan or scroll across your image becomes essential for inspecting details and making edits. Photoshop provides several intuitive methods for this.
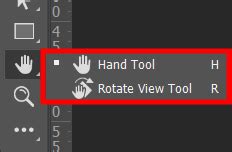
The Hand Tool, located in the toolbar (often near the Zoom Tool), is dedicated to panning. With the Hand Tool selected, you can click and drag your image to move it around the canvas. This is particularly useful when you're zoomed in and can't see the entire image at once.
Flick Panning and Mouse Wheel Navigation:
A dynamic feature known as "Flick Panning" allows for rapid image movement. When enabled in Photoshop's preferences, you can click and drag the image with the Hand Tool and then release the mouse button. The image will continue to move in that direction until it gradually comes to a stop, or you can stop it by clicking again. This provides a fluid, almost physics-based navigation experience.
The scroll wheel on your mouse is another powerful navigation tool. When you hover your cursor over the image, the scroll wheel can be used to pan the image up, down, left, or right. This works regardless of the currently active tool, making it a highly efficient method.
Bird's Eye View: A Unique Navigation Method
Photoshop also offers a unique "Bird's Eye View" for navigation. By pressing and holding the "H" key (the shortcut for the Hand Tool), then clicking and holding on your image, Photoshop will temporarily zoom the image out to fit the screen. A rectangle will appear, representing the area you will zoom into next. Dragging this rectangle allows you to quickly select a new area to focus on. Releasing the "H" key returns you to your previous zoom level and tool.
Scroll Bars for Precise Movement:
Traditional scroll bars, located along the right and bottom edges of the document window, also offer precise control for panning, allowing you to move the image in specific increments.
Customizing Your Workspace for Enhanced Workflow
Beyond zoom and navigation, certain workspace settings can significantly impact your editing experience. Some users find features like "Smart Guides" and the "Welcome Screen" to be distracting or to negatively affect performance.
Disabling Distracting Elements:
- Smart Guides: These visual aids, which display lines to help align layers and objects, can sometimes be intrusive. They can be disabled from the same menu where other workspace options are located.
- Welcome Screen: The initial screen that displays recently opened documents can sometimes slow down Photoshop's startup time. This can be disabled through the Preferences window.
Adjusting Document Display:
- Open Documents as Tabs: By default, Photoshop may open documents as tabs. If this causes distractions or is not preferred, it can be turned off in the Preferences window under the "Workspace" section by un-checking the "Open documents as tabs" option.
- Grid Display: When cropping photos, a grid or net can be displayed for composition assistance. The appearance and visibility of this grid can be controlled through options adjacent to the crop tool settings.
Reconfiguring Mouse Wheel Behavior:
For users who prefer the "Ctrl + Mouse Scroll" behavior for zooming, this can often be enabled within Photoshop's Preferences. Navigating to Edit > Preferences > General (or Photoshop > Preferences > General on Mac) and enabling the "Zoom with scroll wheel" checkbox is the typical method. However, it's worth noting that sometimes, even with this enabled, the default Photoshop behavior or conflicts with third-party software can persist, requiring further investigation or workarounds.
How to QUICKLY Pan & Zoom in PHOTOSHOP
Advanced Zooming Concepts and Considerations
Photoshop's zoom capabilities extend to very high magnifications, allowing for extreme detail work. Modern versions of Photoshop can zoom in to an impressive 12800%. However, it's important to understand that zooming beyond 100% does not reveal any additional detail; it merely enlarges the existing pixels. This can sometimes lead to the appearance of the "Pixel Grid," an outline around individual pixels that serves as a visual reference. The Pixel Grid can be toggled on or off via the View > Show > Pixel Grid menu option and is not visible in exported or printed images.
Third-Party Software and Shortcut Conflicts:
Users attempting to remap Photoshop's zoom shortcuts using third-party software, such as AutoHotkey, may encounter issues where the original Photoshop shortcuts are still triggered alongside the remapped ones. This can render the remapping unusable. The most reliable way to alter modifier key behavior for zooming is usually through Photoshop's own preferences and keyboard shortcut customization options.
Graphics Designers and Tablet Users:
Graphic designers, particularly those working with drawing tablets, often benefit from these zoom and navigation features for ease of use. Flick panning and animated zoom can make the process of moving and adjusting the view much faster and more fluid when working with a stylus.
Continuous Learning and Exploration:
Photoshop is a vast program, and mastering its tools, including zoom and navigation, is an ongoing process. Exploring additional Photoshop tips and tricks, whether you are a professional retoucher or a beginner, can significantly enhance your skills and knowledge. Resources like video tutorials and online guides offer continuous learning opportunities to discover new techniques and optimize your workflow. The "Learn How to Use the Zoom Tool in Adobe Photoshop: A Training Tutorial" is a prime example of a resource that can provide in-depth understanding.
By understanding and implementing these various zoom and navigation techniques, users can significantly improve their efficiency and precision when working within Adobe Photoshop, ensuring a more enjoyable and productive creative process.